Content
Call Queue Login
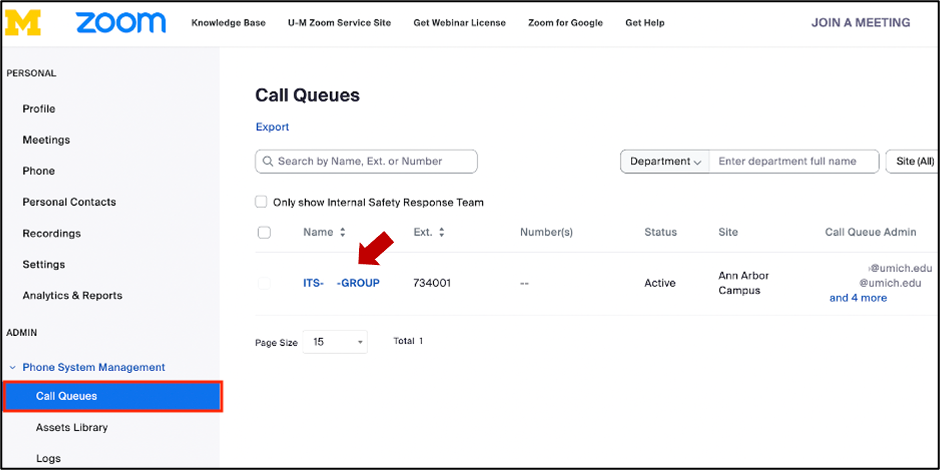
- Sign in to the U-M Zoom web portal with your U-M credentials.
- In the left navigation menu under Admin, click Phone System Management then Call Queues. A list of all call queues will be displayed.
Call Queue Profile Settings
Click the call queue name that you would like to view and manage. Three sections display: 1) Profile 2) Policy 3) Voicemail.

1. Routing Override
- Click the Toggle button to Enable Routing override mode for the call queue.
- In the Routing option section, to the right of Leave voicemail to current extension, click Edit.

- A pop-up window will appear.
- In the window, click the dropdown and select from the following options:
- Voicemail
- User
- Common Area
- Auto Receptionist
- Call Queue
- Phone Number
- Note: After selecting your option, search for and select the extension you want to use.
- Note: You must select the I acknowledge that by checking the box, forwarded calls will be billed based on usage checkbox.
3. Click Save.
- (Optional) Select the Allow end users to route to an external phone number checkbox.
Click Save.

4. To verify the setting is enabled, locate the following message at the top of the web portal screen.

5. After setting your override selection in the web portal, you can turn your Call Queue ON or OFF from any Zoom Phone by dialing *88 followed by your Call Queue's extension. For example, dial *887346470000.
2. Business/Closed/Break/Holiday Hours
The default is 24 hours/day, 7 days/ week. But you can customize how inbound calls are routed during business, closed, break, or holiday hours:
Business Hours

- Click Edit and set the times when the call queue will distribute calls.
- If you check "Allow members to set their own business hours", members' business hours will override the call queue's business hours.
Closed Hours
If you set business hours, the Closed Hours section will display beneath. Calls are routed to voicemail by default after business hours. Click Edit to adjust the routing options if needed. Next to Greetings Prompts, Click Edit to select an audio message from the asset library.
Break Hours
Click Manage to designate certain days and hours as break times and adjust the associated routing options.
Holiday Hours
Click Manage to designate certain days and hours as holidays and adjust the associated routing options. As a Call Queue Admin, you are responsible for setting holidays and season days for your Call Queue. See also: https://hr.umich.edu/working-u-m/my-employment/holidays-season-days
3. Call distribution
Select one of the available 5 methods to distribute calls during business hours:
- Simultaneous: Rings all available members at the same time.
- Sequential: Rings available members one at a time.
- Rotating: Rings available members in a regularly changing order so that calls are distributed evenly.
- Group Rotating: Simultaneously rings and rotates between groups.
- Longest Idle: Rings first the member who has been idle for the longest time. (ITS default selection)
Additional settings with Sequential, Rotating, and Longest idle call distribution are available:
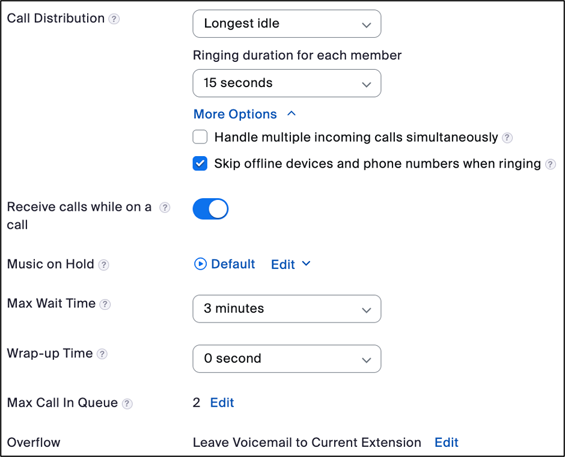
- Handle multiple incoming calls simultaneously, Note: this setting is ONLY recommended when you have a call queue with high incoming call volume, otherwise, keep it disabled, so when there are multiple calls in a queue, the second call will not ring through until the first call is answered.
- Skip offline members when ringing, select it to skip offline members and immediately ring the next available member.
- Ringing duration for each member: Select the amount of time the queue will ring each member.
- Receive calls while on a call, Enable this option to allow members to receive call notifications even if they are busy on a call.
- Music on Hold: Plays music for the inbound caller when they're placed on hold.
- Max Wait Time for a call to be answered when selecting the ring duration.
- Wrap-up time that a member has following a call before another call is routed to them.
- Max Call in Queue Important: when this number is exceeded, callers will be routed based on the Overflow option.
- Overflow setup, click “Edit” and change the Overflow settings to route to Voicemail to allow callers to leave Voicemail in the current extension's voicemail inbox when the Max Wait Time or Max Call in Queue is exceeded.
4. Greeting Prompt
Greeting audio messages and Music on Hold that played for callers in your call queue. All these audio files work in the same fashion but serve different purposes. Instructions for adding or changing your Voicemail can be found in:
- Zoom Phone Voicemail
- Add Audio files to Asset Library (Admin only)
- Managing Audio Greetings in Asset Library (admin only)
5. Active Status
To enable or disable the call queue. Warning: Don't disable the call queues that you belong to.
Call Queue Policy
From the Policy section, toggle on/off the following settings for your call queue to control certain features.
1. Voicemail
Admins can view the list of members who access, receive, or share voicemail
2. Voicemail Transcription
This setting is enabled by default.
3. Voicemail notification by email
This setting is enabled by default.
4. Allow member Ad Hoc Call Recording for Queue Calls
This setting allows for queue members to record calls.
5. Call Queue Pickup Code
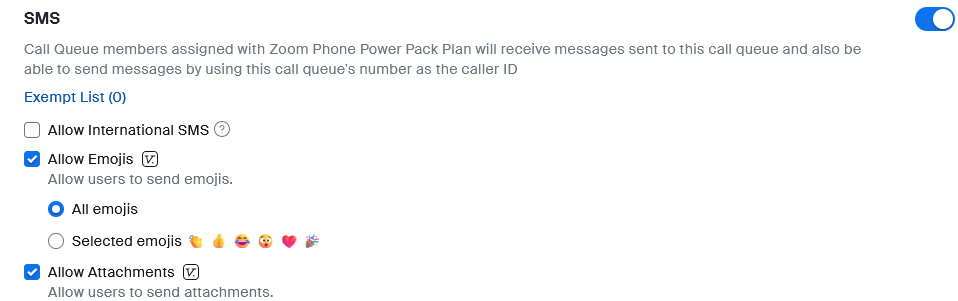
6. SMS
Admins can modify settings like use of emojis and attachments once SMS has been enabled by ITS for the queue.
7. Call Queue Opt-out Reason
This setting allows admins with a Power Pack license the ability to create Opt-out reasons.
8. Callback
Admins can adjust Callback settings after ITS has enabled the feature for a specific queue. When a caller selects the callback option, they keep their place in line and will be called back in the original order. Note that only the second caller (and those after) in the queue are offered the callback option; the initial caller is not. Additionally, the system will make just one attempt to reach each caller who requested a callback. For more details, please refer to the Zoom Phone Callback for Call Queue documentation.

Access Call Queue Voicemail
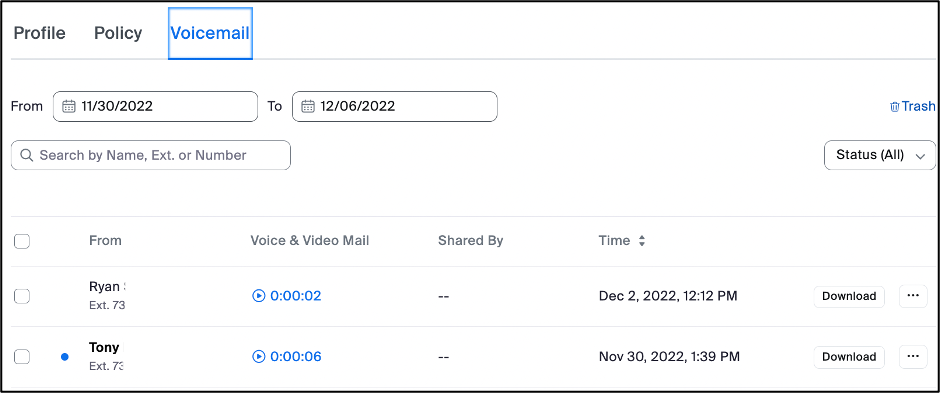
Click the Voicemail tab to:
- View and search through the received voice and video mails history during a specific period of time.
- Click the “Download” button next to a particular voicemail message to download voicemail messages.
- Click the ellipses icon (...) to move voicemail messages to trash.
For more details, see, Zoom's Changing call queue settings and Managing call queues