Content
Important
U-M Zoom Phone includes a voicemail service. Your existing voicemail box will be permanently deleted one week after your service is transitioned to U-M Zoom Phone. Make sure to review, delete and/or download any existing voicemails you may need for the future (documentation links below).
Ann Arbor, Dearborn and Flint Campuses: Review documentation for Cisco Unity voicemail.
If your U-M Zoom Phone is disconnected, your voicemails will not be saved. You should downloaded them before the line is disconnected to store them for future use.
Voicemail Setup
Notes
- This task is handled in the U-M Zoom web portal. However, Video Greeting messages can be recorded in the Zoom desktop client.
- You can have a different voicemail audio file for any situation. The limit on the number of audio files is 100.
- The Call Handling section of Settings allows you to set Business Hours, Closed Hours, and Holiday Hours. If you choose to set business hours, you can set up a voicemail greeting in three sections: Business Hours, Closed Hours, and Holiday Hours. If you do not set business hours, you can set up a voicemail greeting in Business Hours and Holiday Hours only. The instructions below are the same for any of the three situations.
- If you do not add a personalized greeting, a default greeting will play.
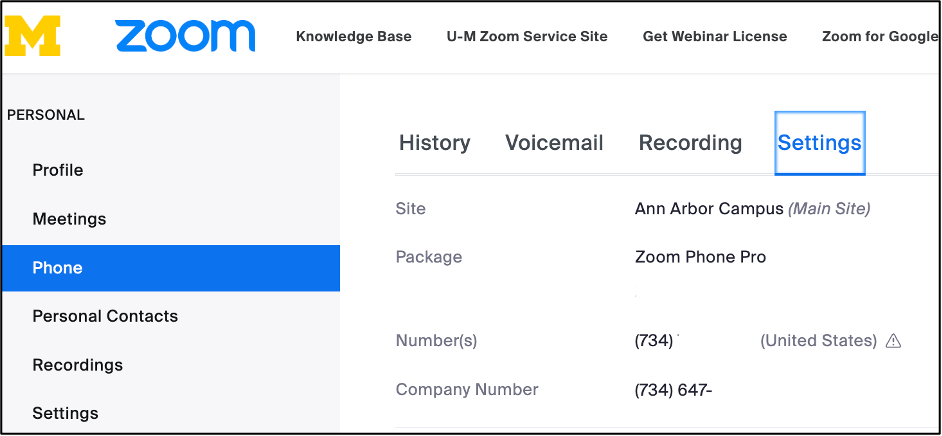
- From the left navigation menu of the U-M Zoom web portal, select Phone.
- Click the Settings tab.
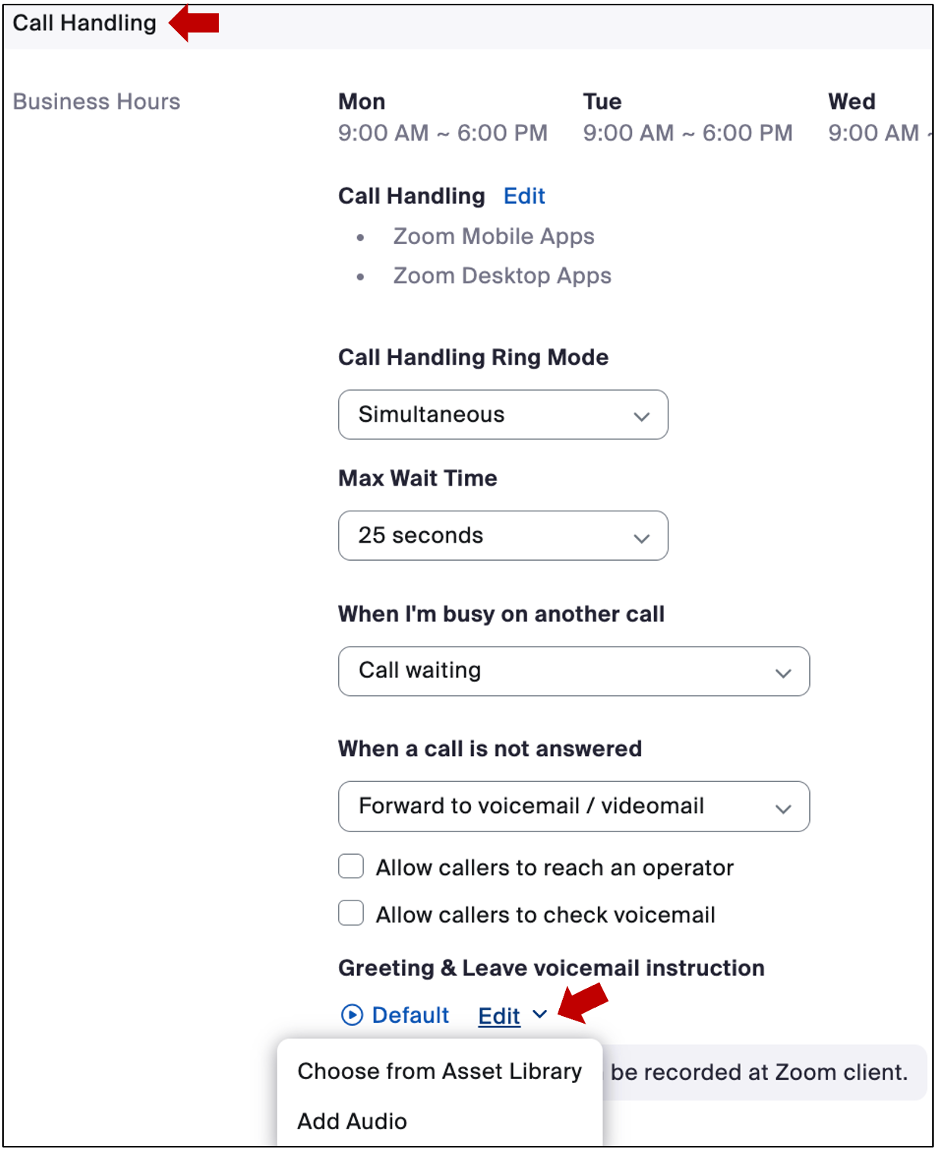
- In the Call Handling section, click Edit in the Greeting & Leave voicemail instruction area for Business, Closed or Holiday Hours.
- Click Add Audio. You have three choices:
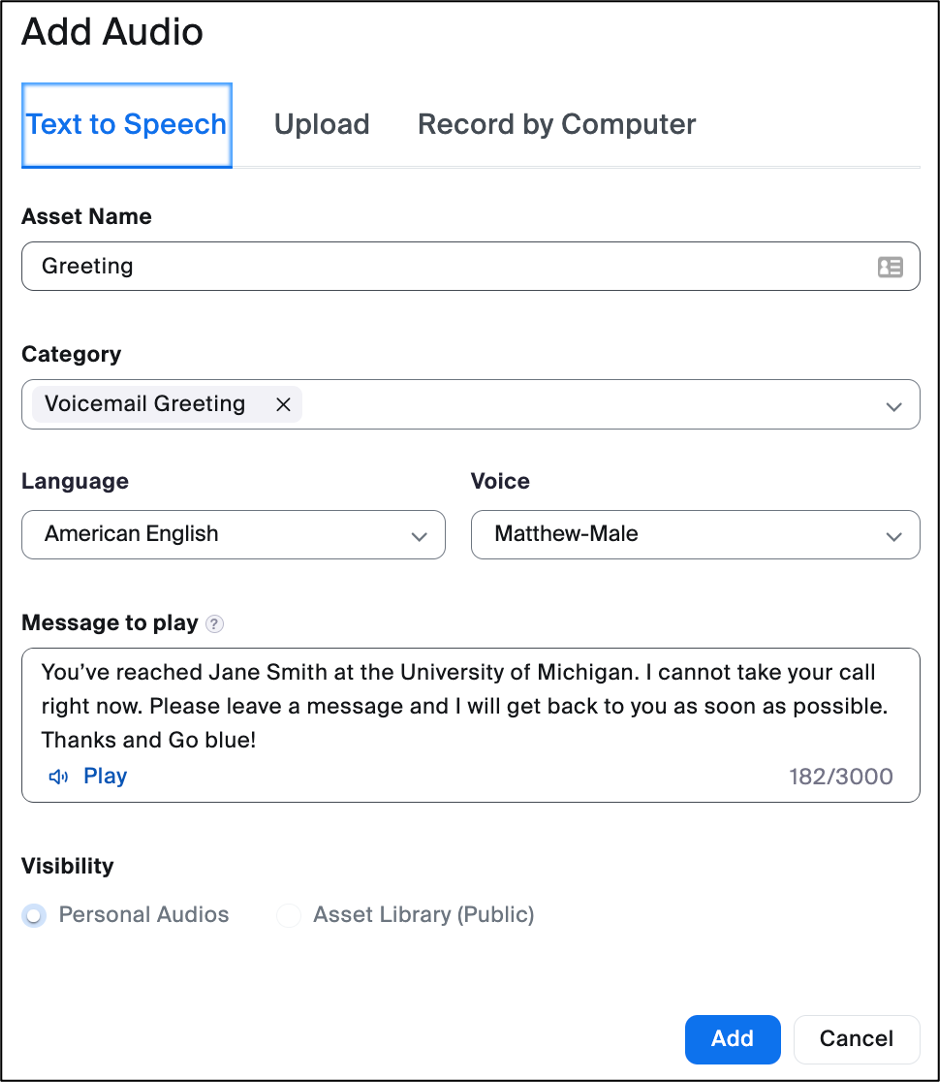
- Text to Speech — Allows you to convert text to speech if you want an quick and easy method to generate audio.
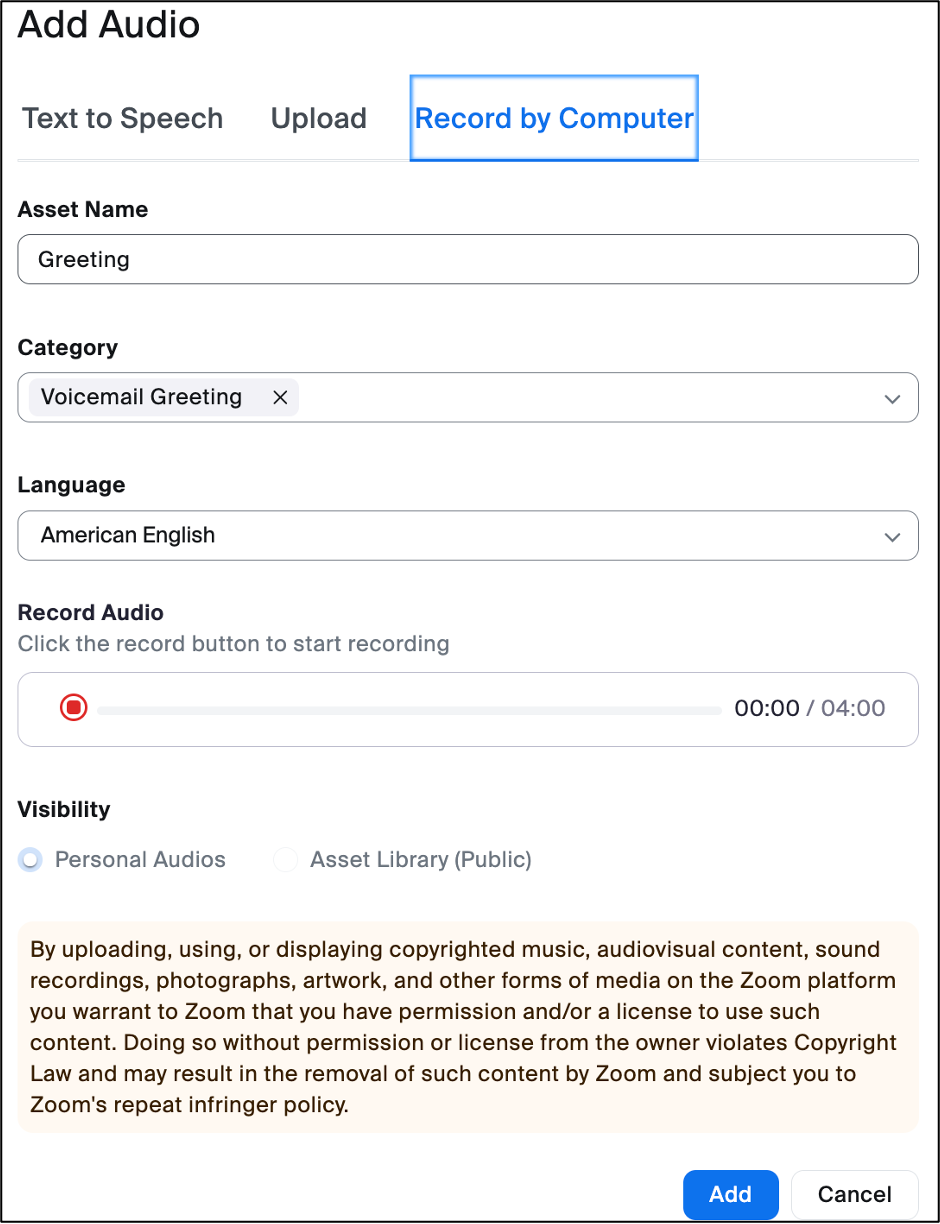
- Record by Computer — Allows you to record custom audio directly in the Zoom web portal. You must have a functioning microphone to record.
- Upload — Allows you to use an already recorded audio file. (.mp3 or .wav formats only, <10MB file size)
Text to Speech
- Enter the desired file name in Audio Name.
- Select the language and Voice style.
- Enter in your voicemail message.
- Click Play to hear your message and adjust choices as needed.
- When satisfied, click Add.
- Click Edit again in the Greeting & Leave voicemail instruction area of Call Handling section. Then
 , select the audio file to use and click Save.
Record by Computer
- Enter an Asset Name.
- Select a Category and Language for your audio message.
- Click Record
 to record your message.
 - Click the stop button to stop recording.
- Click the blue Play button
 to hear your recording.
 - If needed, click Rerecord Again to redo your message.
- If satisfied with the recording, click Add.
- Click Edit again in the Greeting & Leave voicemail instruction area of Call Handling section. Then , select the audio file to use and click Save.
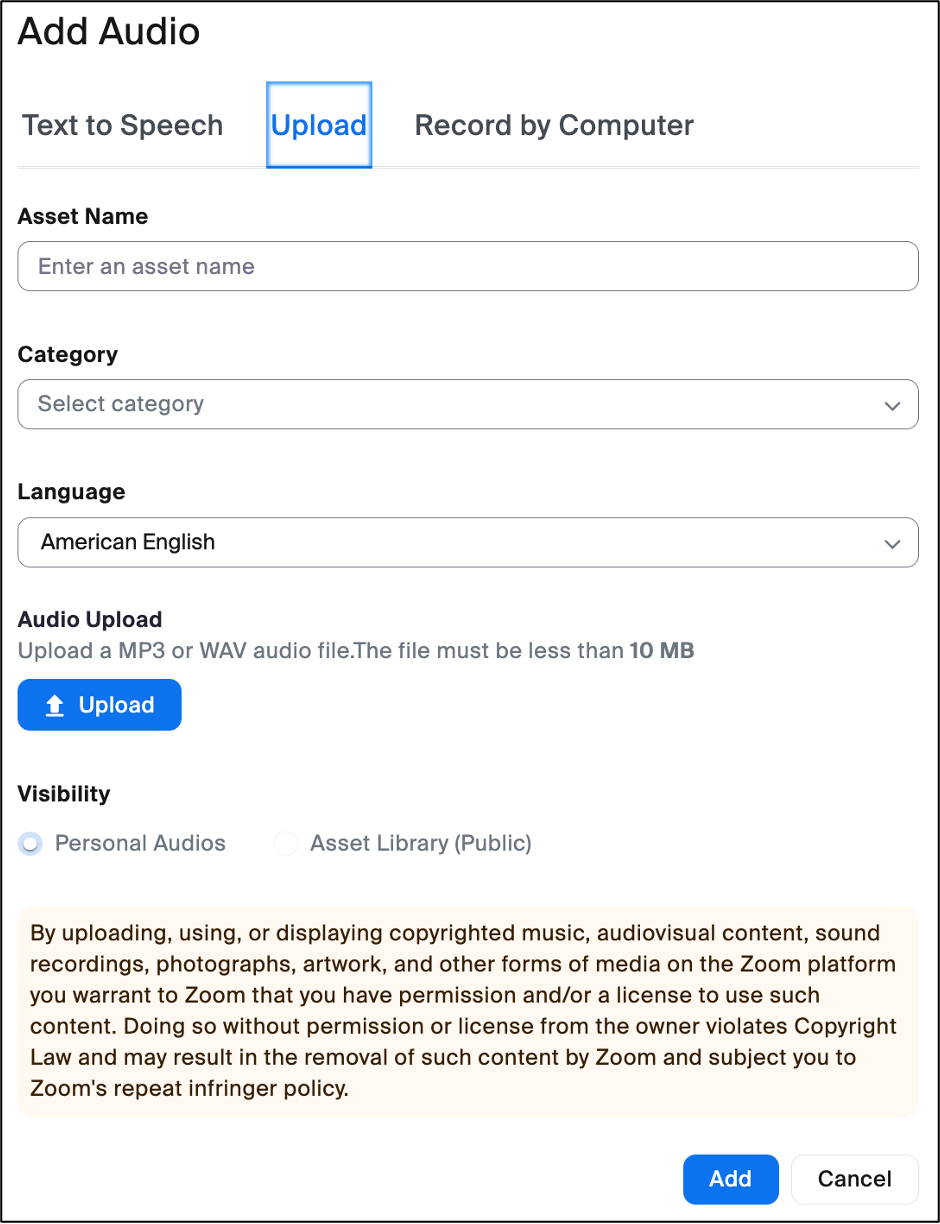
Upload
- Enter an Asset Name.
- Select a Category and Language for your audio message.
- Click Upload and select the audio file you'd like to use.
- Once the upload is complete, the Asset Library will display.
- Click Edit again in the Greeting & Leave voicemail instruction area of Call Handling section. Then , select the audio file to use and click Save.
Note:
- For any of these methods, the files can be edited, deleted or downloaded from the Asset Library dialog box by clicking the three dots icon found to the right of the file name.
- You will receive email notifications of voicemails.
- If you're calling into your direct number from a deskset or a third-party phone service, you'll need the PIN code you set up during the Day 1 tasks to access your voicemail.
See Also
Last Updated
Monday, July 7, 2025