Overview
This document outlines the process used by ATR/EMR Staff (animal Husbandry Technicians), Veterinary staff (Vet Techs and Veterinarians), and EMR Training Core staff to record the initial intake of new arrival non-rodent USDA species, guinea pigs, and rabbit weanlings, enter data, and track information related to the intake, within Electronic Medical Records in eRAM.
Table of Contents
Create Intake Form
- From your Home workspace, select ATR/EMR Staff under My Roles.
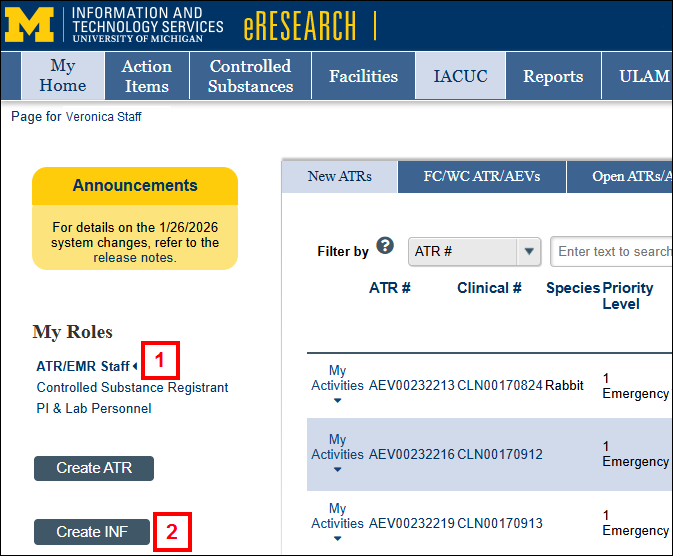
- Click the Create INF button.
Notes- Husbandry technicians will do this for rabbits and guinea pigs.
- Veterinary teams will do this for all non-rodent USDA species and rodent USDA (guinea pigs).
- Training Core will do this for all cages in their colony.
Intake Form
All questions are required on the Intake Form unless indicated as optional.
- Enter or select the Barcode.
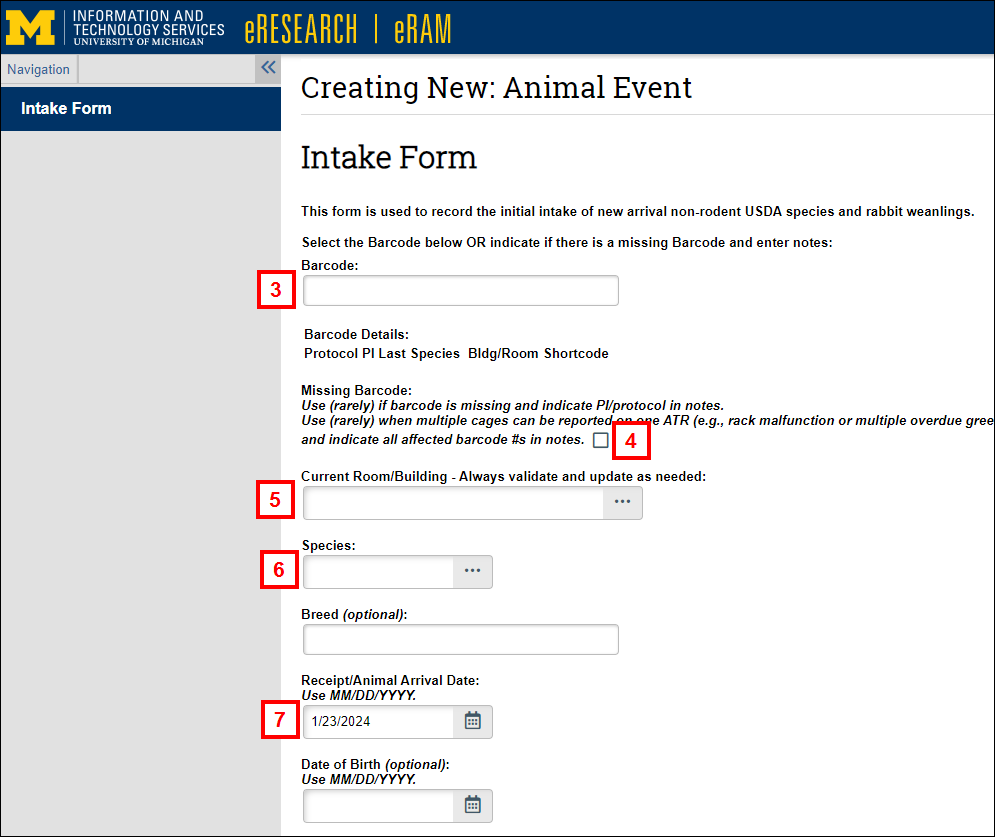
- If applicable, check the Missing Barcode box, and enter Missing Barcode Notes including the PI and Protocol #.
- Verify or update the Current Room/Building.
- Verify or update the Species.
- Verify or enter the Receipt/Animal Arrival Date as (MM/DD/YYYY).
- Complete the remaining fields, as applicable, e.g., Breed, Date of Birth/Age Estimation, etc.
Tips- Please complete as many fields as possible.
- Help text is available for some fields to help you answer the questions.
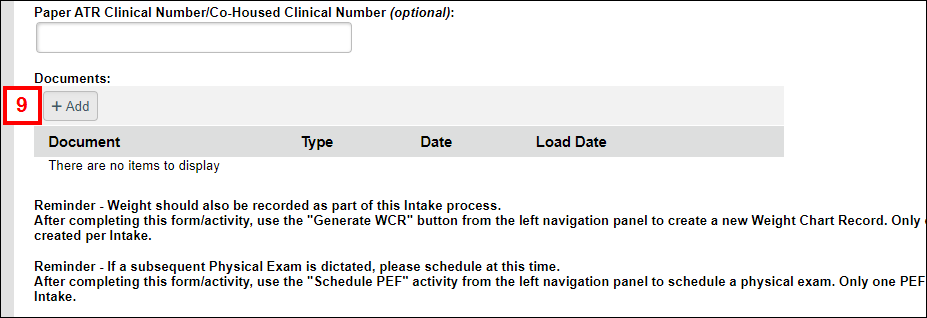
- Click Add to upload related paperwork or documents.
- Click Choose File.
Note Use a simple description for the document file name. It will automatically be associated with Clinical #/PI/Species and date stamp, so these do not need to be included in the file name.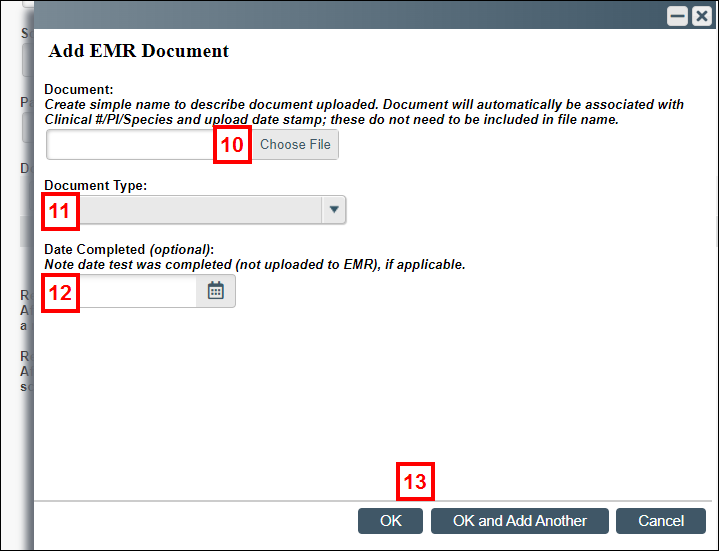
- Select the Document Type.
- If applicable, enter or select the Date Completed.
- Click OK or OK and Add Another.
- Click Finish when complete.
The INF is saved and the Intake Form workspace will display.
A Clinical ID number (CLN #) Electronic Medical Record (EMR) is automatically created and assigned by the eRAM system.
Intake Form Workspace
The Intake Form (INF) workspace is the summary page for the collection of animal intake information. As intake information is entered and saved, data and details are populated on the Intake Form workspace. From the Intake Form workspace, you can:
- Use activities to edit/update the Intake Form.
- Record animal event actions related to the intake (e.g., generate Weight Chart).
- Schedule a Physical Exam.
Note Activities and buttons that display depend on your role and the state of the INF.
Tip You may need to scroll right to see all the tabs and fields.
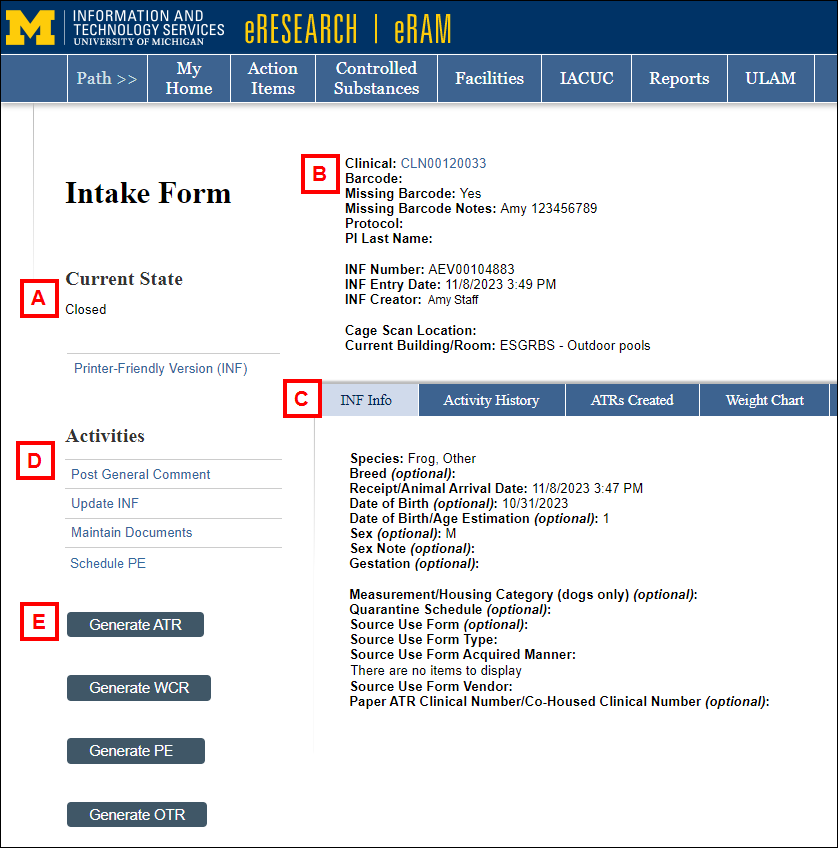
| Letter | Section |
|---|---|
| A | Current State – Status of the Intake Form record. Note Once the Intake Form is saved, the State becomes "Closed", and the parent Clinical record State remains "Open". |
| B | Overview and high level details about the Intake Form, including a link to the CLN, Barcode, INF Number (Action/Event AEV00000001), INF Creator, and Location. |
| C | Tabs – Tabs organize the Intake Form information into pages:
|
| D | Activities – Use the Activities menu to update intake-related information.
|
| E | Buttons – Use to record animal events related to the intake.
|
Update Barcode and Location on Intake Form
The location is updated as you add Animal Events (AEV) to the Clinical (CLN). If you add a new ATR and update the location there, it will update in the Clinical and in any open AEVs (and in the original Intake Form (INF)). The location can be changed on any open ATR or the Training Core Info (TCI), as well.
Alternatively, follow these steps to update the barcode and location within the Intake Form when animals are transferred.
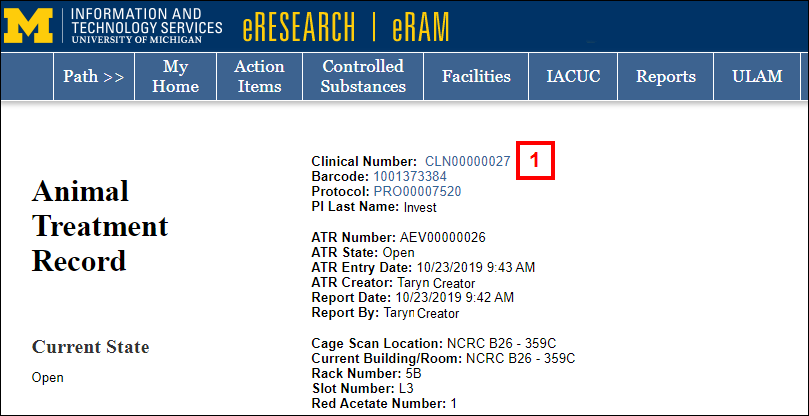
- From your Home workspace, click the Open CLNs tab.
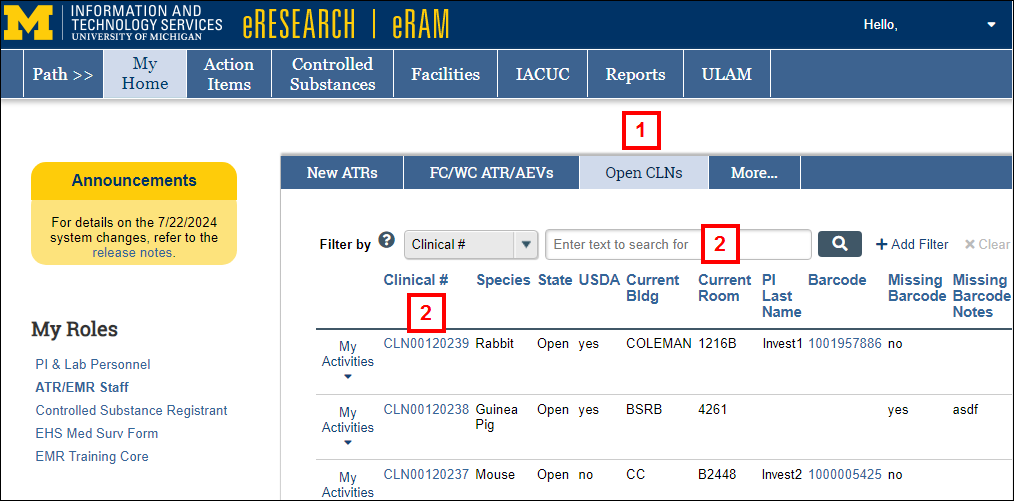
- Search for and click the applicable Clinical #.
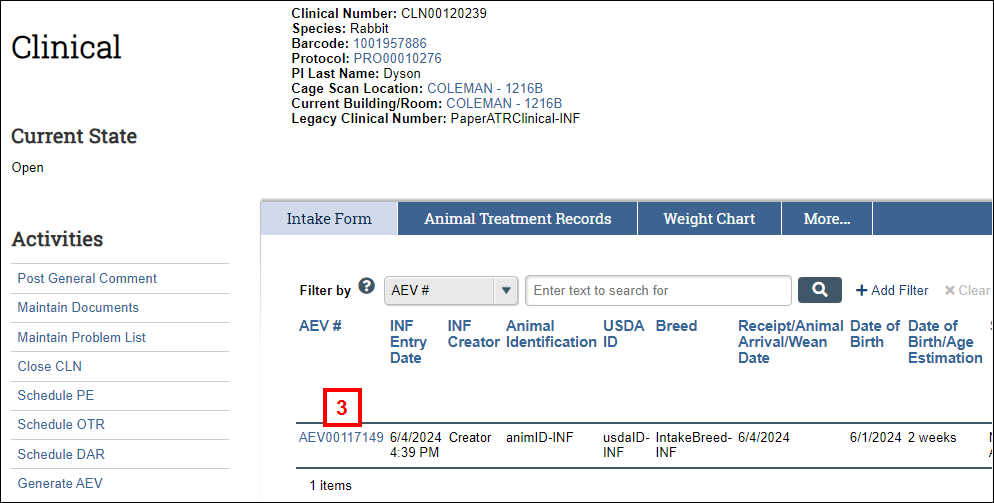
Tip Filter by the Clinical # or other search criteria to find a specific Clinical record. - On the Clinical workspace, click the AEV number on the Intake Form tab to open the original Intake record.
- On the Intake Form workspace, click the Update INF activity.
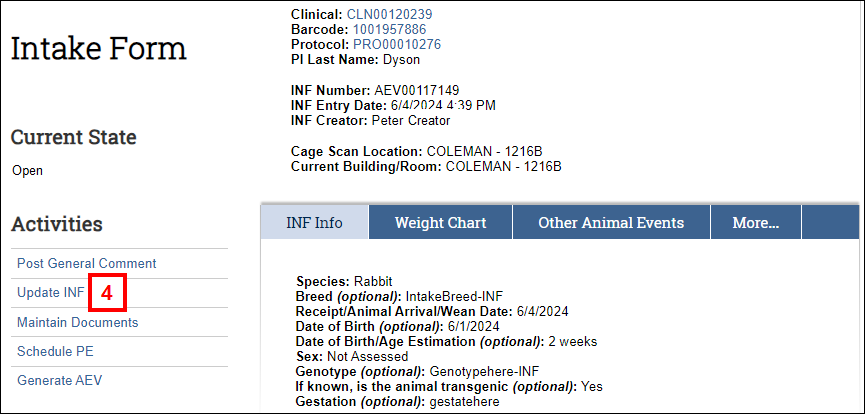
- If applicable, enter the new Barcode.
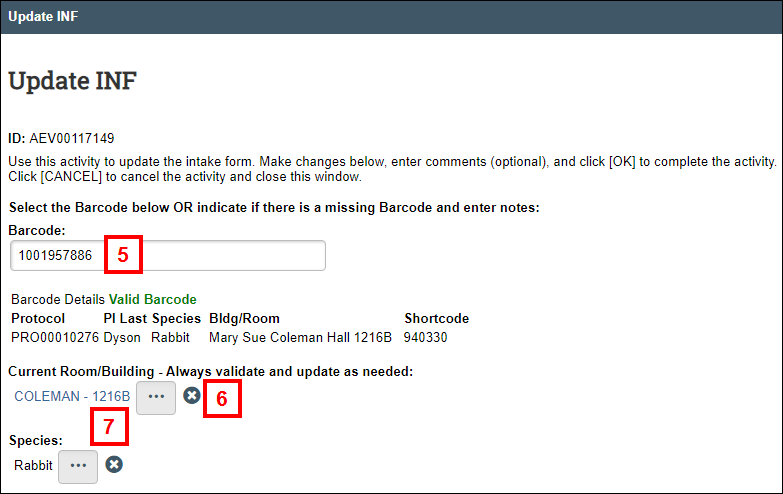
- To change the Current Room/Building, click Delete.
- Enter the new Current Room/Building.
- Click OK to save the information.
How to complete an Intake retroactively if an existing ATR was first written for USDA
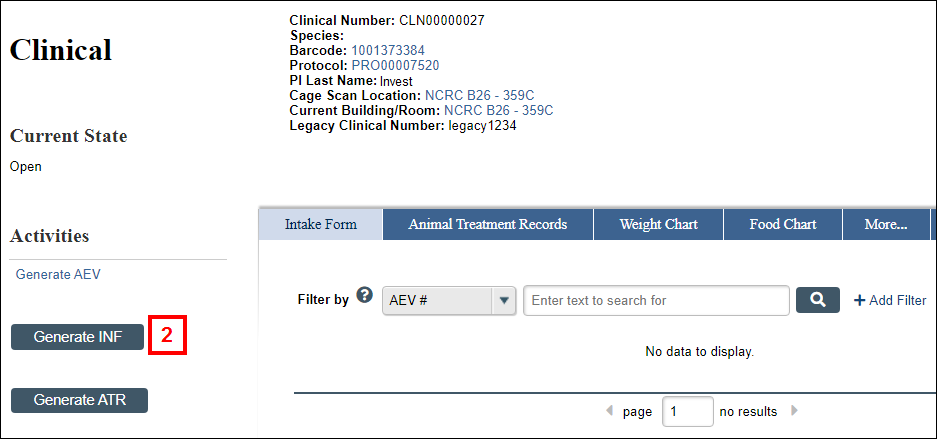
- From the applicable ATR workspace, click the Clinical Number (CLN) link.
- From the Clinical workspace, click the Generate INF button.
- Update the fields on the Intake Form.
Note Some fields may already be populated and can be updated, as needed.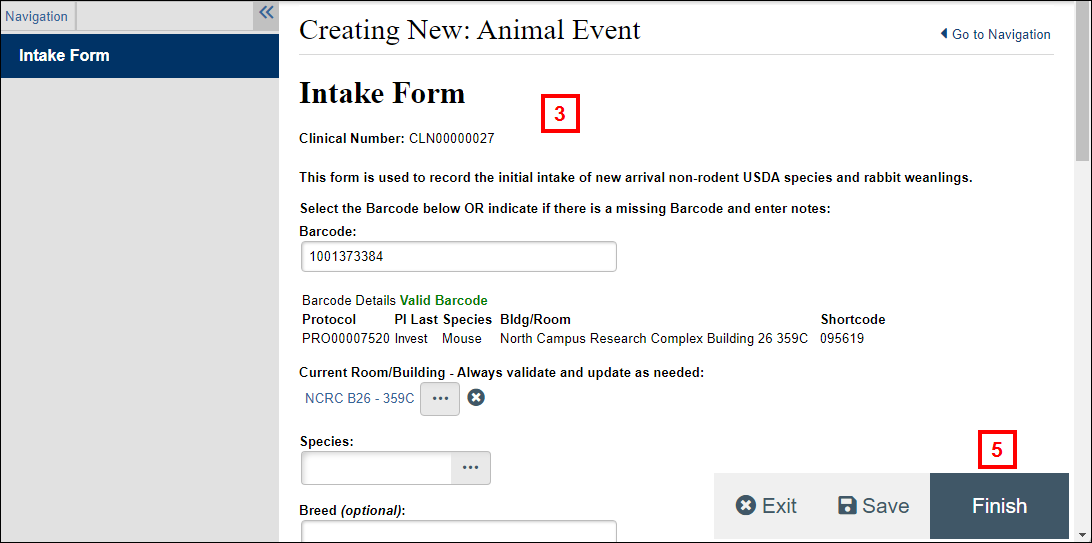
- Complete the remaining fields, as applicable.
- Click Finish to save.