
Create new
- Log in to Amazon Connect.
- On the navigation menu, select Users> Routing profiles.
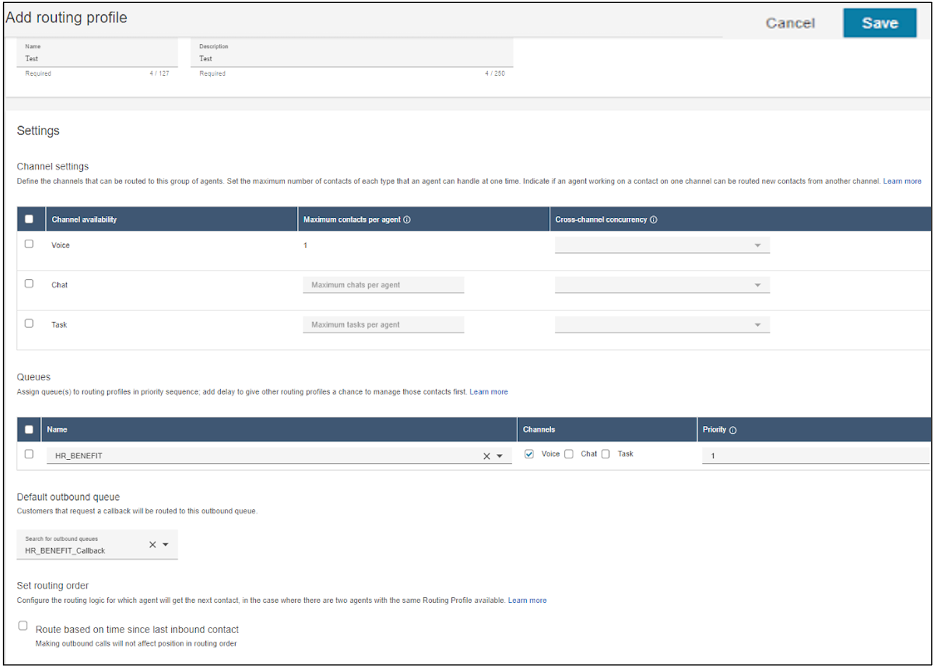
- Click Add routing profile.
- In the Routing Profile Details section, Enter Name and Description.
- In the Channel Settings section, select Voice (only option for now)
- In the Queues Settings section,
- Assign whichever queues for this profile from the dropdown menu.
- Modify Priority and Delay as needed (in the Priority- Specify the order in which contacts are to be handled for that queue. In the Delay- Enter the minimum amount of time a contact should be in the queue before they are routed to an available agent).
- Assign Outbound queue.
- Assign queue order.
- Click Save.
Modify Routing Profile
- Log in to Amazon Connect.
- On the navigation menu, select Users> Routing profiles.
- Click on the hyperlink of the Routing profile to modify.
- Change Parameters as desired:
- Name & Description
- Channel- Only Voice
- Queues
- Modify Assigned queues for this profile
- Modify Priority and Delay as needed.
- Modify Outbound Queue
- Click Save.
Assign Routing Profile to Agent
- On the navigation menu, select Users> User Management
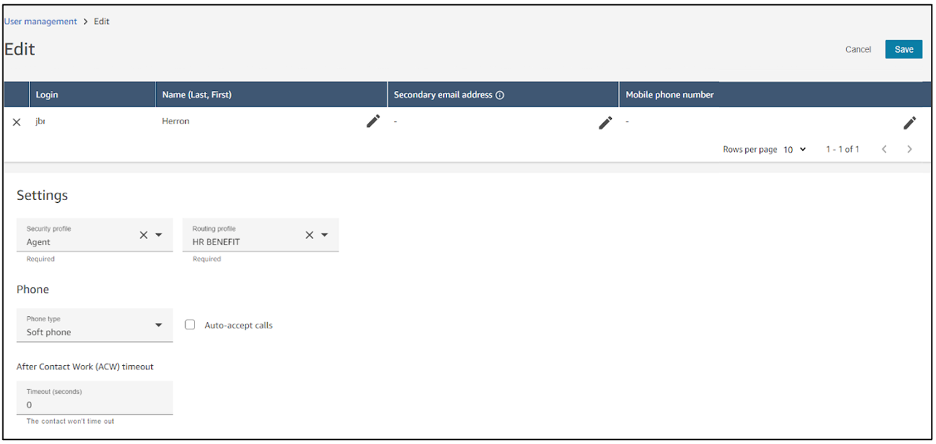
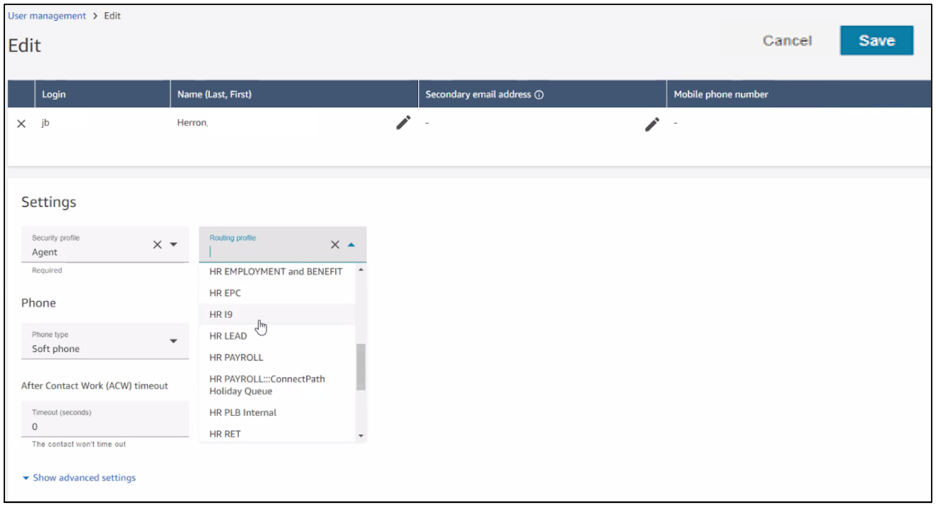
- Click on the hyperlink for the agent to modify
- Click on the Routing Profile section to select the desired Routing Profile
- Click Save
Last Updated:
Wednesday, August 30, 2023