Table of Contents
- Search for Files and Folders Owned by You
- Transfer Ownership to Another Individual at U-M
- Transfer Ownership to a Google Shared Drive
- Additional Resources
Overview
There are many cases where you may need or are required to transfer ownership of files and folders you own in Google Drive. This document provides instructions on how to transfer ownership to another individual at the university or to a Google shared drive owned by a department/unit. (Note that you cannot transfer ownership of files/folders to a non-UM Google account using the steps below.)
Search for Files and Folders Owned by You
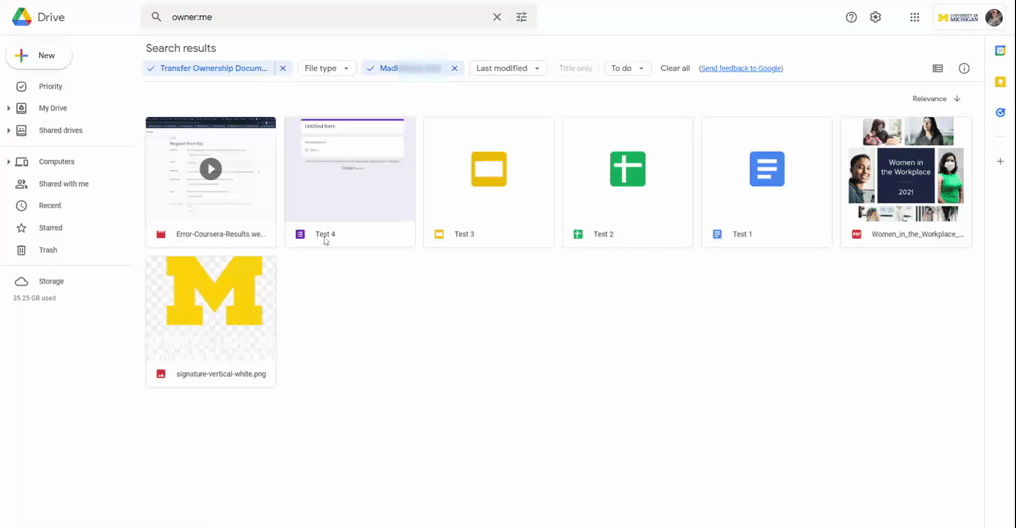
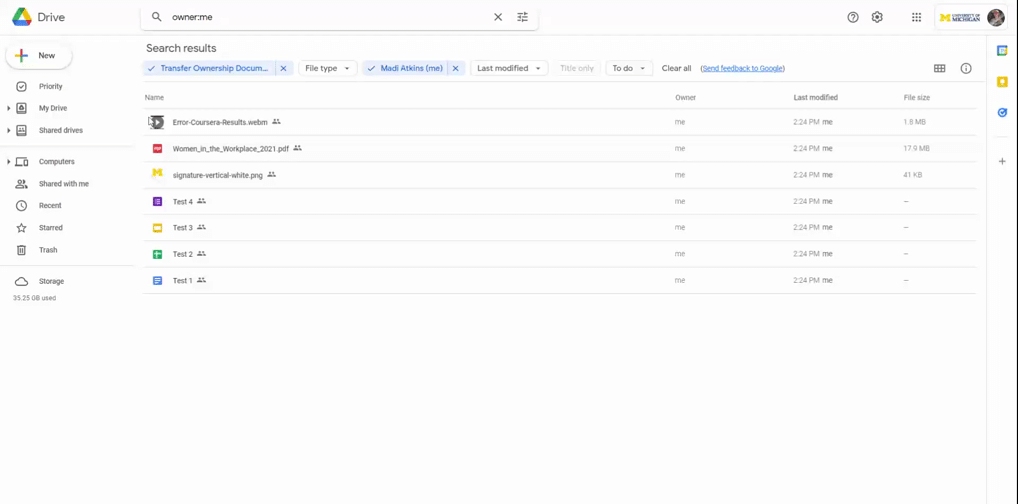
You should search for all files and folders owned by you in My Drive and/or a specific folder in My Drive to then determine what should/shouldn’t be transferred to the new owner.
Before searching within Google Drive, you can use the ITS Data Reclamation tool, which provides you with a list of files you own and have shared with others in My Drive. Refer to Find Google Files You’ve Shared With Others for more information.
If you still want to search for all files/folders owned by you in My Drive using Google Drive:
- Go to Google Drive.
- Click the Search options icon (
 ) to the right of the search field at the top of the page.
 - Select Owned by me from the Owner drop-down menu.
- Select My Drive from the Location drop-down menu and click Select.
Tip: It is recommended that you narrow your scope to specific folders you want to search within, as it will return a more manageable list of search results. Select More locations…, hover over the My Drive option (you may need to click All locations to find it), click the right arrow that appears, select the folder within which you want to search, and click Select.
- Click Search.
Note: Your search results may return a lot of files, so be sure to keep scrolling the page until all results have loaded. You can also adjust the search criteria from the search results page by using the options at the top of the page. Also, switching from grid view to list view ( ) will allow you to view more results in a more organized way.
Transfer Ownership to Another Individual at U-M
To transfer ownership of a file to another individual at U-M, it must already be shared with them. If the user you intend to transfer ownership to is not shared on the file(s), do so before proceeding with the next steps.
Caution: If there are Google Shortcuts (i.e., links that reference another Drive file or folder) within your search results, you will need to unselect those before attempting to bulk share and transfer ownership of multiple files, or they will prevent you from bulk sharing/transferring. Unfortunately, there is no way to exclude Shortcuts from your search results at this time.
Bulk share files
If there are multiple files they need to be shared on:
- Click and drag your cursor over the relevant files from your search results to select them. (If there are files you don't want to be shared, hold the Ctrl (Windows) or Cmd (Mac) key and click on each file you don't want to share to unselect them.)
Tip: Click the List view icon () in the top right of the results to make it easier to view and select the files.
- Click the Share icon (
 ) in the top left of the results.
 - Enter the email address of the individual to which you’d like to transfer ownership in the Add people and groups field.
- Uncheck the Notify people box to avoid sending the individual multiple email notifications and click Share.
Bulk transfer ownership
Once the individual has been shared on the files, you can now bulk transfer ownership to them.
Important: Google has a 750GB limit for the amount of Google Drive files you can transfer ownership of in a 24-hour period. There is no workaround for this, and you will have to wait at least 24 hours from when you received the error message before you can transfer more files.
- Click and drag your cursor over the relevant files from your search results to select them. (If there are files you don't want to be transferred, hold the Ctrl (Windows) or Cmd (Mac) key and click on each file you don't want to transfer to unselect them.)
Tip: Click the List view icon () in the top right of the results to make it easier to view and select the files.
- Click the Share icon () in the top left of the results.
- Click the drop-down menu beside the individual to which you want to transfer ownership and select Transfer ownership.
- Click Yes and then click Done.
After the ownership transfer is complete, the individual will automatically become the new owner. The files will move to your Shared with me section in Google Drive, and the new owner will notice the files now appear in their My Drive.
Depending on how many files are transferred at once, the individual may receive several emails alerting them, “You're now the owner of # items.”
Note: If you transfer ownership of a lot of files/folders at once, it may take some time for you to notice the changes reflected in your My Drive.
Transfer Ownership to a Google Shared Drive
It is recommended that you choose to move your collaborative data related to administration, learning, teaching, and/or research at U-M into a Google shared drive. Shared drives are owned by a group rather than an individual, which makes offboarding easier for your department/unit. If your team does not have a shared drive, refer to Shared Drives in U-M Google for more information.
Google allows you to move both files and folders you own from your My Drive to a shared drive.
- To transfer FILES, you must be a Contributor, Content Manager, or Manager of the shared drive.
- To transfer FOLDERS, you must be a Manager of the shared drive.
Transfer files
To transfer ownership of your files to a shared drive:
- Ensure you have the correct permissions to move files from My Drive to the shared drive.
You must be at least a Contributor of the shared drive to move files from your My Drive into a shared drive.
- Click and drag your cursor over the relevant files from your search results to select them. (If there are files you don't want to be moved, hold the Ctrl (Windows) or Cmd (Mac) key and click on each file you don't want to move to unselect them.)
Tip: Click the List view icon () in the top right to make it easier to view and select the files.
- Click the Move to icon (
 ) in the top left of the results.
 - Click All locations and double-click on Shared drives.
- Select the shared drive to which you want to move the files and click Move.
- Click Move again to confirm the transfer.
Transfer folders
Google recently released the ability to move folders from My Drive into a shared drive. However, due to the feature still being under development and the complexities of how shared folders work in Google, there are several critical limitations that you should be aware of when attempting to move a folder into a shared drive.
To transfer ownership of folders to a shared drive:
- Ensure you have the correct permissions to move folders from My Drive to the shared drive.
You must be a Manager of the shared drive to move folders from your My Drive into a shared drive.
- Click and drag your cursor over the relevant folders from your search results to select them. (If there are folders you don't want to be moved, hold the Ctrl (Windows) or Cmd (Mac) key and click on each folder you don't want to move to unselect them.)
Tip: Click the List view icon () in the top right to make it easier to view and select the folders.
- Click the Move to icon () in the top left of the results.
- Click All locations and double-click on Shared drives.
- Select the shared drive to which you want to move the folders and click Move.
- Click Move again to confirm the transfer.
Google may state that some items won’t transfer and/or your move has been canceled. If this happens, refer to Errors and Limitations of Moving Folders from Google My Drive to Shared Drives for more information and a detailed overview of why you may have received this message.
Additional Resources
- Google: Accounts for People Who Leave U-M
- Make someone else the owner of your file (Google Drive Help Center)
- Shared Drives in U-M Google
- Store & share files or folders with shared drives (Google Drive Help Center)
- Find Files You Own in Dropbox, Google, Microsoft 365, Slack, and Zoom