Content
- Annotating Documents
- Using Annotation Shortcuts
- Copying Documents
- Appending Documents
- Merging Documents
- Reordering Pages
- Adding Documents to Workflow
- Routing Documents within Workflow
- Deleting Documents within Workflow
Annotating Documents
- Search for the document you wish to annotate.
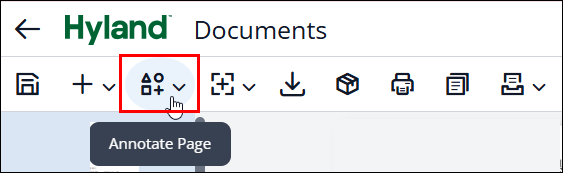
Note: Only documents with the following file types can be annotated: tif, g42. If your document is not one of those types but you need to annotate it, follow the Adding Documents to Workflow instructions to add to the Convert to TIF workflow. Once converted, you can annotate the document. - Select the Annotate Page Icon.
- Select Create Annotation and then select the annotation you wish to use. In this example, we have chosen the Green check annotation.
Note: Recently Used annotations will show as the top menu option for quick selection of your commonly used annotations. 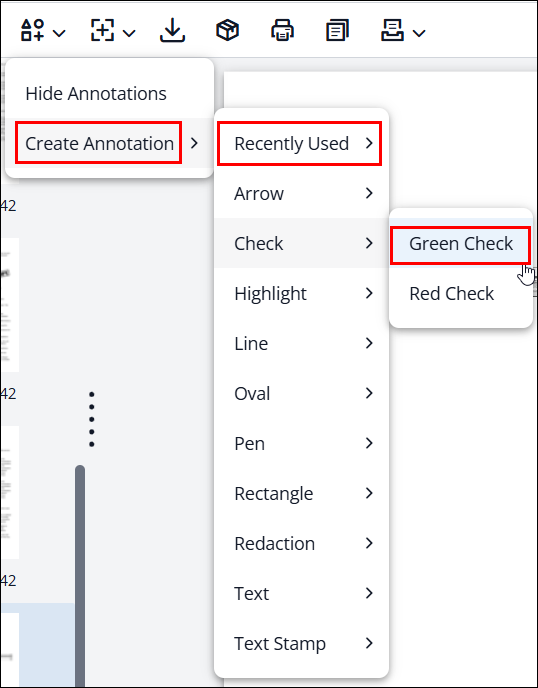
- Your mouse icon will now appear as a plus symbol. Depending on the annotation, you may see it paired with the plus sign (checks, arrows and stamps) such as this:
 Other annotations such as the highlights or ovals don’t appear until you click to insert the annotation.
 - Hover over the area of the document where you need to place the annotation and click to insert the annotation.
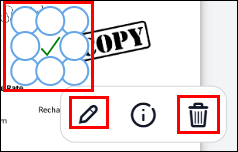
- The Annotation will appear. You can select it and drag/move it, if you need to adjust the location of the annotation within the document. Clicking on the circles surrounding the annotation allows you to resize it. Additionally, you can Edit or Delete the annotation by selecting the appropriate icons, if needed.
- Click the Save icon to save your annotation(s) in the document.

Using Annotation Shortcuts
If you frequently use specific annotations, you can set a keyboard shortcut to easily insert the annotation.
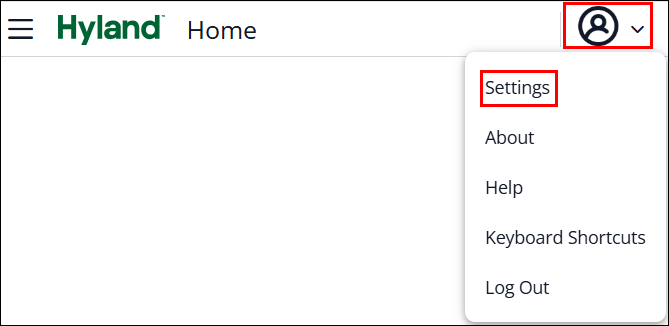
- Navigate to your settings by selecting the User Icon in the upper-right corner of the screen, then select Settings.
- Select Shortcuts from the Menu, then click Add Annotation and select the annotation you wish to create a shortcut for. In this example, we are creating a shortcut for the green check annotation.

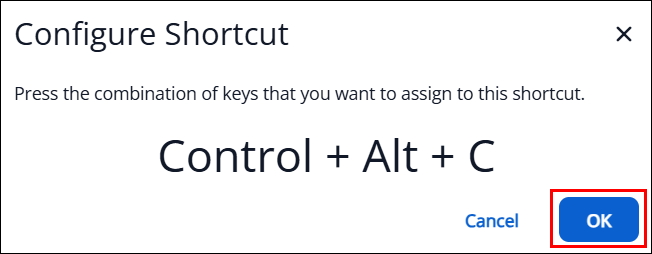
The Configure Shortcut box opens. Press the combination of keys that you want to assign to this shortcut. For this example, we pressed Crtl then Alt then C as shown below but you can choose whichever combination that will be easy for you to remember. Click Ok after you enter your preferred combination of keys.
- Repeat these steps to add shortcuts for additional annotations, if desired.
- To use your shortcut, open the document you need to annotate and type in your combination of keys that you configured to add the annotation.
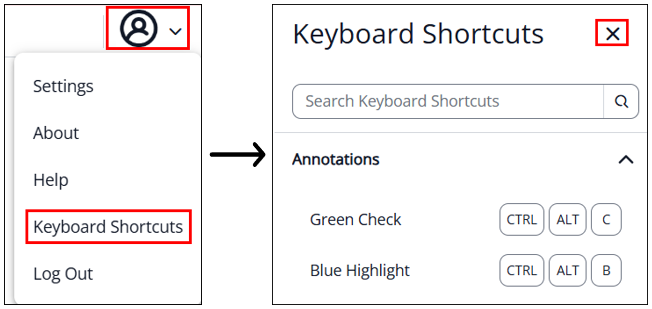
Note: To easily see your shortcuts while on a document, select the User Icon at the top right and then select Keyboard Shortcuts. The Keyboard Shortcuts panel will open on the right side of your screen. All configured shortcuts will appear with the annotation shortcuts at the top. Click the X to close the Keyboard Shortcuts panel.
Copying Documents
Search for the document you wish to copy. You have two choices to copy a document.
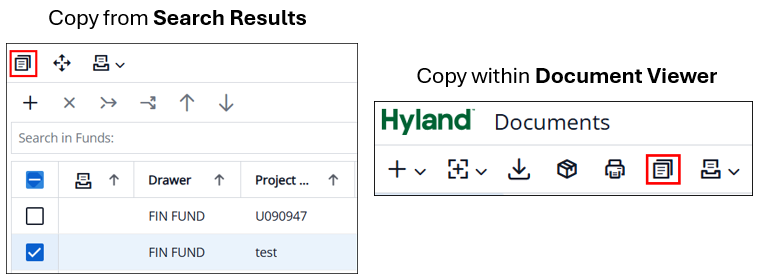
- To copy from the search results screen, click the checkbox that is to the left of the document and click the copy icon.
- To copy within the document viewer, open the document and click on the copy icon.
Note: The copy icon only appears if you select a single document. If you selected multiple documents, the copy document icon will not display.
- The Copy Document box opens.
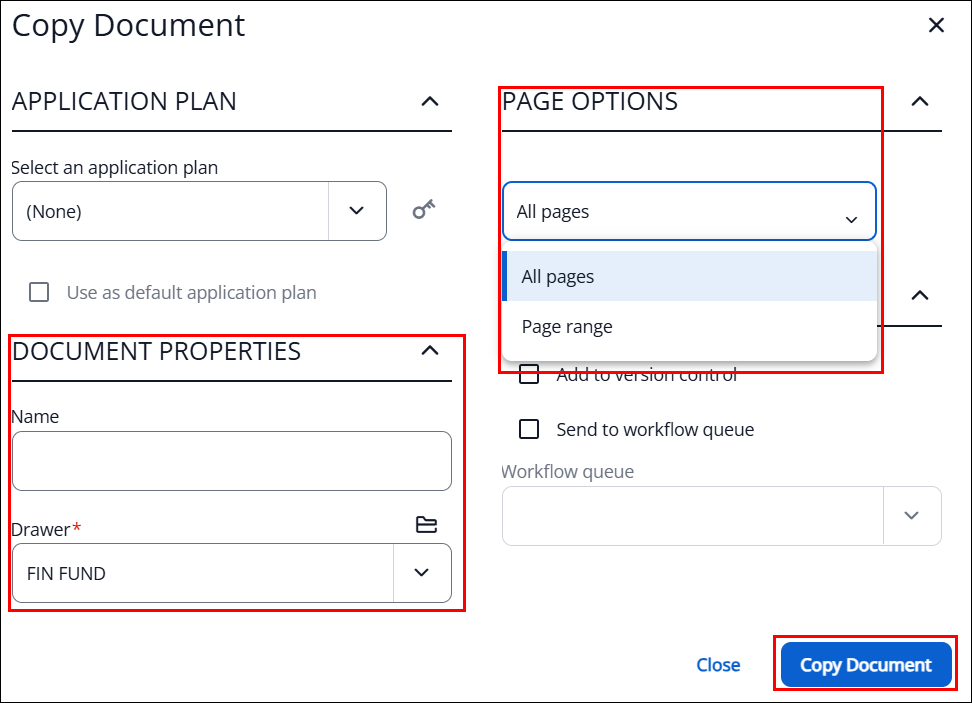
- Select the desired Page Options. You can copy every page (All pages) or a range of pages (Page range). The system defaults to “All pages.”
- Update the Document Properties for the new document. There are multiple document properties that can be updated, scroll down to view/change them as needed.
- Once the properties are complete, click Copy Document.
A message appears letting you know the document was copied. Click the X to close the message.

- The existing document remains open. Navigate back to your search results and update your search parameters to find the new copied document.
Note: You can also use the A User, 1 day filter on the All Documents view to quickly find the new copied document.
Appending Documents
- When capturing a new document that you wish to add to an existing document, update the Document Properties of the new document (including Type), to match the existing document. Once the properties match, click Save.
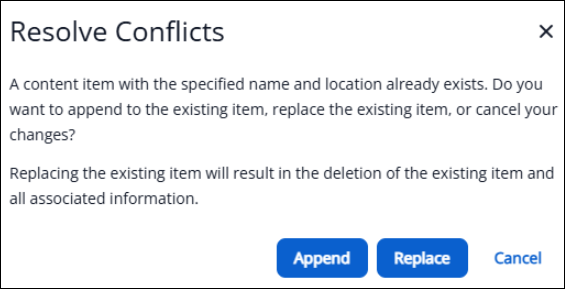
- A warning message appears, letting you know a document already exists with the specified keys (properties).
- Click Append to append to the existing document.
- Click Cancel to return to the edit screen to update the properties to no longer match an existing document.
- Click Replace to delete the existing document and overwrite it with the document you are working with.
Note: This action cannot be undone.
- After you click Append, the document is closed and moved into the existing document. To find the document you just appended to, search for the document using the same keys (properties) that you entered when appending and open the document. The additional page(s) can be found at the end of the document.
Merging Documents
- Search for the documents you wish to merge.
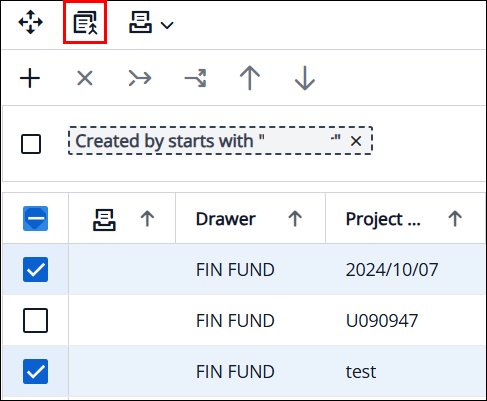
Select the checkboxes to the left of the documents that need to be merged. You must select two or more documents. Click the Merge icon in the first toolbar.
A warning message appears asking if you are sure you want to merge the items. The document keys of the document you last selected appear and will be retained on the merged document.
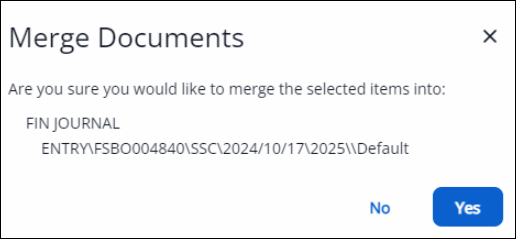
- Click Yes
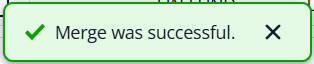
A message appears letting you know the merge was successful. Click the X to close the message.
- Navigate to the document to view the merged version. The pages of the document you selected last will appear first when viewing the document.
Reordering Pages
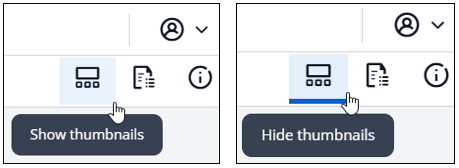
While viewing your document, click on the Thumbnail viewer icon on the upper-right side of the screen to set the thumbnail viewer to Show or Hide.
- Once the thumbnails display, select the page you wish to move/reorder, then drag and drop it to the correct location within the document. The screen will refresh and save automatically.
Issue: The document appears as a single thumbnail image but actually contains multiple pages that can be scrolled through, common with PDF-type files. In order to rearrange the pages within this type of document, follow the instructions for Adding Documents to the Convert to TIF Workflow. Once the document is converted, you’ll be able to reorder its pages.
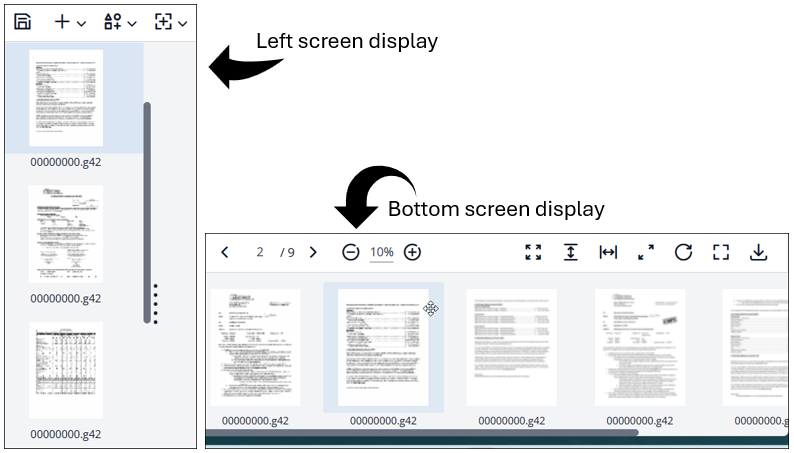
Note: Thumbnails may appear on the left or at the bottom of the document, depending on your individual choice.
To change the location of your thumbnails:
Navigate to the User icon in the top-right corner and click the dropdown arrow.
Click Settings > Defaults.
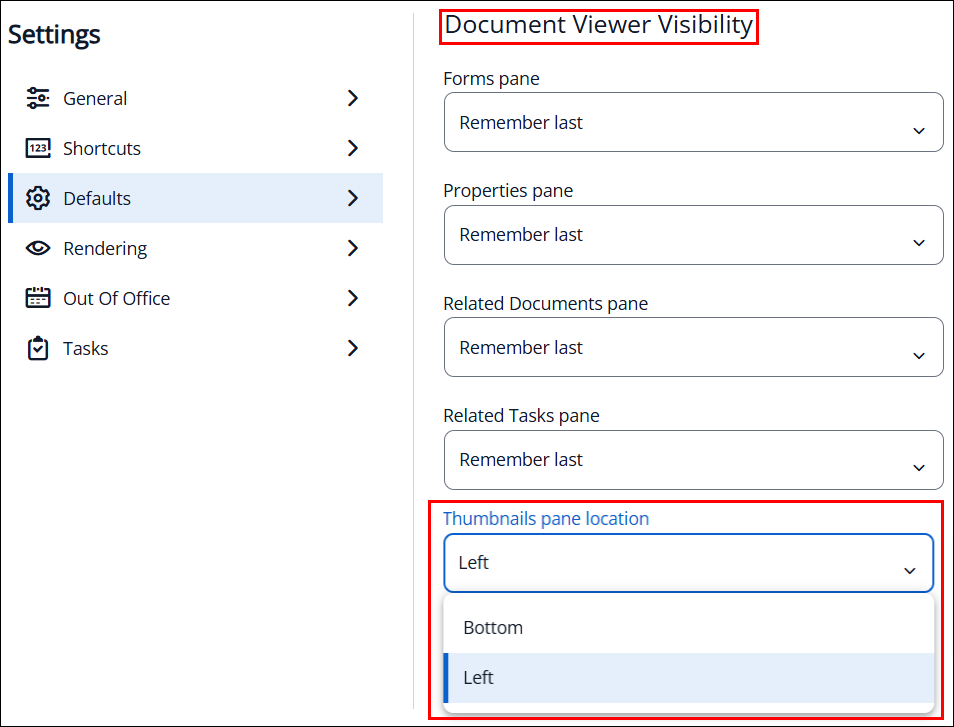
Scroll down to the Document Viewer Visibility section.
In the Thumbnails pane location field, click the dropdown arrow and select either Left or Bottom.
Adding Documents to Workflow
- Search for the document you wish to add to a workflow (for special processing of documents, when applicable). There are two locations where you can add a document to a workflow.
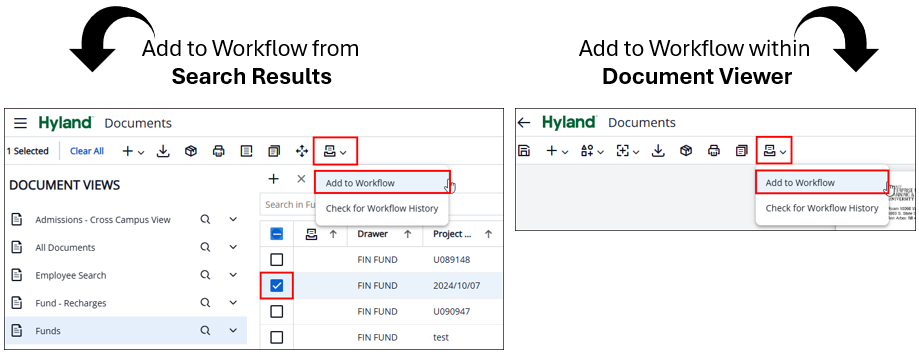
- From the Search results, click the checkbox to the left of the document to select it.
- Click the Workflow icon from the top menu bar and select Add to Workflow.
- From the Document Viewer, click the Workflow icon and select Add to Workflow.
- The Add to Workflow box opens.
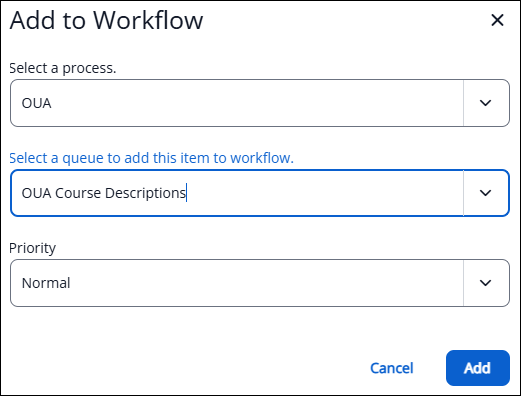
- Click the dropdown arrow in the Select a process field and choose the appropriate process.
- Click the dropdown arrow in the Select a queue to add this item to workflow field and choose the appropriate queue.
- Click Add.
- A message appears letting you know the document was added to the workflow. Click the X to close the message.

Notes:
- Only the workflow processes you are able to access will appear in the dropdown choices.
- To reorder pages or annotate a document, add the document to the Convert to TIF workflow. Then, wait a few minutes and refresh your search by clicking the Search button, to locate your document again. Ensure the File Type has been changed to TIF before proceeding with the page reorder or annotation.
Routing Documents within Workflow
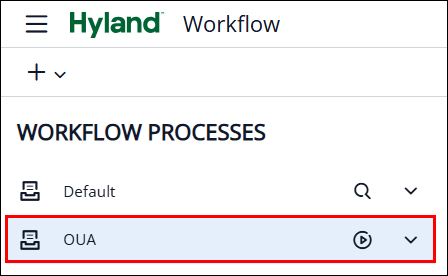
To route a document forward or to another queue, you must first navigate to the workflow. From the Home screen, select Workflow.

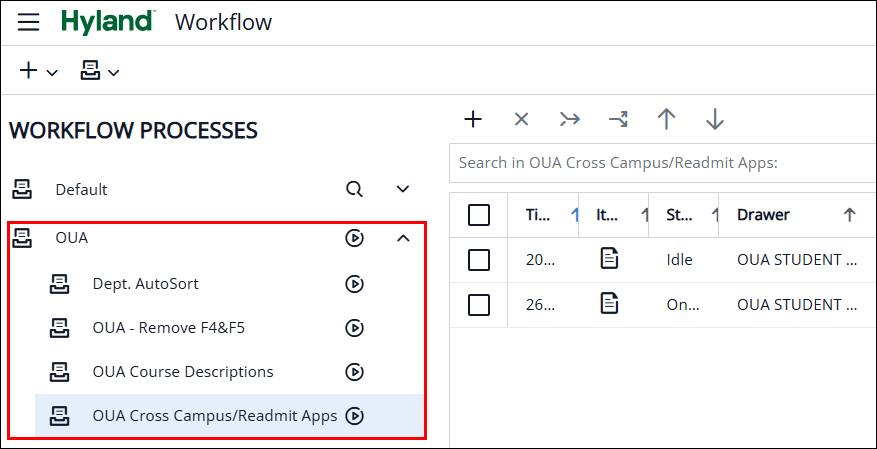
In the Workflow Processes column, click the dropdown arrow next to the appropriate workflow. Only the workflows you have access to will appear in the listing.
The Queue(s) related to the Workflow will be listed; locate and click on the appropriate queue.
- To route the document forward to the next queue process, click the checkbox to the left of the document to select it.
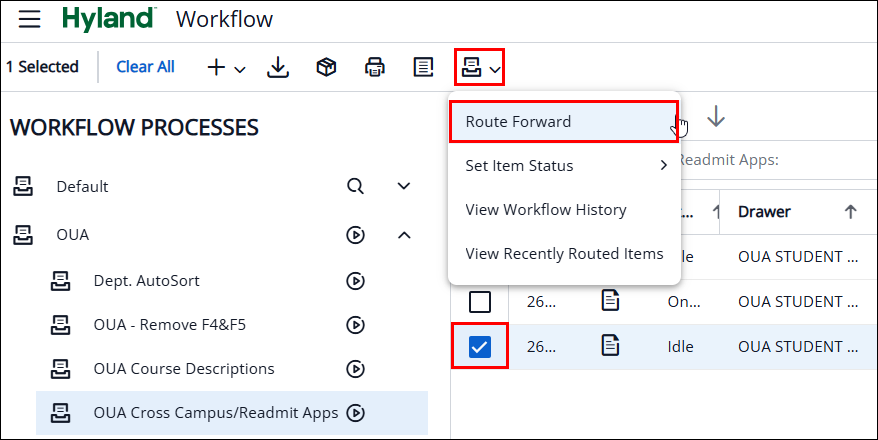
- Then click on the Workflow icon from the top menu bar and select Route Forward.
As an alternative, open the document in the workflow document viewer, where the Workflow icon is readily accessible. This is especially useful if you need to edit the document with additional document properties before you route it forward.

Once you click the Route Forward option, the document is removed from the queue list. If you had the document opened in the workflow document viewer, the document is closed and you are returned to the queue list. A message appears letting you know the documents were routed successfully. Click the X to close the message.

Deleting Documents within Workflow
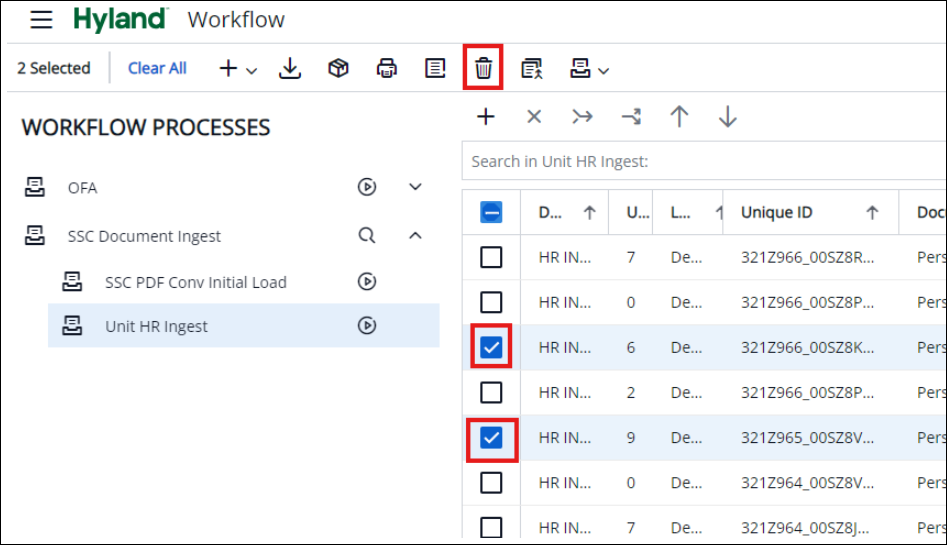
- From the Workflow queue, select the checkbox next to the document(s) that need to be deleted.
Then, select the Delete icon from the top menu bar.
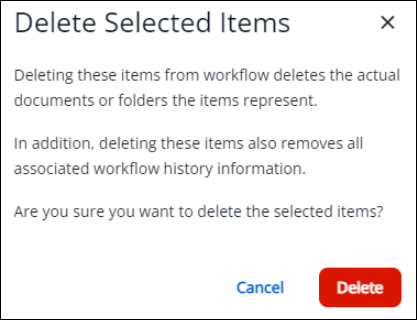
A message appears letting you know this action will delete the actual document and all associated workflow history. Click Delete to proceed with the deletion.
A message appears letting you know the selected items were deleted successfully. Click the X to close the message.
