Table of Contents
- Selecting Documents
- Downloading Documents into Individual Pages
- Exporting Multiple Documents as PDF Files
- Printing Multiple Documents to a Single PDF File
Selecting Documents
- Search for your document(s).
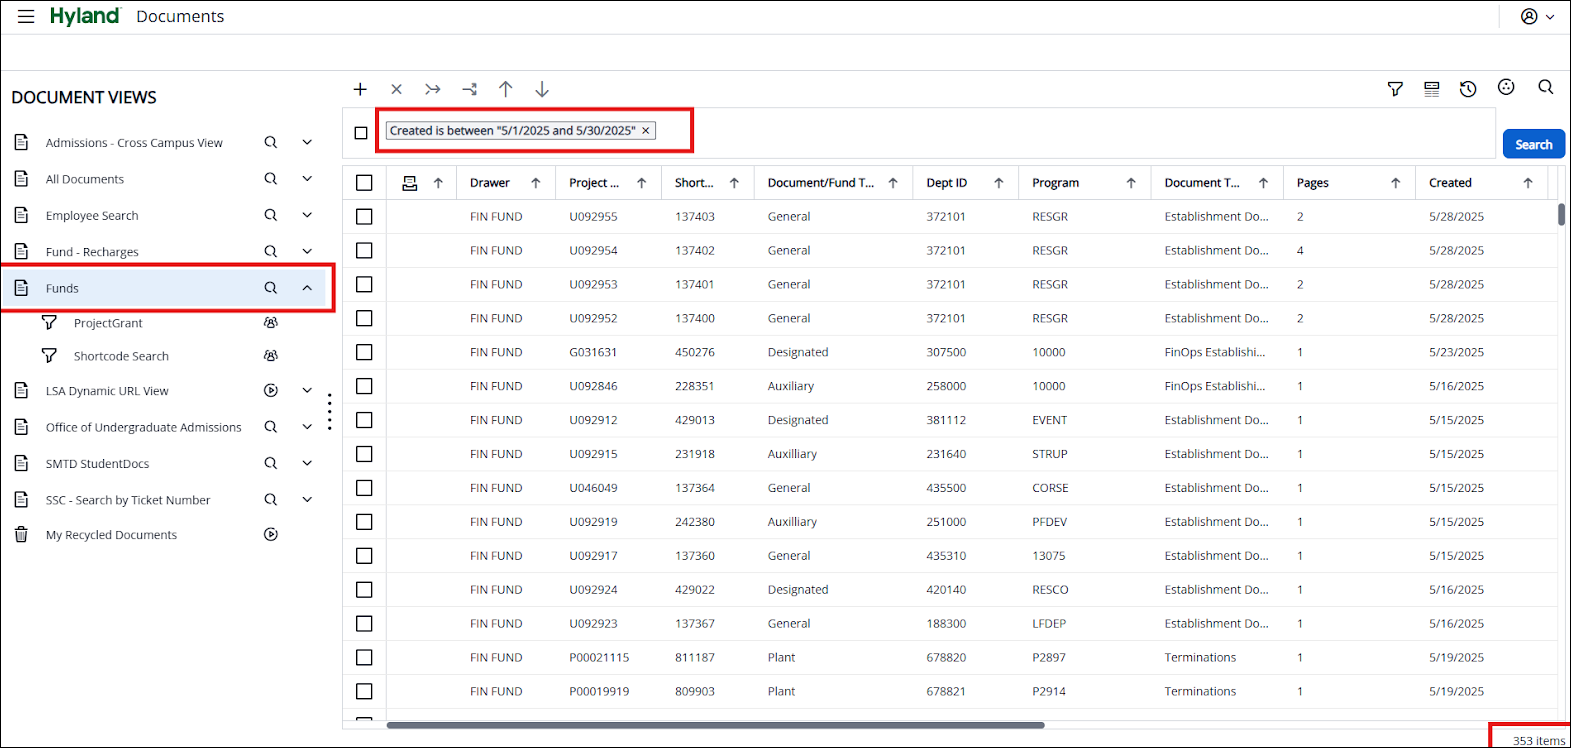
- From your list of documents, on the left side of the list, select the checkbox(es) of the documents you wish to save to your computer.
Note: Click twice to uncheck all boxes.
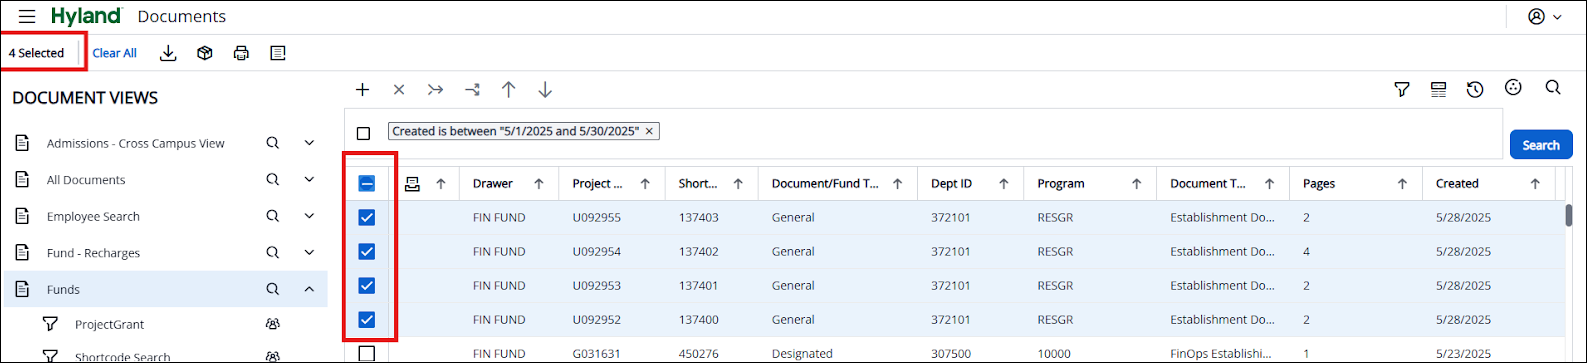
There are three ways to save a document to your computer.
- Using the Download Document button

- Using the Download Document button will download each page of the document into the same file type of the original document. All these pages can then be used to add specific pages to another document or reorder them into a new document. This option can be used for any size document, with no page limits.
Note: If the file type is G42, it is not recommended to use the Download Document option, as it will produce a file containing G42 documents that cannot be opened outside imaging.
- Using the Download Document button will download each page of the document into the same file type of the original document. All these pages can then be used to add specific pages to another document or reorder them into a new document. This option can be used for any size document, with no page limits.
- Using the Export to PDF button

- Using the Export to PDF button creates a single PDF document for each document.
- Using the Print Document button to print to PDF

- Using the Print Document button allows you to save multiple documents to your computer as a single PDF file (i.e., Save to PDF). Printing to PDF lets you select the document page size (e.g., Letter, A3, A4), include annotations, and print custom page ranges (e.g., 1, 3-5, 10-15).
Downloading Documents into Individual Pages
- Click the Download documents icon to download the selected document(s).

- The message “The document download is in process. Click cancel to cancel downloading.” is displayed quickly when downloading more than one document or a document is relatively large.
- The selected document(s) are downloaded to your computer. Each individual page of the document(s) is downloaded into the resulting .zip folder. By default, the files are saved to the C:/ drive in the Downloads folder and named documents.zip.
Note: You do not need to extract the contents of the zip file to view the documents, as long as it is in a format that your computer can read (e.g., Excel files, PDF, or Word documents, etc.). - Click the documents.zip download when it appears, or go to your recent download history to find it.
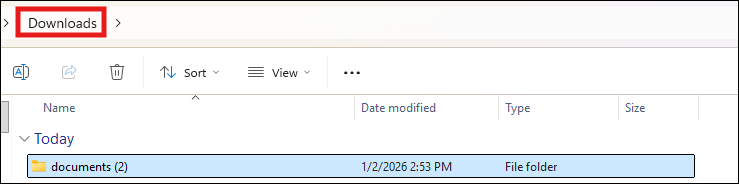
- The File/Windows Explorer box opens.

- The documents are saved in their original file types, as shown in the File type column of imaging search results.
- Double-click the appropriate document name to open.
- View, print, or save the documents as desired.
Exporting Multiple Documents as PDF Files
- Click the Export icon to export the selected documents.

- The message “The document export is in process. Click cancel to cancel exporting.” is displayed.
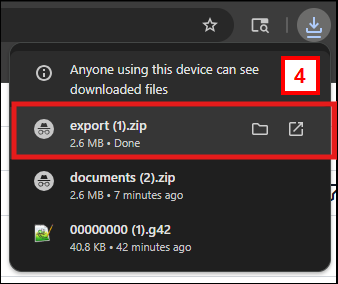
- The export saves each document as a separate PDF file to an export.zip folder. Click Save to save the file to your Downloads folder.
Note: If the export.zip folder does not appear at the top right of your browser, check the address bar to see if an icon with a red x appears (i.e., there is a pop-up blocker). Click the icon and select “Always allow…” Click Done. Repeat step one. - Click the export.zip download when it appears, or go to your recent download history to find it. This screenshot shows the download appearing in the top-right corner of your screen.
- The File/Windows Explorer box opens.
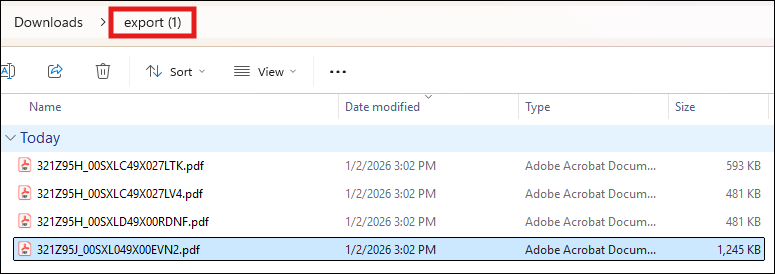
- The documents display as separate .pdf files.
- Double-click the appropriate document name to open.
- View, print, or save the documents as desired.
Printing Multiple Documents to a Single PDF File
- Click the Print icon to print the documents you selected. This will save the documents as a single PDF file.

- Uncheck the boxes under Printing Preferences, set the page size to Letter, then click OK.
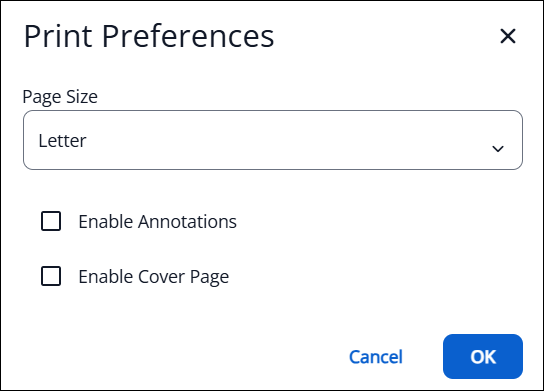
Note: You can select the Enable Annotations checkbox. This will include any annotations in the saved PDF document. Once checkboxes are selected, they remain selected until the user deselects them. - The application displays a message “Loaded page (x) of (total pages)” showing the progress of the export. When the export is completed, the printer destination page is displayed.
- Select a Print Destination (e.g., Save as PDF)
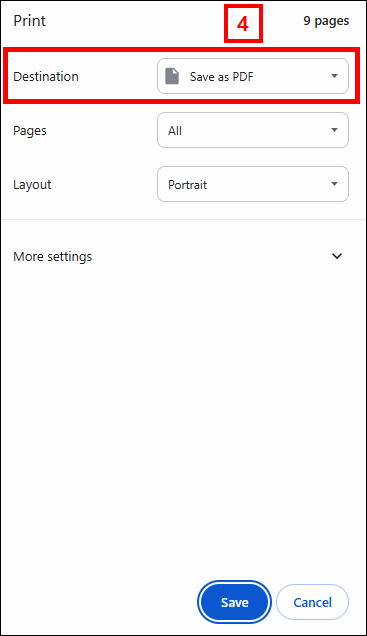
- Select a location to save the file.
- Navigate to your saved location and utilize the single PDF file as desired.
Last Updated
Thursday, February 19, 2026