
Content
- Overview
- Log into ConnectPath
- ConnectPath Dashboard
- Manage Agents
- Amazon Connect Link
- Settings
- Learn More
Overview
Contact center Supervisors can access ConnectPath and Amazon Connect Dashboards to manage agents, receive and make calls, view call status, and access Real-Time and Historical Metrics.
Log In to ConnectPath
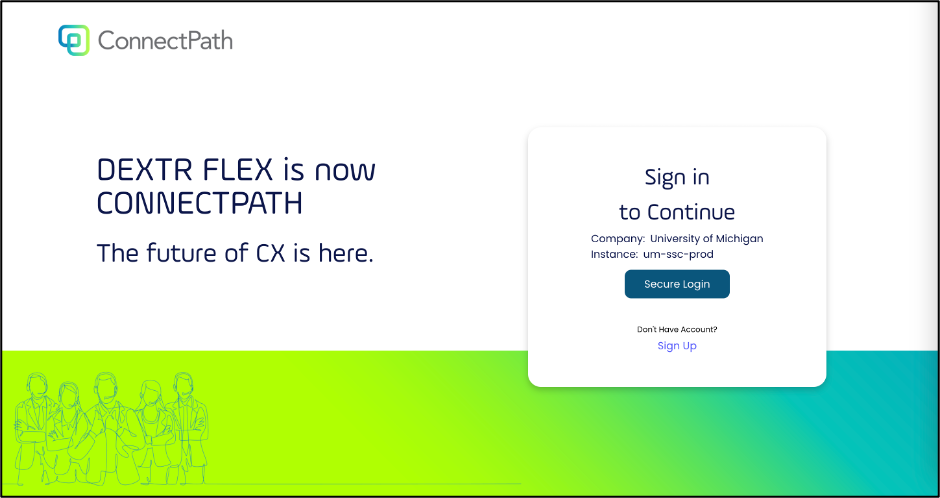
- Navigate to ConnectPath.
- Click Secure Login, you will be taken to the U-M Weblogin page. Log in with your U-M SSO credentials.
- When logging in for the first time, you will be prompted to allow microphone and pop-ups in the browser.
- A new pop-up window will come up to prompt a login into Amazon Connect instance
- Enter your U-M credentials and click “Sign In”
- Once you log in, you will have the option to click on “Go to Application”. Note: Make sure you are not logged into Amazon Connect in any other browsers or Tabs.
Overview of ConnectPath Dashboard
Home
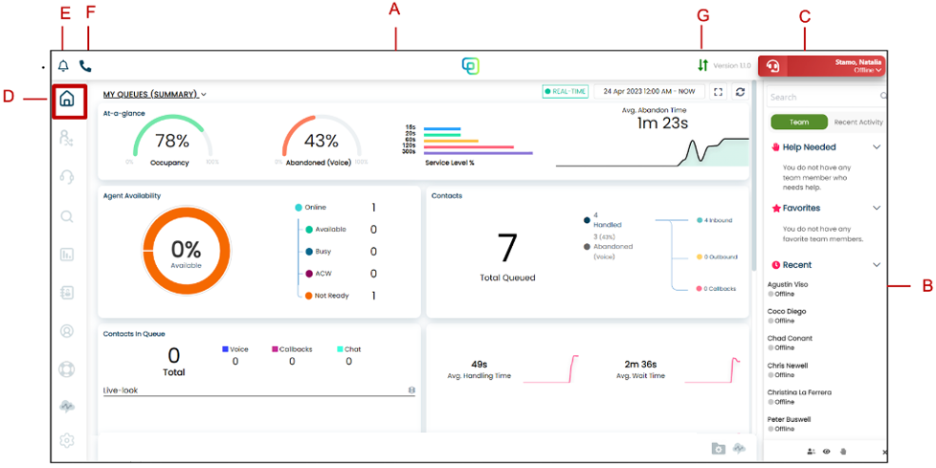
Once you enter the ConnectPath dashboard, you will be able to see:
- A- Header is a global section of ConnectPath that will always be on display. You’ll see your Status, a Handset, a Bell and the Instance logo.
- B- Team Status Drawer in the right corner. It displays Your status and User Status of other supervisors and agents.
- C- Your Status in the right corner at the top of the screen. You have predefined list of statuses to select from:
- Available
- Custom status for break/lunch
- After Call Work: Important: once you end a call, you will automatically be placed in a ACW mode (status will still display Available) until you close the contact. In this mode, you will not be able to accept calls until you close the contact. No calls will be routed to you until your are available.
- Offline.
- D- Home Dashboard and Widgets in the left navigation bar. By default it displays the real time metrics for all queues in near real time activity. Clicking on a queue name in the dropdown will show the metrics for that specific queue while the Global view summarizes all queues. This area includes:
- Queues Summary At- a- Glance
- Agent availability
- Contacts in Queue
- Contacts
- Agent Performance
- Queue Performance
- Abandoned calls
- Duration
- Real Time and Historical Metrics.
- E- Announcements displays all the announcements related to your queue. You can post announcements by clicking the pencil icon in the bottom side, or delete them by clicking the trash icon
- F- Handset is for quick dial and you can input a phone number to make a call.
- G- Network Speed- shows the network speed and helps diagnose any issues related to call dropping or quality.
- In the top corner of Home Dashboard, you can also spot 2 icons at the right side, one for entering full screen mode and another one to rearrange your card placement.
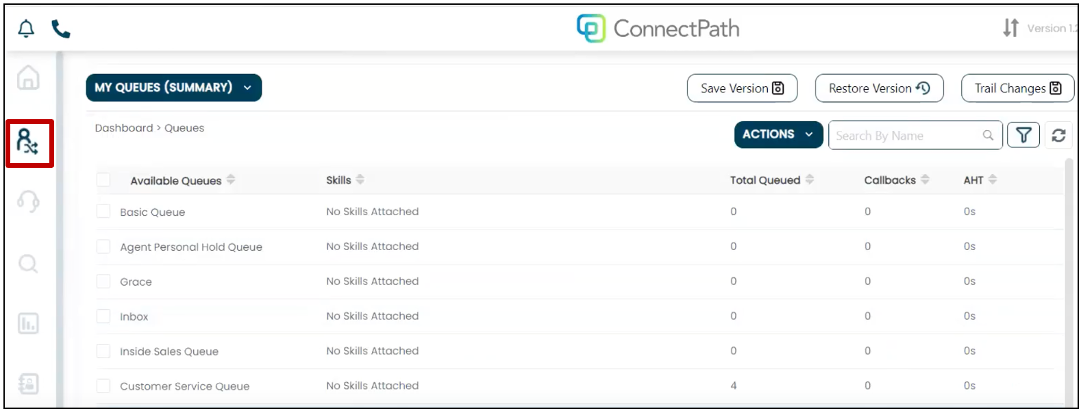
Queues
This tab allows you to view the list of your available queues. Clicking on a queue name in the list will show the available agents and calls in that specific queue.
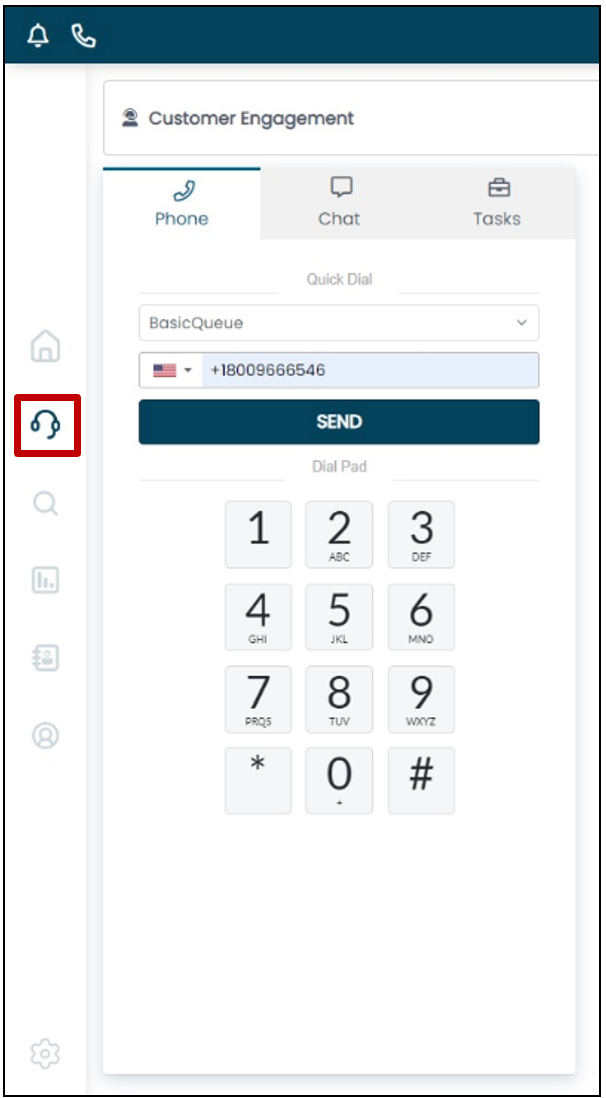
Customer Engagement
- Phone Tab: To make a call or do call transfers. It also displays the details of incoming calls in the Customer Profile area.
- Chat Tab: To receive chat requests in the same web-based Contact Control Panel.
- Tasks: Note:Shared Services is not currently using these features.
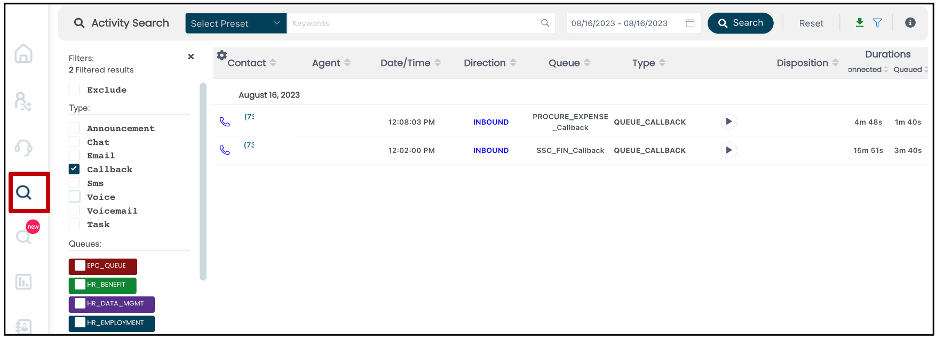
Activity Search
The Activity Search dashboard is the instance history of phone calls. You can search and filter by:
- Contact
- Date/Time
- Duration (Connected and Queued)
- Direction (Inbound, Outbound, Callback or Missed)
- Queue
- Type (Voice/Announcement)
- Disposition (if enabled in settings)
- Agent
You can search call activities, sort and filter calls and export activity results (this includes filters applied). Once created, the activity results will be displayed in the reports page.
Historical Reports
From this tab you can create, schedule, and export (Download an Excel file) historical reports without any restrictions on time period. Reports can be run and downloaded immediately or scheduled to be run monthly or yearly (Daily reports can be schedules to be run hourly or daily).

Manage Agents
Add Agent
- Log in to MCommunity with your UMICH uniqname and password.
- On the directory's home page click My Groups.
- Add agent (supervisor) to your AWS Contact Center group (or ask the group owner to add them).
- Log into Amazon Connect.
- Navigate to the People icon, then ”User Management” in the left navigation.
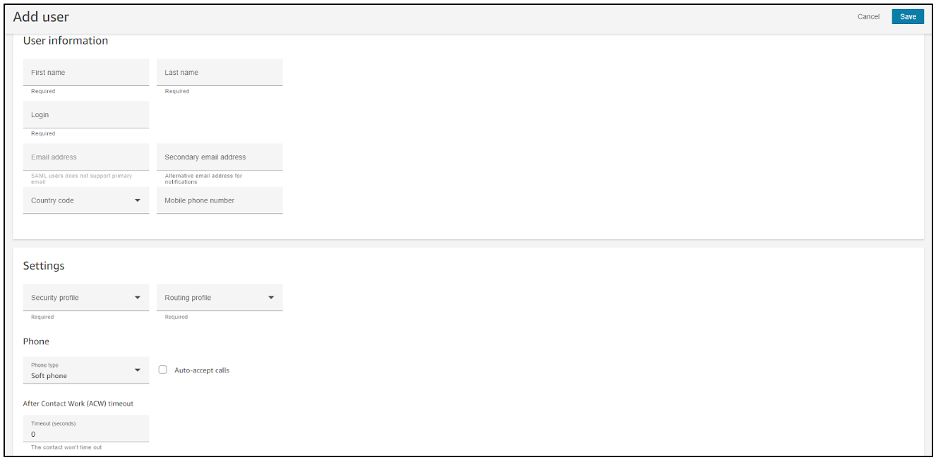
- Click Add New User
- In Add User window, enter the agent information: First Name, Last Name, Login Name (Unique name), Routing Profile (Contact center queue), Permission group (Admin, supervisor, or agent), Phone Type, After Call Work (ACW) Timeout ( setting the ACW timeout value to 0 would set it to infinite while entering any values other than 0 should put them in available state after X seconds).
- Click Save.
Edit Agent Role
- Log into Amazon Connect.
- Navigate to the People icon, then ”User Management” tab in the left navigation.
- Search for the agent that you would like to modify.
- Modify the setting desired (Routing Profile, ACW, etc)
- Click Save.
Remove Agent
- Log into Amazon Connect.
- Navigate to the People icon, then ”User Management” tab in the left navigation.
- Search for the agent that you would like to remove
- Click the checkbox next to the user you would like to remove
- Click the Delete button
- Log into MCommunity and remove the agent (supervisor) from your AWS Contact Center group.
Change Agent Status
To change the status of an agent:
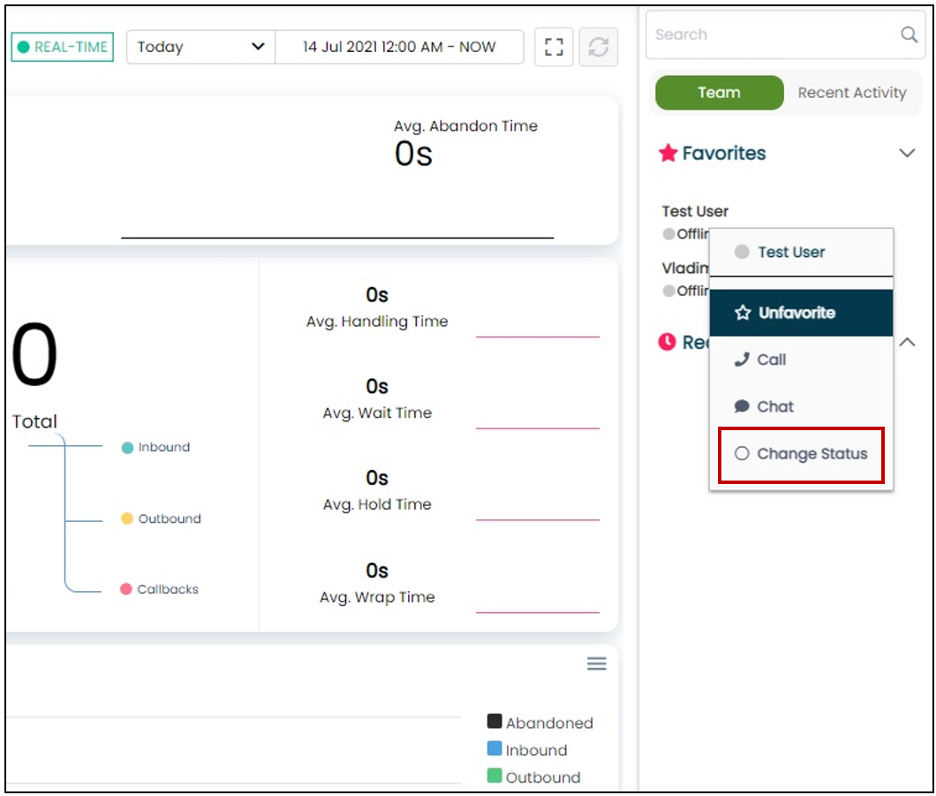
- In ConnectPath:
- Log into ConnectPath Dashboard
- Navigate to Team Status Drawer, Right-Click the Agent's name and select "Change Status" then select the desired status (Available, Offline, etc..).
- In Amazon Connect:
- Log into Amazon Connect.
- Navigate to Amazon Connect Real-Time Metrics.
- Click the Agents tab.
- Change the agent status that's displayed in the Agent Activity column such as, Available, Offline, or Break.
- You may also use the custom reports created to perform the same actions
Silent Monitoring and Whisper Coaching
As a supervisor, you have the option to silently monitor your agent calls and join the calls if needed to take over or provide Whisper coaching (without the caller hearing your conversation with the agent).
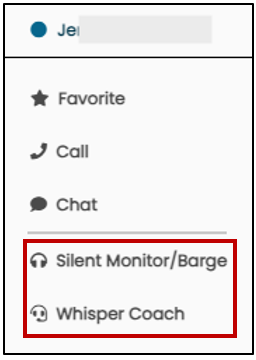
- Log into ConnectPath Dashboard
- When an agent is on call, you'll see the Connected status in the Team Drawer,
- Right click the agent name and select one of the options:
- Silent Monitor/Barge allows you to silently hear the call between the agent and the contact.
- Whisper Coach allows you to whisper/speak with the agent without the contact being able to hear you.
-
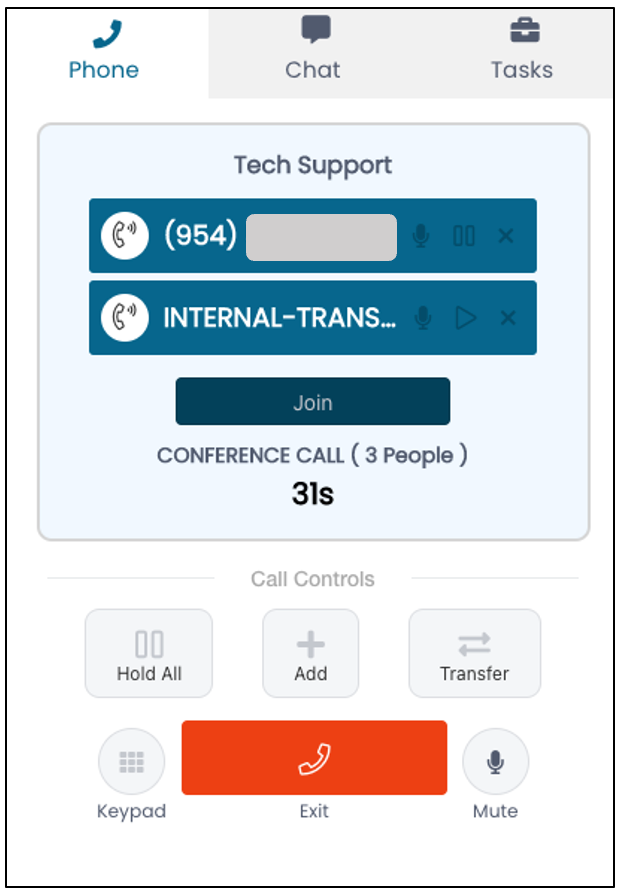
Upon Clicking Silent Monitor/Barge, you will see the following on the Engage Page, receive an Auto-Accepted Contact and be placed in a busy status. You may then click Exit to end the Silent Monitor session or Barge to introduce yourself into the call, as if you were conferenced in.

- Upon clicking Barge, you will see the following options in the screenshot below:

Note The Exit button turns into End Call, and additional options are enabled for you again, enabling you to participate in the call as if you were conferenced in.
- When you enable Barge, the agent will note their Engage page changes as well, again, as if you were conferenced in, however, the agent may proceed to handle the call as if it were any other conference call and additional actions are not required on behalf of the agent.
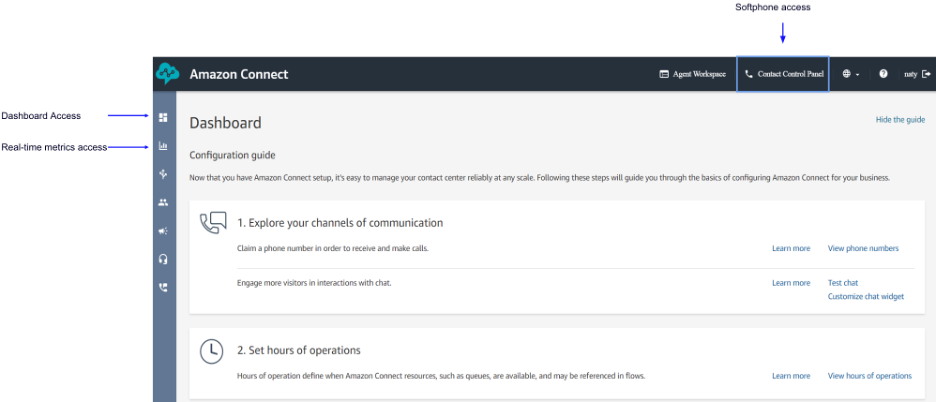
Amazon Connect Dashboard
You can access Amazon Connect Dashboard by clicking the Amazon Icon in the left navigation of ConnectPath or visiting Amazon Connect and log in with your U-M credentials. Select SharedServices-AWS and click Sign In
Use the Dashboard to:
- Run Real Time metrics and Historical Time reports.
- Change agent status (using the Real-time reports)
- Manage Queues
- Do Contacts lens/Contact search using different parameters, and save search reports.
- Access Contact Control Panel (CCP)
Learn More
For more information, please see:
- Amazon Connect Supervisor Training Demo
- ConnectPath Home
- Additional resources on: Amazon Connect Administrator Guide