
Overview
Event Connections are the individuals who are attached to events either as interested or confirmed attendees to the Event. Adding connections to events allows you to track overall attendance, ticket availability, and event capacity.
An event needs to be created before connections can be entered. See Salesforce: Create Events for more information.
Contents
This document is divided into sections:
Add Event Connection
- Search for and open the Event.
- Click Add Event Connection.

- Search for and select the contact.
- If the individual does not exist, check the Contact cannot be found box, click Next, and follow the instructions on the Salesforce: Add Contact or Affiliation document.
- Click Next.
- Select the contact’s affiliation as it relates to their attendance at the event. For example, if the contact has affiliations with U-M and a non-profit organization, and they are attending the event as a representative of the non-profit, you would select the non-profit affiliation.
- If the correct affiliation is not listed, click the radio button to create either a new affiliation, new alumni affiliation or new administrative account affiliation, click Next, and follow the instructions in the Salesforce: Add Contact or Affiliation document.
- Click Next.
- Select the individual’s Status as it relates to their attendance at the event.
- Enter any Notes.
- Click Next.
If you are adding a connection to a non-ticket event, this is the end of the process. If the connection is with a ticket event, continue to step 10.
- Enter the Ticket Contact Phone number and Ticket Contact Email that should be used when contacting the individual about their ticket(s).
- Select the ticket Delivery Method from the drop-down list. Options are:
- Electronic Delivery - If selected, the tickets will be sent to the email address specified in the Ticket Contact Email field.
- Pickup
- US Mail
- UPS
- Other - If selected, enter the details in the Notes field.
- Enter the number of Tickets Requested.
- Enter the Ticket Price.
- Enter the number of Tickets Sold.
- If the individual has requested tickets or tickets are being reserved for the individual, this can be left at 0 and updated later after the purchase is complete.
- Select the Payment Term (method of payment) from the drop-down list. Options are:
- Cash
- Check
- Credit Card
- Shortcode - If selected, enter the Shortcode in the field that displays
- Enter a Shipping fee, if applicable.
- Enter the Seat Assignment, if known.
- Enter any Notes.
- Click Next.
View Event Connections
There are multiple ways to view event connections:
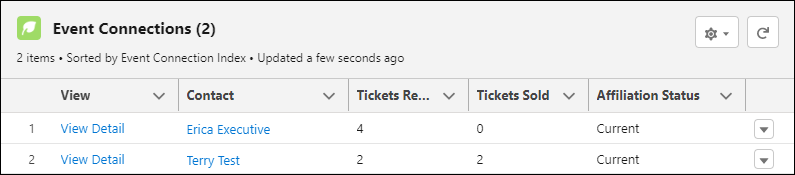
On the Event record, they are listed in the Event Connections section:
On Non-Ticket Event records, click the View Event Connections button to run a report that displays a list of connections:

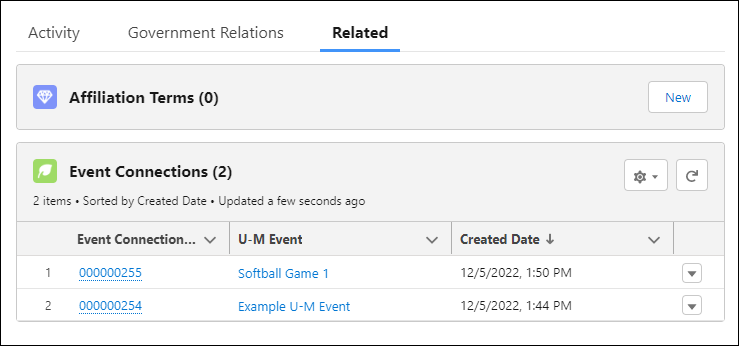
On a Contact record, event connections for the individual are listed in the Event Connections section on the Related tab:
Update Event Connections
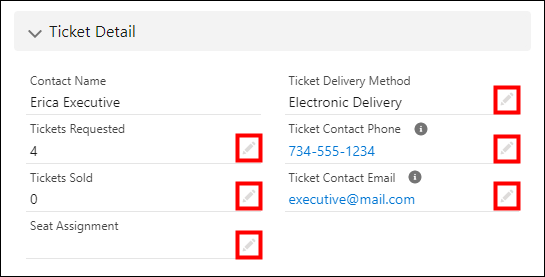
When working with Event Connections, you may need to update information on the record, such as adding the number of tickets sold, adding a seat assignment, changing the number of guests, etc.
- Open the Event Connection record from one of the locations described above.
- Click Edit next to the field that needs to be changed.
- Clicking Edit next to one field in a section makes all fields in that section available for editing.
- Make any necessary changes.
- Click Save.