Overview
The eResearch Proposal Management (eRPM) system upgrade to vendor framework version 9.0, effective January 11, 2021, brings a number of user interface changes and navigation improvements to the smartforms for all projects, including Proposal Approval Form (PAF) Worksheet, Award (AWD), Subcontracts (SUBK), Unfunded Agreement (UFA), Agreement Acceptance Request (AAR), and Grants.gov (SF-424) applications.
To see this information in slides format, please view this PDF.
Contents
- Smartform Changes
- Navigation
- Forms Menu (previously Jump-To)
- Validate (previously Hide/Show Errors)
- Slide-ins
- Document controls
- Continue where you left off
- Manage Data Changes
Smartform Changes
Navigation
The Navigation Bar that previously displayed at the top and bottom of the smartform has changed.
Old look (displayed navigation bar at top and bottom of smartform)

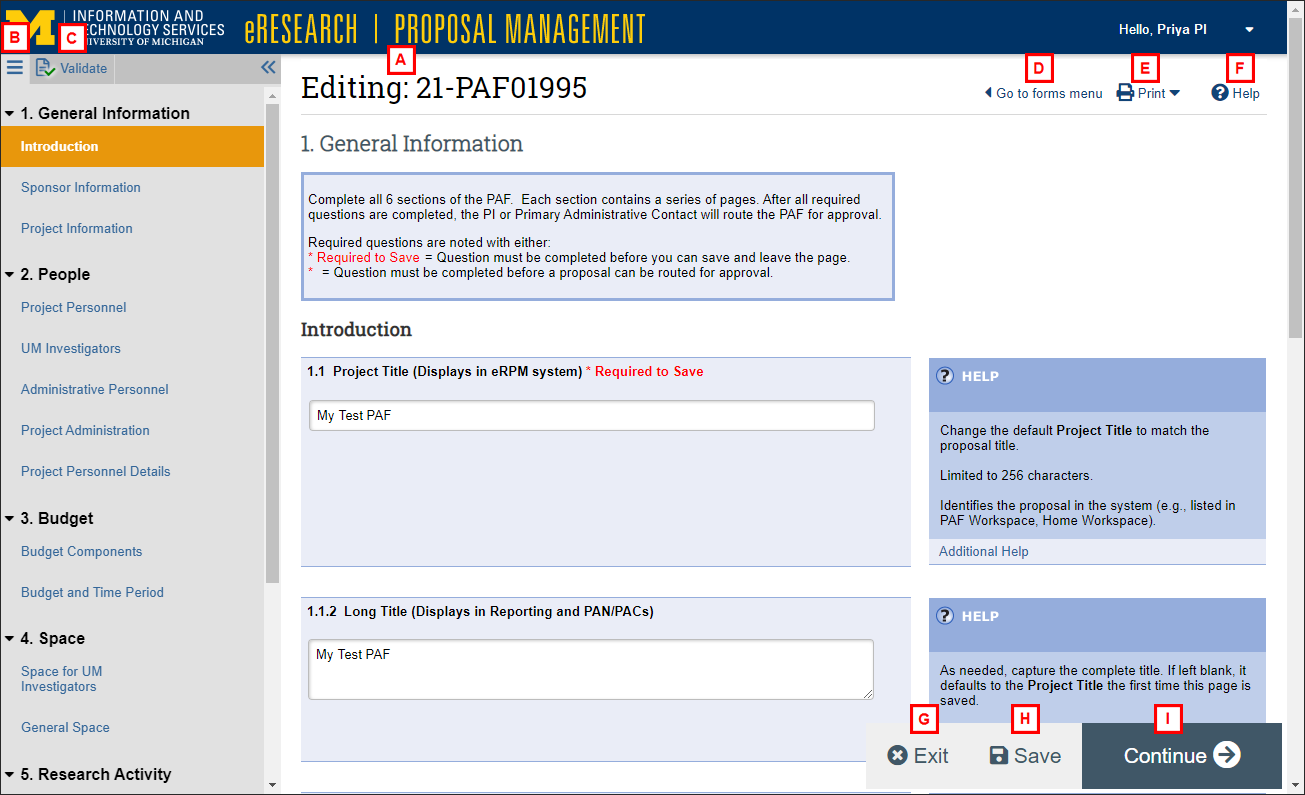
- The PAF ID now displays more prominently at the top of the smartform, e.g., "Editing: 21-PAF01995".
- Forms menu bars replaces the Jump To list, and it has moved to the left navigator. It displays all the sections and pages in an application. See Forms Menu for more details.
- check Validate replaces Hide/Show Errors, and it has moved to the left navigator. Click to run project validation/error checking. See Validate for more details.
- left Go to forms menu Shifts the focus from the smartform to the forms menu, i.e., it opens the forms menu if it was closed.
- print Print Print this page or this project to open a printer-friendly version. See Print for more details.
- Help Help contains links to the software vendor's help. For eRPM specific help, see the Help located next to the questions within the smartform.
- H. I. Buttons to exit Exit, save Save, and Continue right arrow float at the bottom-right corner of the smartform. They always display, and you don't have to scroll to view them.
Tip Use Continue to advance to the next required page in the application.
New look
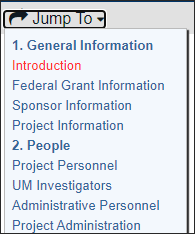
Forms Menu (previously Jump To)
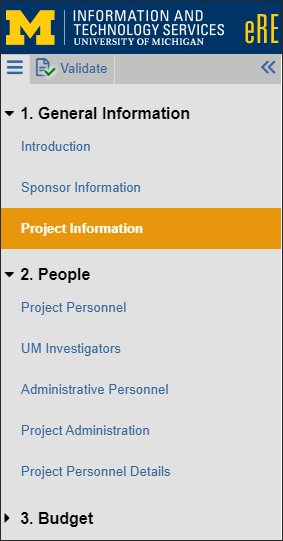
The forms menu bars replaces the Jump To list. It persistently displays a list of sections and pages within a smartform.
The entire left navigator can be toggled on or off, i.e., closed left or opened right, with the double-arrow icon.
- The page that you are currently viewing is in bold and highlighted.
- Click on a top-level bold section number, e.g. 1. General Information, to expand right (right) or collapse down (down) the pages within that section in the forms menu.
| Old look | New look |
 |
 |
Validate (previously Hide/Show Errors)
Validate replaces Hide/Show Errors. It is located within the forms menu.
Old look (displayed Error/Warning Messages in a bottom panel)
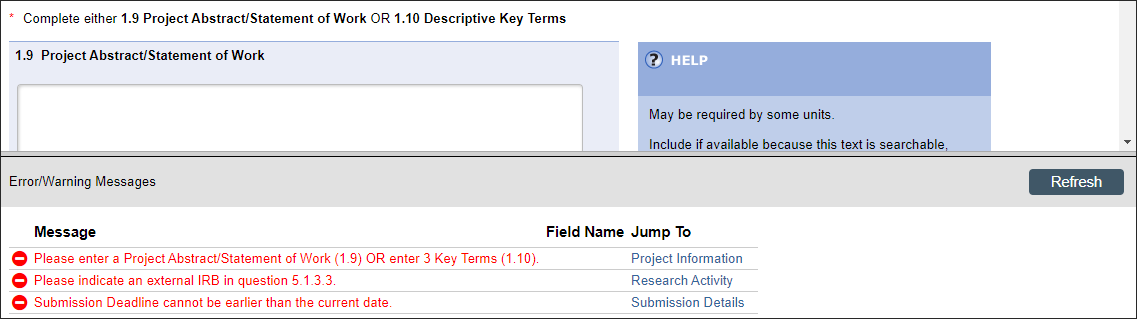
Click check Validate to run project validation and view Error/Warning Messages. Pages/questions with green checkmarks checkmark indicate verification/completion, and red circles minue indicate incompletion and/or warnings.
Note Pages that are not required will also get a green checkmark checkmark.
New look (displays errors within the Forms Menu)

The print Print down drop-down list has two options:
- This page (opens a Printer-Friendly view of the current page in another browser tab)
- This project (opens a Printer-Friendly view of the entire application in another browser tab)
Slide-ins
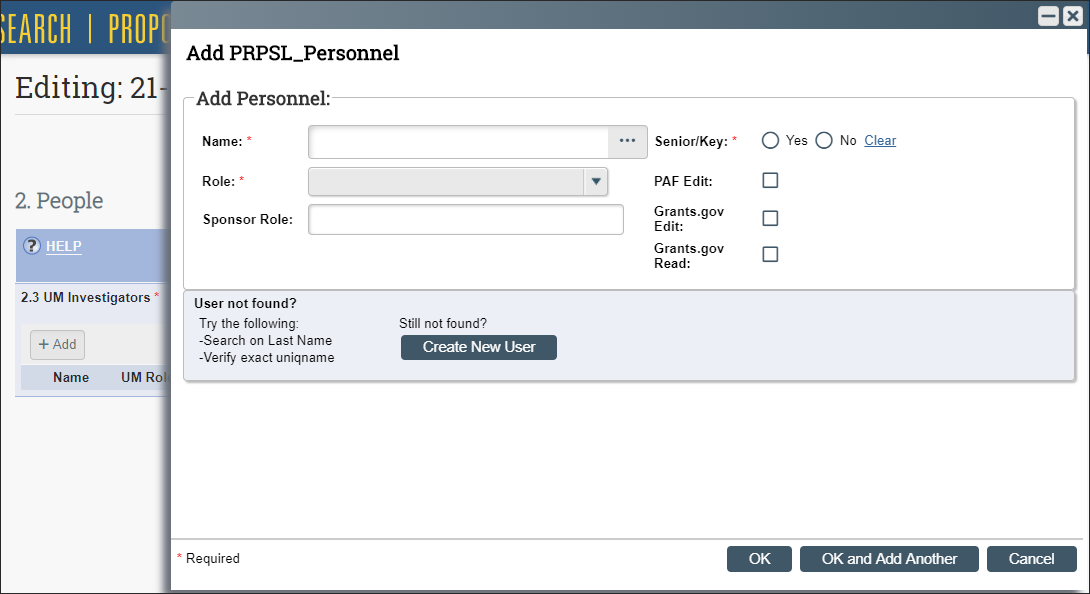
When entering information for some questions that have Add, Update, or Browse... buttons, the additional fields that opened as separate "pop-up" browser windows now slide in from the right side of the smartform. For example, when adding a UM Investigator in question 2.3, the "Add Personnel" window slides in.
Note The window can be minimized minimize or closed close to return to the main smartform, but you must click OK to save your selection.
Slide-in example
The slide-in windows are also called Dialogs. If you've minimized a slide-in and returned focus to the main smartform, then options to Close close and Restore restore dialogs display in a bar on the right-side of the smartform.
Note The main smartform controls remain locked for editing until you close the slide-in dialog.
Slide-in minimized

Document controls
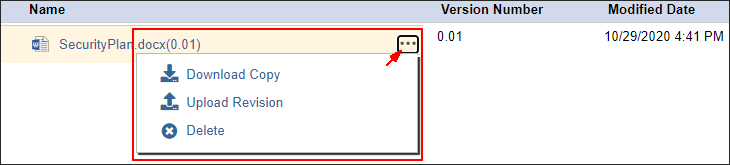
When working with certain documents, there is a new location for the buttons/controls on document stacks. Click the Browse browse ellipsis button next to the Version Number for options to:
- download Download Copy
- upload Upload Revision
- history View History
- compare Compare with Previous Version
- delete Delete.
Note The options that are available may vary based on the project type (i.e., AWD, ACR, MOD), question, document-type and user role.
Document controls
Continue where you left off
The system remembers where you last were within a smartform. A "Welcome Back! Continue where you left off" message displays, and the project opens directly to the most recent page of the application that you had saved.
Manage Data Changes
Forms Menu
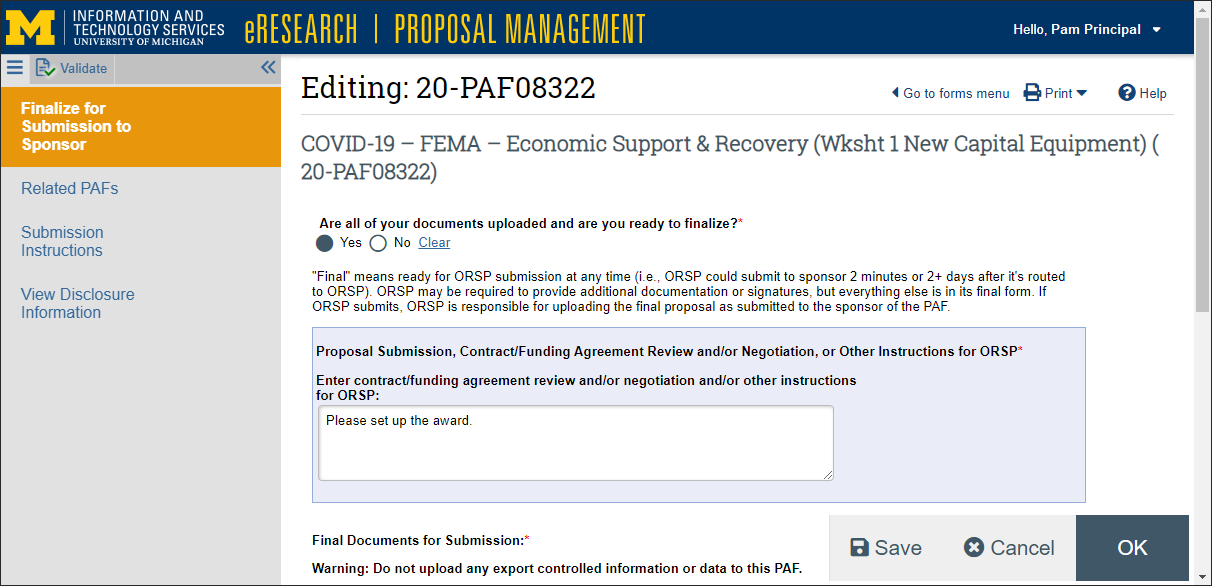
When clicking on an item under Manage Data, you'll notice the smartform view that opens includes its own Forms Menu with a series of links to other Manage Data forms in the left navigator (former Jump-To list).
Note The available links that display depend on the State of the project and the user Role.
Manage Data > Finalize for Submission to Sponsor
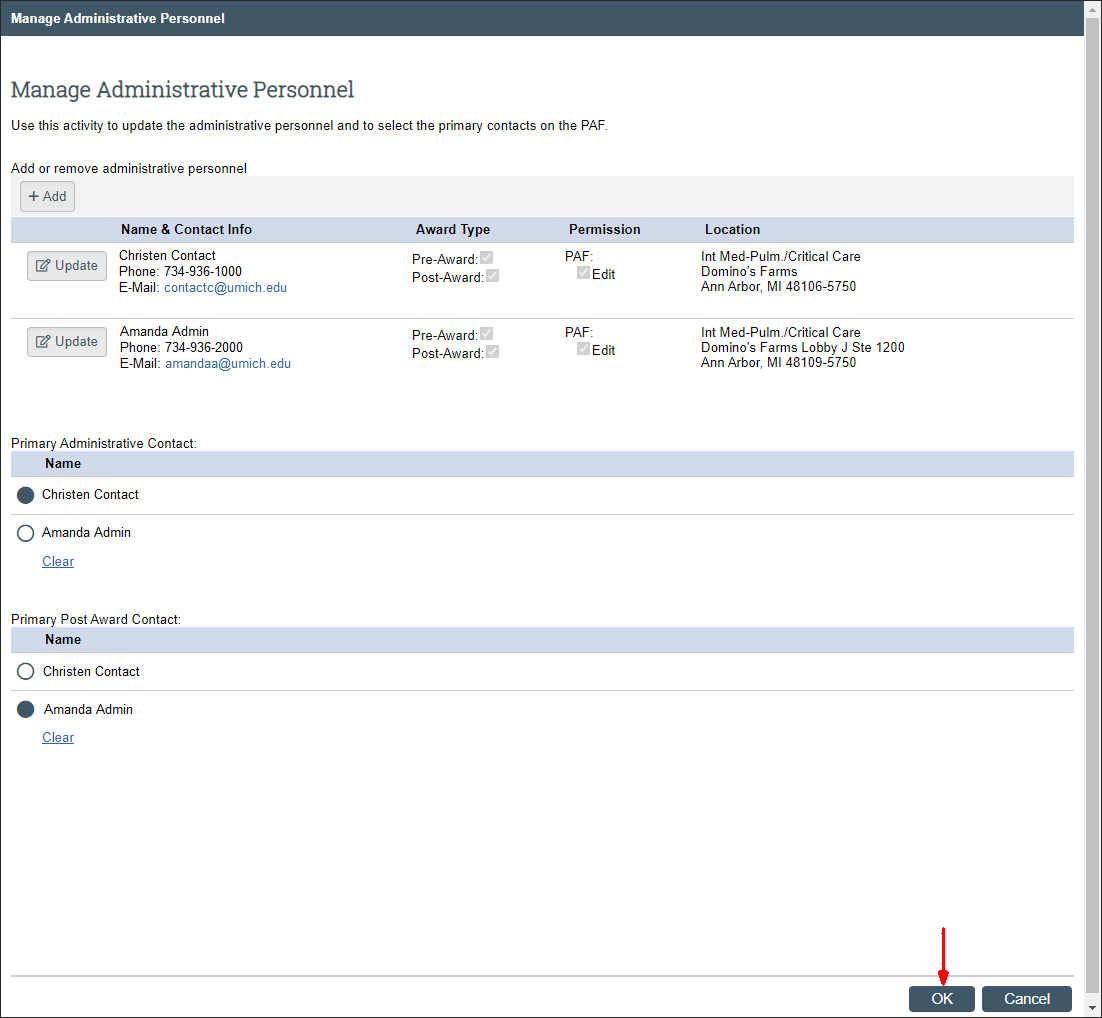
Manage Administrative Personnel
On PAFs and UFAs, the Manage Administrative Personnel view was relocated from the Manage Data menu to under the Activities menu. The functionality has not changed.
Important After making any changes in the Manage Data activities, closing the window ("x"-ing out) will not save all changes. It will appear as if the person entered is part of the Administrative Personnel set, but they will not be able to see the record unless you click OK to commit the changes.
Tip You may need to scroll down the window to see the OK button.
Activities > Manage Administrative Personnel