Table of Contents
- Single Recipient
- Single Recipient - Fields Not Yet Added
- Multiple Recipients
- Authentication and Recipient Settings
- Bulk Invites (distribution list of recipients)
- Select the document sent for signature.
- Click More then Move.
- Select team to move to under Shared documents.
Single Recipient
The following steps are taken if signature fields are already added to the document as detailed in Uploading and Preparing a Document. See the next section if fields have not yet been added to the document.
- Locate your document or template.
- Click Invite to Sign.

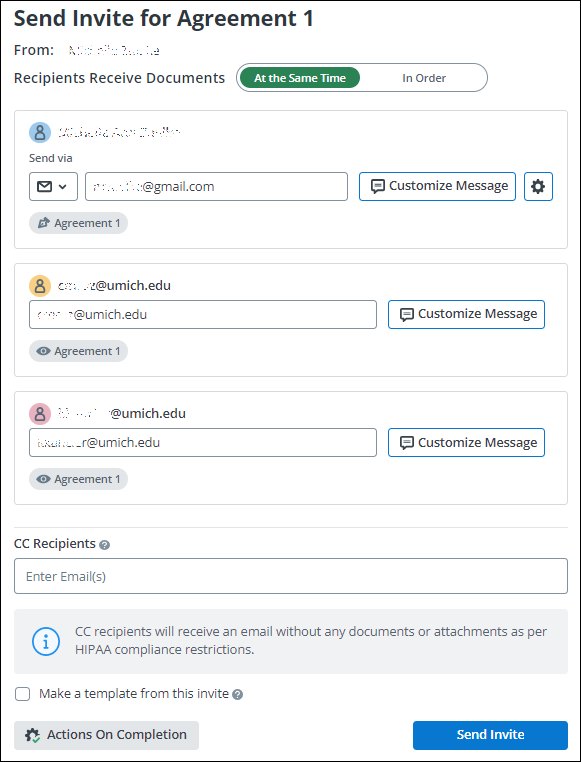
- The Send Invite for <your document name> opens. Enter the E-mail address for the recipient and anyone needing to be CC'd.
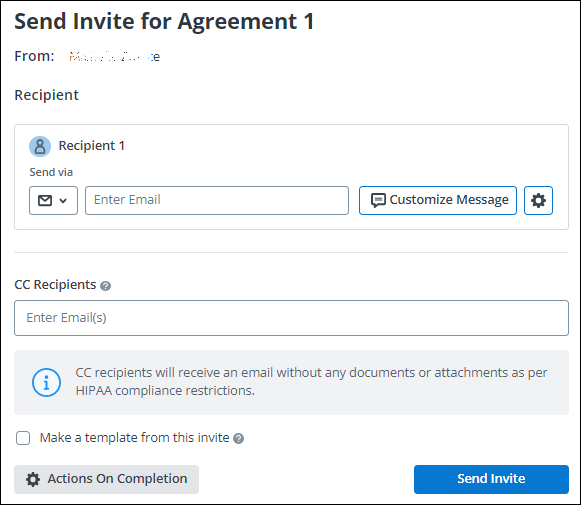
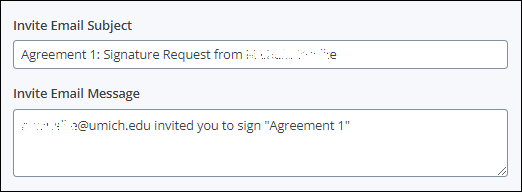
- Click the Customize Message button.
- Update the Invite Email Subject and Invite Email Message boxes as desired. Note: If you choose not to customize the Subject and Message, SignNow will send the invitation with the subject and message seen below.
- Click Send Invite.
NOTE: If you choose not to customize the recipient email, the subject line will read: <your unique name>@umich.edu Needs Your Signature. The Message will read: <your unique name>@umich.edu invited you to sign <document name>.
Single Recipient – Fields Not Yet Added
The following steps are taken if signature fields have not been added to the document.
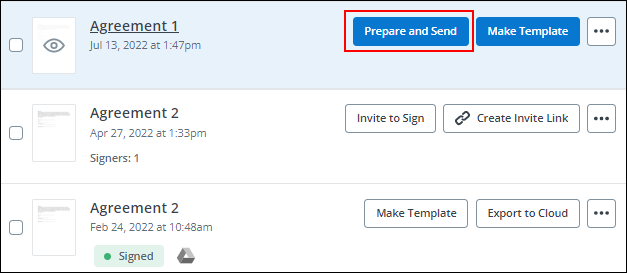
- Select Prepare and Send.
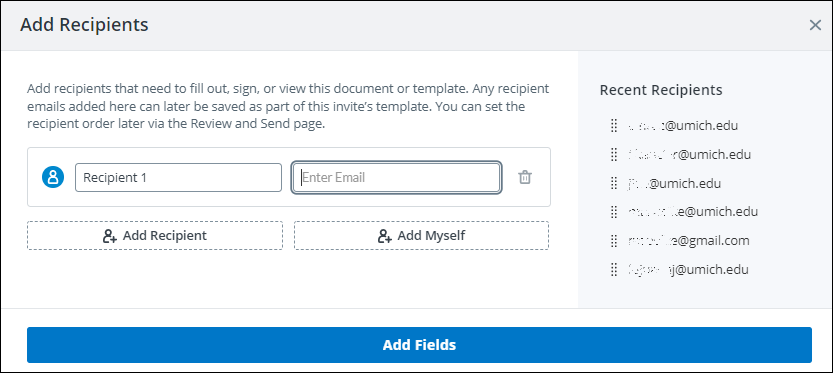
- The Add Recipients box displays. You can type the Name and Email address or drag and drop a recipient from the Recent Recipients list on the right. You can skip this step and add recipients during the Review & Send process.
- After adding recipients or to skip that step, click Add Fields.
- In the left navigation column, drag and drop the desired fields such as Signature Field, Signature Reason, and/or Date and Time Field onto the document.
Note: The user may require the signer to complete the "Signature Reason" field (if this is not well documented within the context of the document being signed).
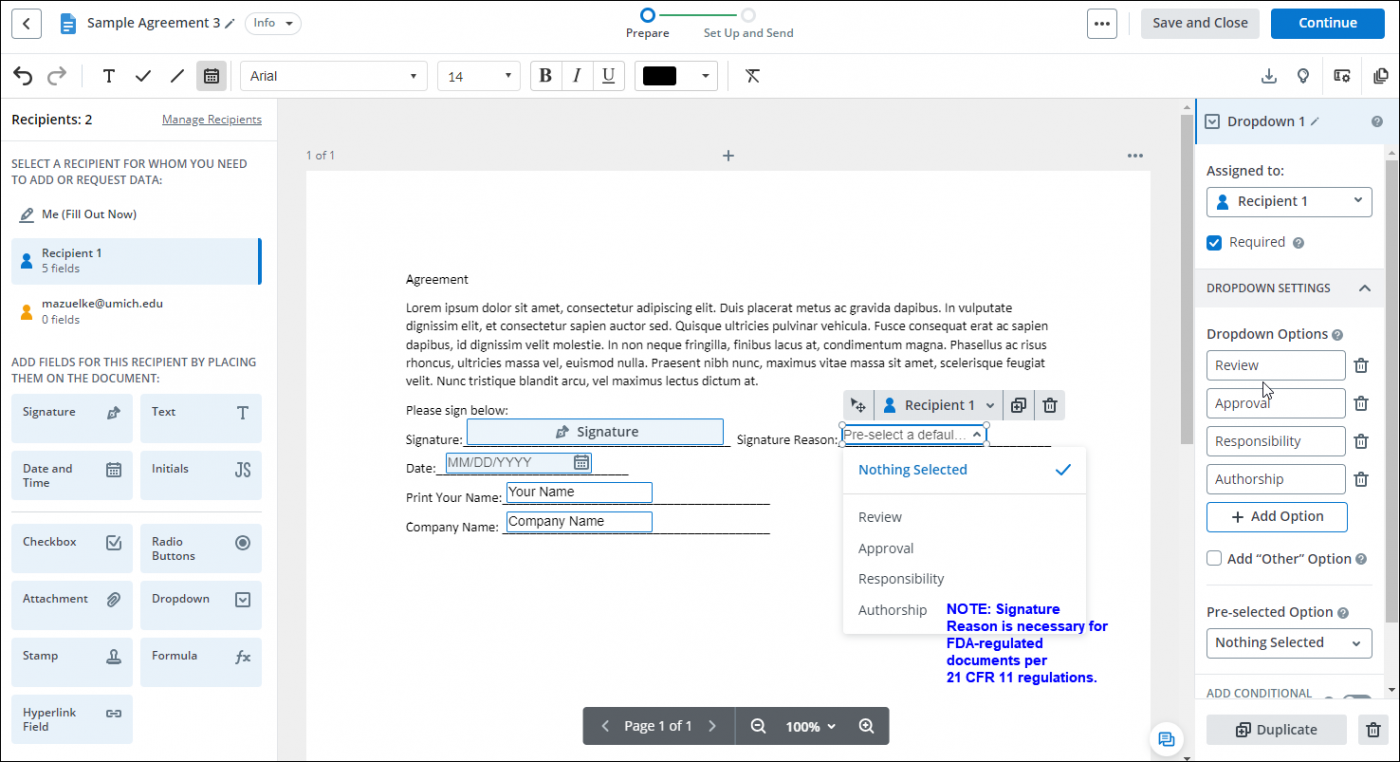
Note: All fields default to Required when added to a document. If a certain field is not required, click on that field in the document to open a new column on the right side of the document and uncheck the Required box. - Once all desired fields are added, click Save and Close to return to your document list or Continue to send an Invite.
Multiple Recipients
When a Role is created for a signature it is displayed on the Invite to Sign window. In this example the Role Names are Signer 1, Signer 2, and Signer 3. These roles were created during the Uploading and Preparing a Document steps.
- Locate and open the document.
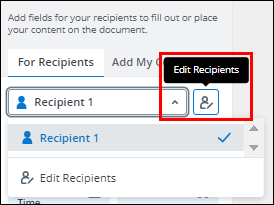
- Click the Edit Recipients button found in the left navigation column of the document.
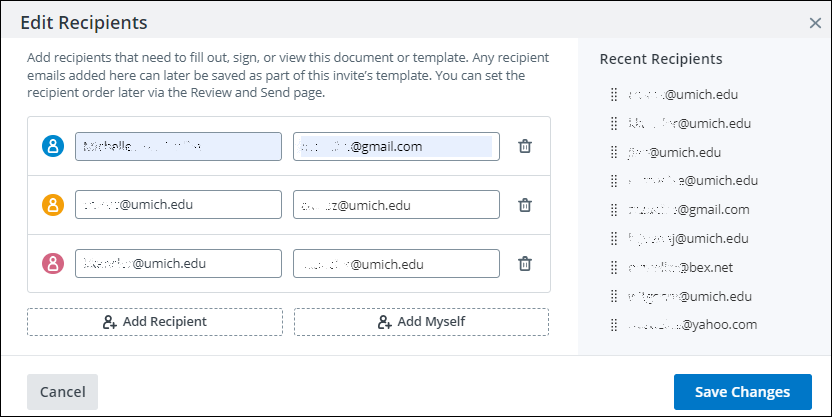
- The Edit Recipients window opens. You can manually enter names & email addresses or drag and drop them from the Recent Recipients list.
- Click Save Changes.
- Save and Close the document.
- Click Invite to Sign.

- The Send Invite for <document name> window opens.
- Follow steps 4-7 in the Single Recipient section to continue sending invitations to sign.
NOTE: You can choose how Recipients Receive Documents. The toggle button is above the Recipient list.
- Select At the Same Time to have the document sent to all recipients at once.
- Select In Order for the document to go to one recipient at a time. The request for signature email will go to Signer 1, once signed an email will go to Signer 2 and so on.
Authentication and Recipient Settings
- Locate your document or template.
- Click Invite to Sign.
- The Send Invite for <your document name> opens.
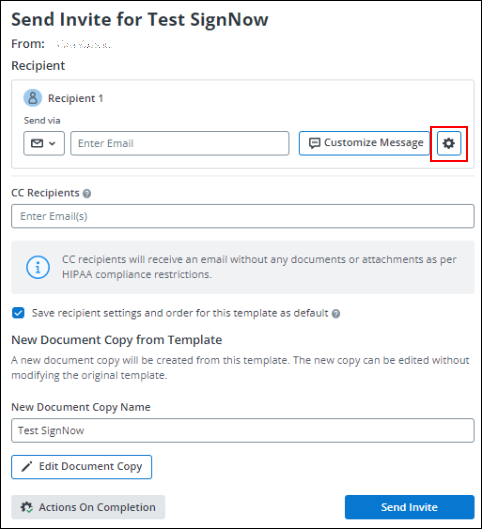
- Select the Settings button next to Customize Message.
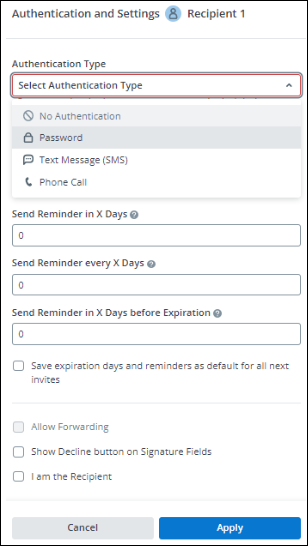
- The Authentication and Settings windows opens.
- Here you can:
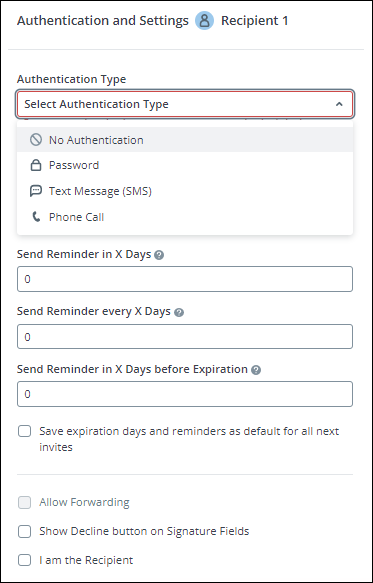
- Select an Authentication Type.
- Allow the Recipient to forward the document
- Set an expiration date on the document
- Set a Reminder for the Recipient
- Choose to use the Show Decline button on Signature Fields option:
- When the signer clicks the on signature field, they will be asked if they want to decline to sign that field.
- If the signer clicks the "Decline" button, the whole signing session of the document will also be declined.
- Set a password - there are three options, see below for details.
- If setting a Password - you will need to notify the recipient of the password via Text Message or Phone - do not send passwords via email.
Setting and Sending a Password
Option 1 - Create Your Own Password
- To create your own password, click the down arrow in the Authentication Type box.
- Select Password.
- Enter the desired password.
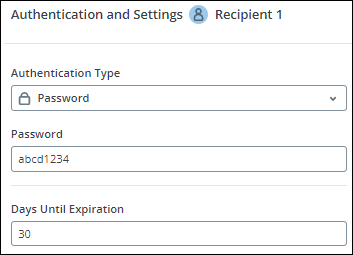
- Click Send Invite.
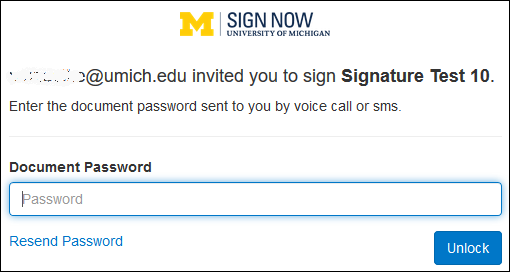
Note: If setting a Password - you will need to notify the recipient of the password via Text Message or Phone - do not send passwords via email. - The recipient will receive an email and after they click Open Document, they will be prompted to enter the Document Password.

Option 2 - Send Password via Text Message
- To send a password via text message, click the down arrow in the Authentication Type box.
- Select Text Message (SMS).
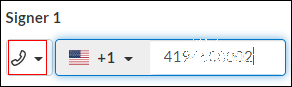
- Enter the recipient's phone number.
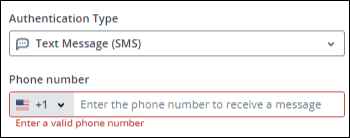
- Click Send Invite.
- The recipient will receive an email and after they click Open Document, they will be prompted to request a Password.
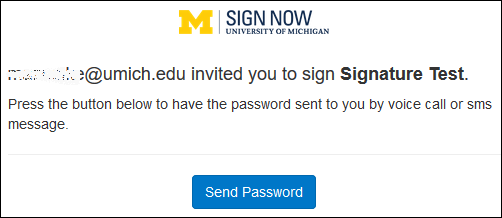
- The recipient will receive a text message with a password from SignNow to enter, which will open the document.
Option 3 - Send Password via Phone Call
- To send a password via phone call, click the down arrow in the Authentication Type box.
- Select Phone Call.
- Enter the recipient's phone number.
- Click Send Invite.
- The recipient will receive an email and after they click Open Document, they will be asked to request a Password.
- The recipient will receive a phone call with a password from SignNow to enter, which will open the document.
Bulk Invite
Bulk Invites can be made from a template.
- Multiple email addresses can be entered manually or uploaded via a .csv file.
- The bulk invite can also include a recipient in Signing Step 2 or 3, as needed. See the TIP at the end of this section.
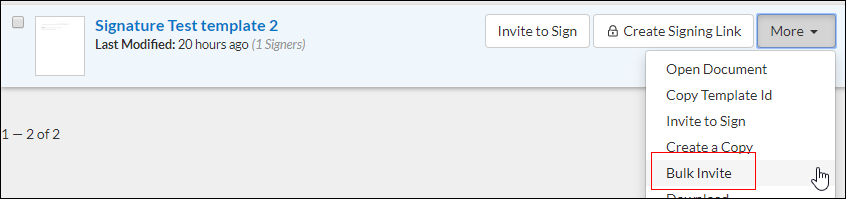
- Locate the template.
- Click the More dropdown arrow.
- Select Bulk Invite.
- The Bulk Invite window opens.
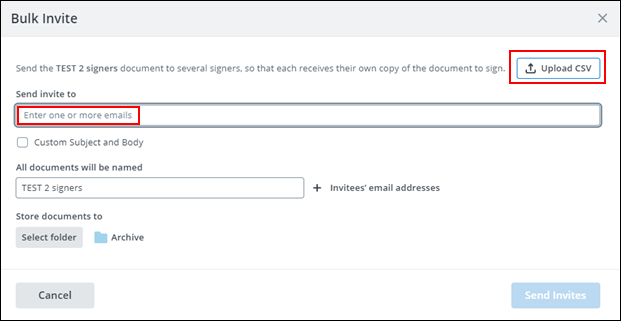
- Option one for sending:
- Manually enter or copy/paste the e-mail addresses in the Send invite to field.
- Make any necessary changes to the document name in the All documents will be named section.
- Click Send Invites.
- Option two for sending is to upload a CSV file with a list of email addresses.
- Select Upload CSV.
- Locate file to upload and click Open.
- Once the file is uploaded, select the column name from the CSV file that includes the email addresses.
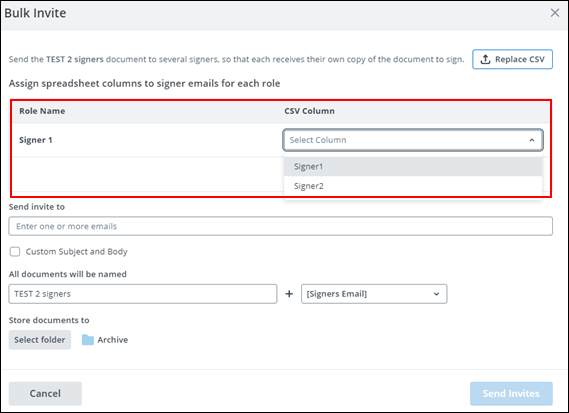
- Select Done.
- The email addresses will display in the Signer 1 column.
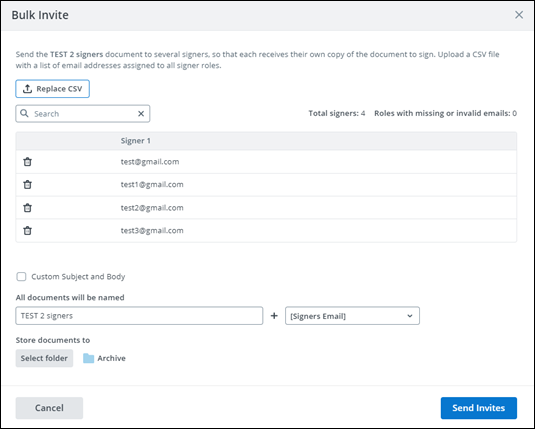
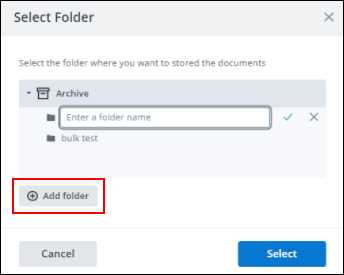
- Documents created from the bulk invite are automatically saved to your Archive folder. If you prefer you can add a new folder (specific to this bulk invitation) which will become a subfolder under Archive.
- Make any necessary changes to the document name in the All documents will be named section.
- Click Send Invites.
NOTE: Be sure you are ready to send. The email invites will be sent to your entire list of recipients as soon as you click Send Invites.
TIP:
If you also have a Step 2 or Step 3 signer on the Bulk Invite, you can enter their email address on the Invite to Sign page prior to selecting Bulk Invite.
