Upload a Document
- Select either Start Uploading Documents Now or Upload Documents.
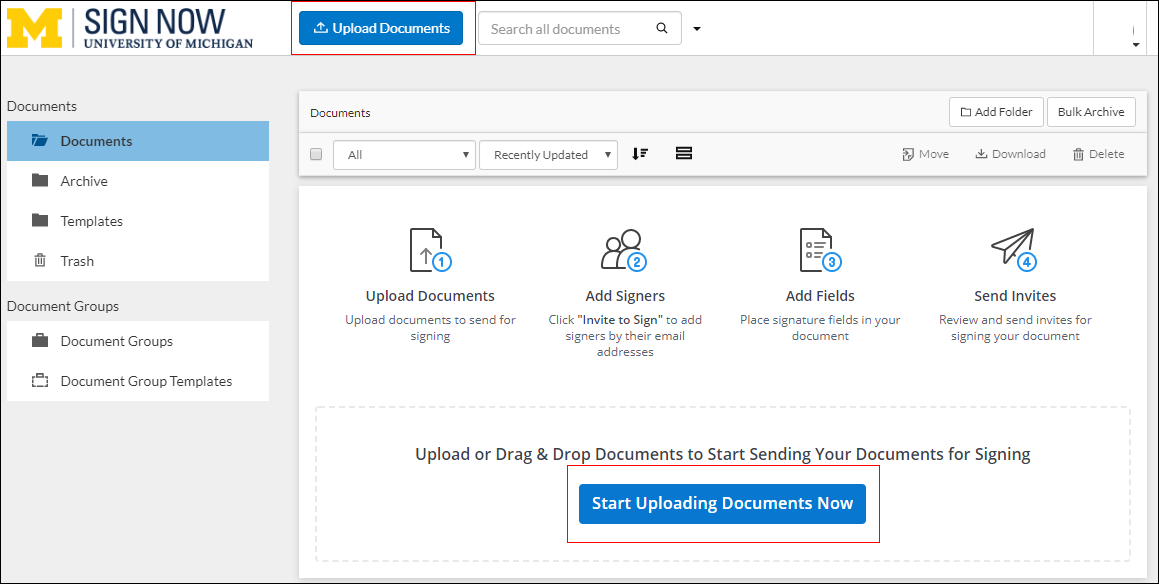
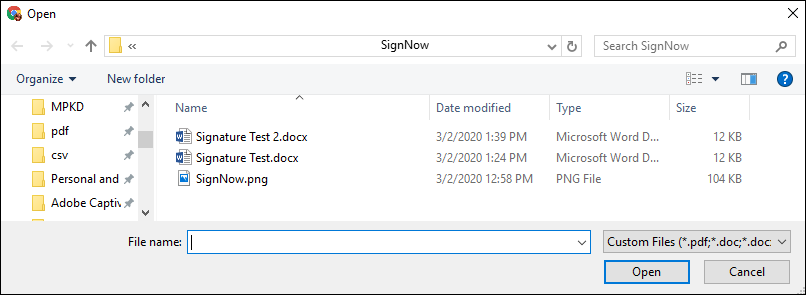
- The Open window displays.
- Browse and select the document to be uploaded.
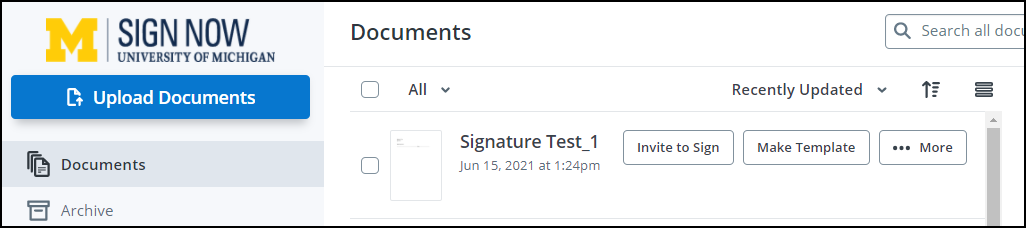
- The uploaded document can be found in the Documents folder.
Note: The page displayed in step one is only seen the first time you login to SignNow and have no documents uploaded. After documents are added to SignNow, the page appears as seen here, in step four.
Prepare a Document
Add Fields
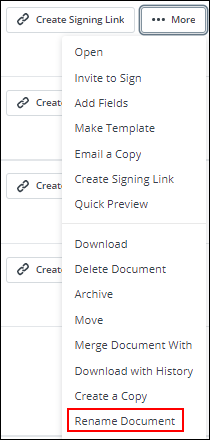
- The document Name will appear in the subject line of email, please consider this when naming the document or template to avoid the email looking like Spam. A document can only be renamed before it has invitations.
- To prepare the document for signing, fields must be added.
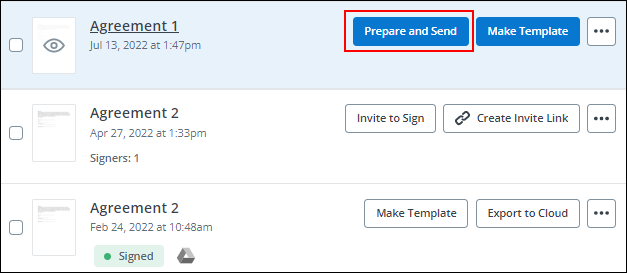
- Select Prepare and Send.
- The Add Recipients box displays. You can type the Name and Email address or drag and drop a recipient from the Recent Recipients list on the right. You can skip this step and add recipients during the Review & Send process.
- After adding recipients or to skip that step, click Add Fields.
- In the left navigation column, drag and drop the desired fields such as Signature Field, Signature Reason Field, and/or Date/Time Field onto the document.
- The user may require the signer to complete the "Signature Reason" field (if this is not well documented within the context of the document being signed).
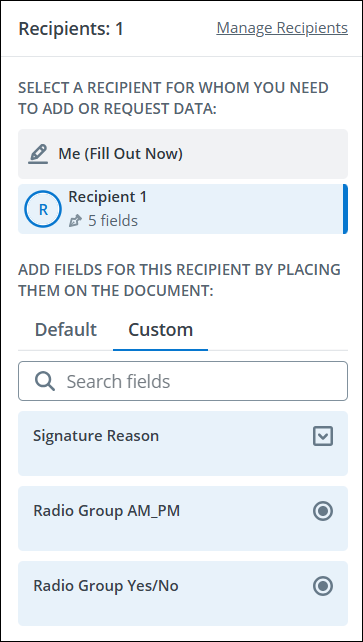
- Fields can be saved as your personal Custom fields for easy reuse. Once saved, select the custom tab (above the fields on the left) and easily add your custom fields without the need to recreate for each document.
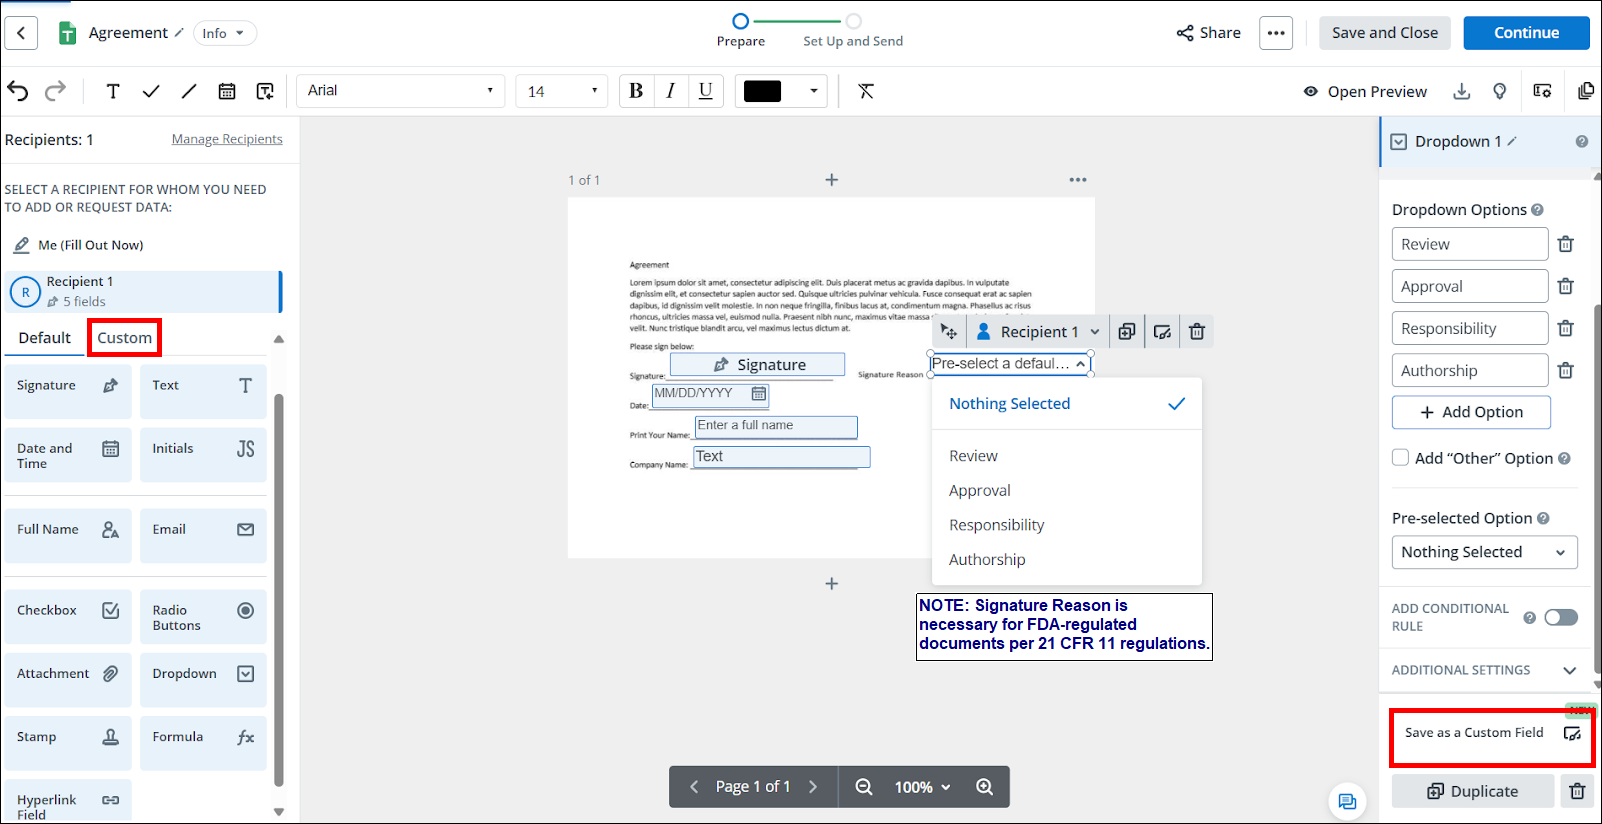
Note:- All fields default to Required when added to a document. If a certain field is not required, click on that field in the document to open a new column on the right side of the document and un-check the Required box.
- All fields default to Required when added to a document. If a certain field is not required, click on that field in the document to open a new column on the right side of the document and un-check the Required box.
- When adding a Text Field, a new column will open to the right side of the document. Enter the field name to display in the Label text box.
Note: Best Practice for preparing a document would be to include a Printed Name field with or under a signature line.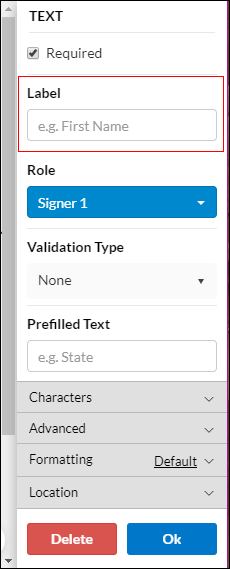
Note: When adding fields to a document, use the same Label on fields that will require the same input. For example, if there are several places on your form or document that require the recipient’s company name, label each text field Company Name. After the recipient completes the first Company Name field, their response will be auto-filled into the remaining Company Name fields as they click on these fields in the document.
- Once all desired fields are added, click Save and Close.

Add Multiple Recipients
- Click the document to open it.
- Drag and drop a Signature Field onto the document.
- Click inside the Signature Field box.
- The Signature column will open to the right of the document.
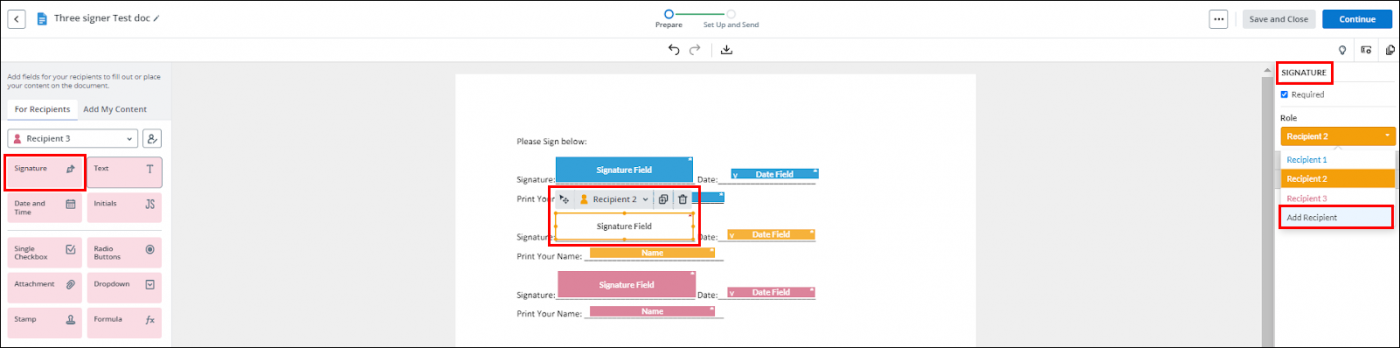
- To add additional signers, Click on the Role dropdown.
- Select Add Recipient.
- Click OK.
- Repeat for each additional recipient. Note: Each Signature Field will be a different color for easy differentiation.
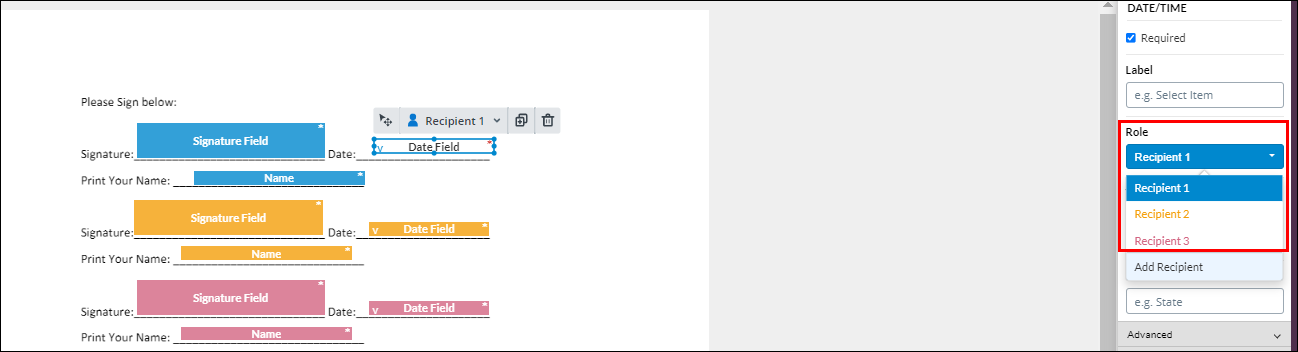
- To add a Date/Time Field for each recipient, drag and drop the Date/Time Field onto the document.
- Click inside the Date/Time Field.
- The Date/Time column will open to the right of the document.
- Click the Role dropdown and select the role that corresponds to each recipient.
- Repeat Role selection for each additional recipient.
- Once all desired fields are added, click Save and Close to return to your document list or Continue to send an Invite.

Edit Signer(s)
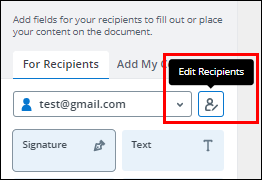
- To change the Role Name or Signers Name, click Edit Recipients in the Add Fields for Recipients section to the left of the document.
- The Edit Recipients window opens.
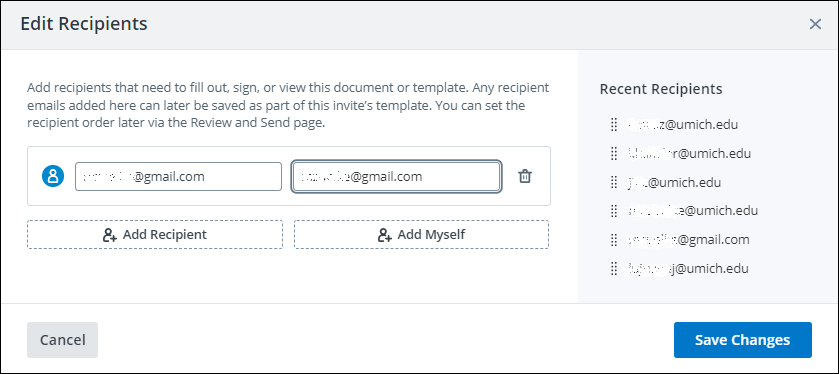
- Click the recipient or role name to edit.
- Click the trash can icon to delete a recipient.
- Enter the Email address(es) for anyone that needs to be copied on the invitation.
- When finished editing, click Save Changes.
Note: Additional Fields can be added to documents. These fields can be defined with the options on the right side of the page, the options are: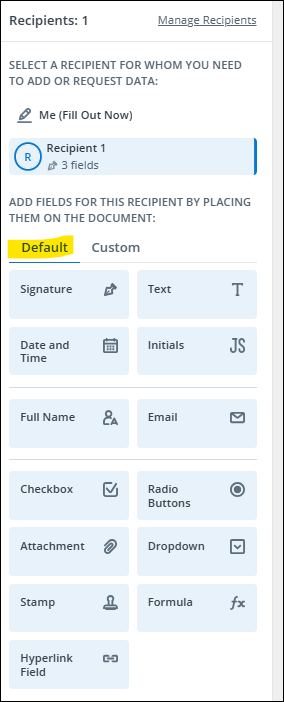
Create a Template
Upload a Document to a Template
In addition to creating a template, you can upload your document directly to a template which also allows you to save your signature set-up and resend the document over and over without having to recreate the document each time.
- Open the Templates folder in the Documents section on the left.
- Select Upload or Create.
- The document displays in the Templates section.
Creating a Template allows you to save your signature set-up and resend the document over and over without having to recreate the document each time. There are several Make Template options as seen in step #2.
- Locate the document to be used as a template.
- For a new document with no fields yet added, click Make Template.
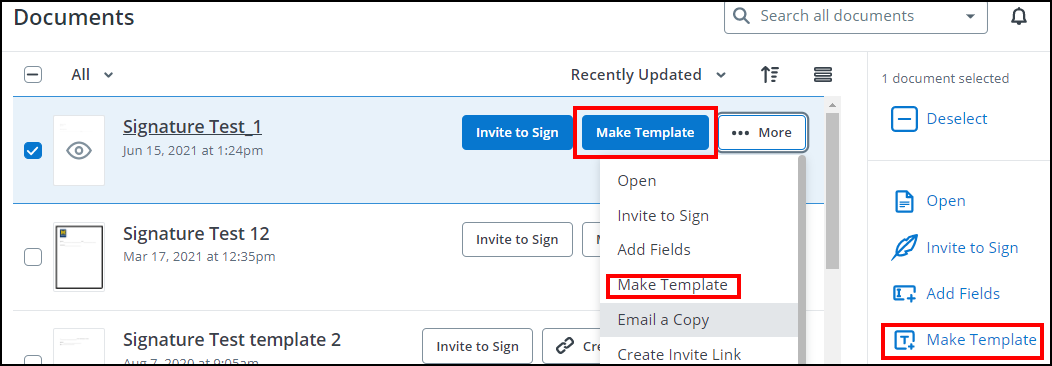
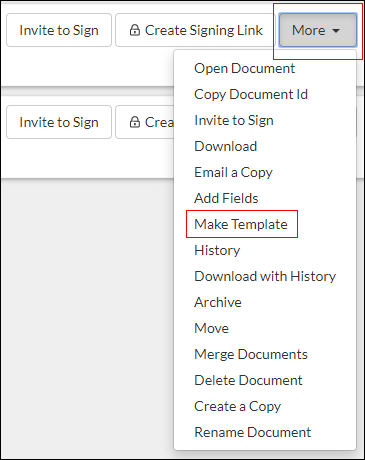
- For an existing document with fields set up, select the More dropdown.
- Click Make Template.
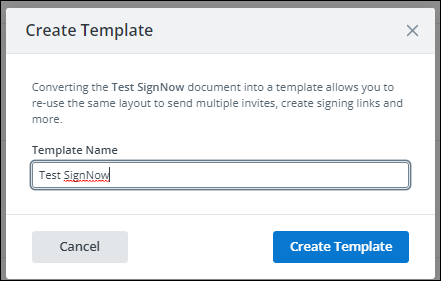
- The Create Template opens. Enter the Template Name.
Note: Keep in mind the template name will serve as the subject line in the email request. - Click Create Template.
- The document is now found in the Templates folder.

Note: If changes are needed to the template you can create a copy and make changes. (e.g. change number of signers)