Overview
COI Staff
When a discloser identifies a new company they are an owner of, or has a relationship with (via the COI question on a PAF or by the U-M Innovation Partnerships), the COI Office creates a Company Profile, and then prompts the UM Company Contact Person to complete the Company Profile in M-Inform for conflict of interest review.
Contents
- Create Company Profile
- Edit Company Profile / Update Company Contact
- Request Changes / Post Comment
- Acknowledge Company Profile
- Administrative Cancel
- Close Company Profile
Navigation
M-Inform > COI Staff Dashboard
Step-by-Step Process
Create Company Profile
- From either your COI Staff Dashboard or from the All Projects tab, click the Create Company Profile button.
- Enter and select the name of the applicable Company.
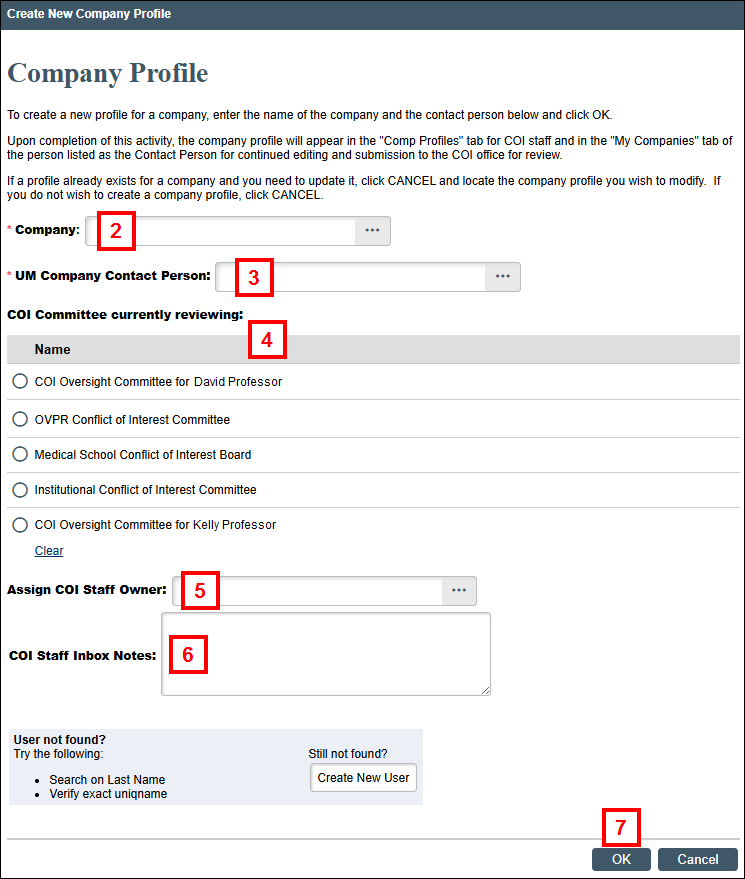
- Enter and select the name of the UM Company Contact Person.
Important It is recommended that you initially assign yourself as the Company Contact, since the email notification associated with the creation of a Company Profile does not contain a link to the project. Once you’ve finished creating the profile, the Company Contact can be updated, which will then send an email containing a link to the project. - Select the COI Committee currently reviewing the project.
- Enter and select the name of the COI Staff Owner to assign.
- If desired, enter COI Staff Inbox Notes.
- Click OK.
Edit Company Profile/Update Company Contact
Once a Company Profile has been created, it will be in the state of Review Company Information. COI Staff can then edit the profile as needed, attach any documents, enter additional editors, and update the Company Contact.
- Click Edit Company Profile.
- Make any necessary changes to the Company Profile worksheet.
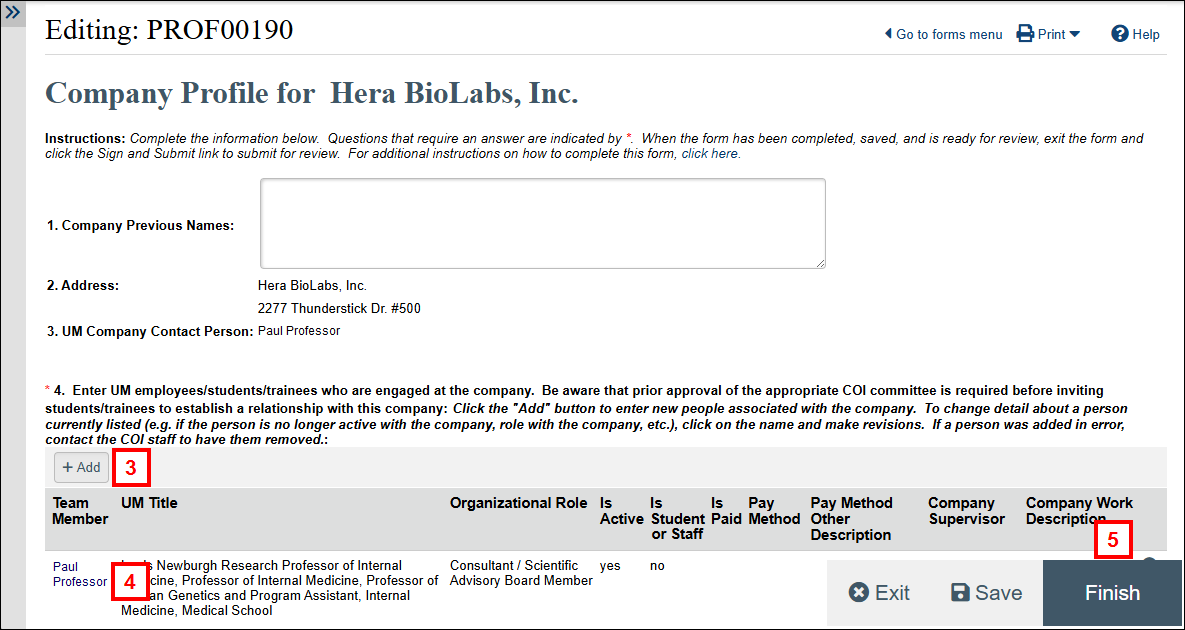
- To enter additional UM employees/students/trainees who are engaged at the company, click Add, then complete the form that displays.
Notes- If you add an individual in error, you can click delete Delete to remove them.
- If an individual listed in question 4 is no longer actively engaged with the company, do not delete them. Click their name, and then answer No for "Is the person actively engaged with the company?" in the form that displays.
- To edit information for a Team Member listed in question 4, click their name and then edit in the form that displays.
- Click Finish when all changes are complete to save and return to the Company Profile workspace.
Upload Documents
Info Steps 6-8 are optional
- Click Manage Documents under Activities.
- Click Add or drag and drop files to upload.
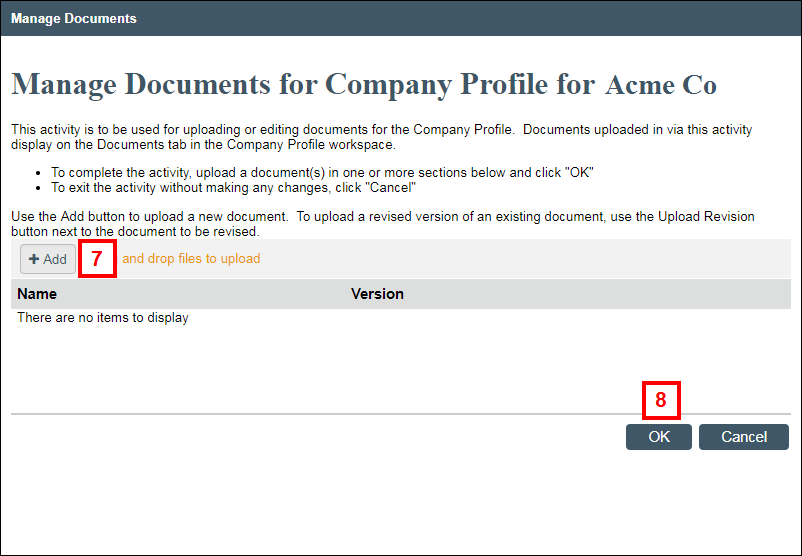
- Click OK.
Note Uploaded documents display on the Documents tab in the Company Profile workspace.
Additional Editors
Info Steps 9-11 are optional.
- Click Manage Editors and Viewers under Activities.
- Enter and select the name of the person you wish to add as an Editor or a Viewer.
OR Click Browse ... to search for the desired person.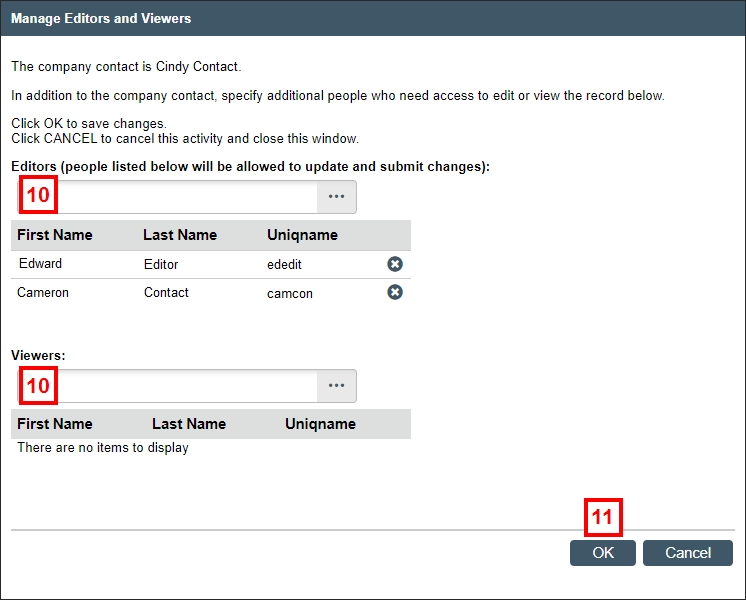
- Repeat step 10 as needed to enter additional Editors and/or Viewers, then click OK when you are finished.
Note Additional Editors display on the Summary tab of the Company Profile workspace. - Click Update Company Contact under Activities.
- Click Browse ..., then enter and select the name of the Company Contact.
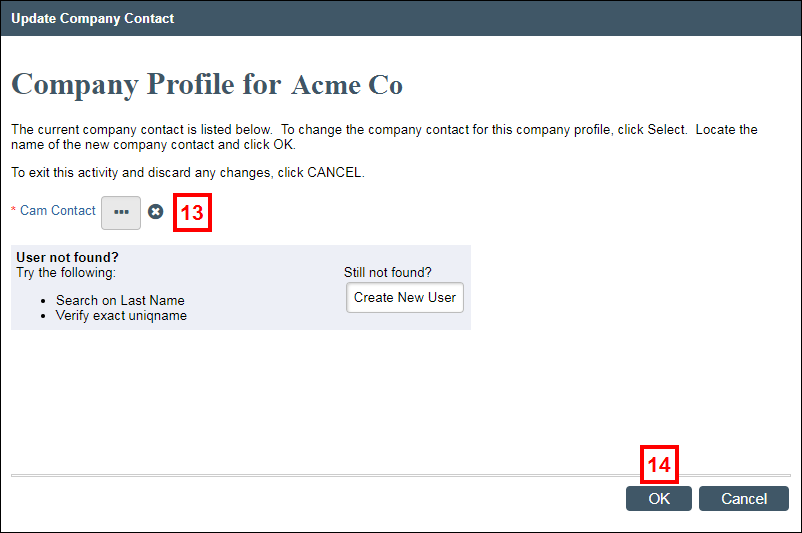
- Click OK.
Note An email is sent to the U-M Company Contact requesting that they complete the Company Profile then sign and submit it.
Request Changes/Post Comment
Once submitted by the Company Contact, the Company Profile displays in the Action Required list on the Comp Profiles tab in the COI workspace. It is in the state of COI Review.
COI Staff can edit the Company Profile or request that the Company Contact make changes. COI Staff can also use the Post Comment activity to request additional information or to log a comment in the Company Profile workspace (which is visible to anyone who can view the Company Profile).
Request Changes
- Click Request Changes under Activities.
- Enter a description of the requested changes.
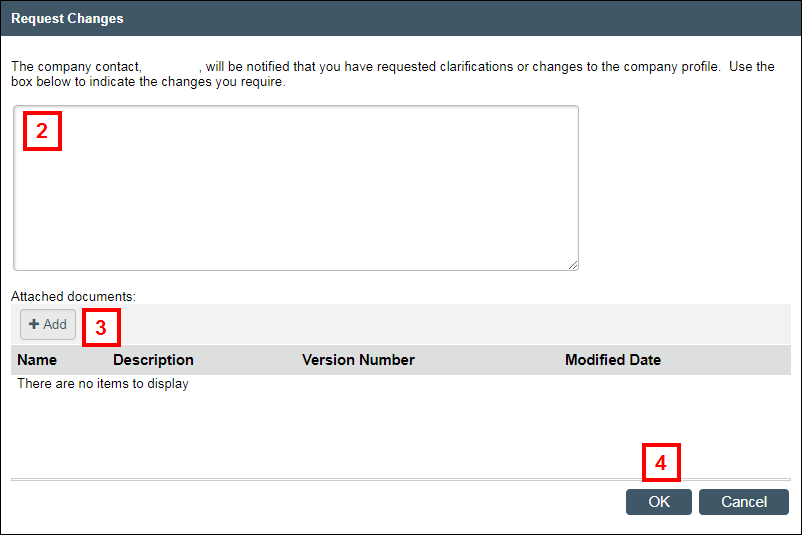
- If desired, click Add to attach any related documents.
- Click OK.
Post Comment
- Click Post Comment under Activities.
- Enter your comment.
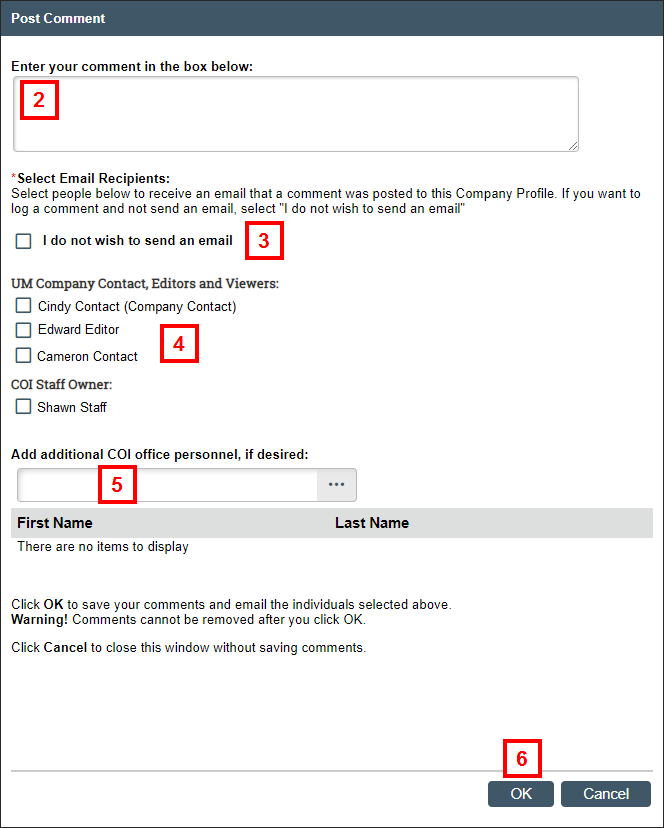
- If desired, check the box to indicate that you do not wish to send an email.
- If desired, check the name box(es) for desired Email Recipients.
- If desired, enter or Browse ... for additional COI Office personnel to send an email to.
- Click OK.
Acknowledge Company Profile
- Click Complete Review under Activities.
- If desired, enter a Comment.
- Click OK.
Note The state of the Company Profile changes to Review Complete.
Administrative Cancel
If a Company Profile was created in error, the COI Staff can complete the Administrative Cancel activity to inactivate it. Administrative Cancel is available in any state except the states of Cancelled or Review Complete.
Important Administrative Cancel should only be used if the Company Profile was created in error.
- Click Administrative Cancel under Activities.
- Enter the reason for cancellation.
- Click OK.
Notes
- The state of the Company Profile changes to Cancelled.
- The Company Profile will display on the My Completed tab of the COI Staff workspace.
Close Company Profile
If a Company Profile is no longer active, the COI Staff can complete the Close Company Profile activity to close it. The Close Company Profile activity is available in the state of Review Complete.
- Click Close Company Profile under Activities.
- Enter the reason for closing.
- Click OK.
Notes
- The state of the Company Profile changes to Closed.
- The Company Profile will display on the My Completed tab of the COI Staff workspace.