Overview
If an Export Control Officer determines that an Export Control Agreement (ECA) is needed, they can create the Unfunded Agreement (UFA) by clicking Create New UFA in the Export Control Officer’s Home workspace. Once the UFA has been created, additional activities are available in the UFA workspace to facilitate negotiation and activation of the agreement. Changes can also be made after the agreement has been activated.
Related Resources Refer to Export Control Home Workspace for more information.
Contents
Navigation
Role: Export Control > My Home
Create an ECA
- Click the Export Control role, or verify it is selected.
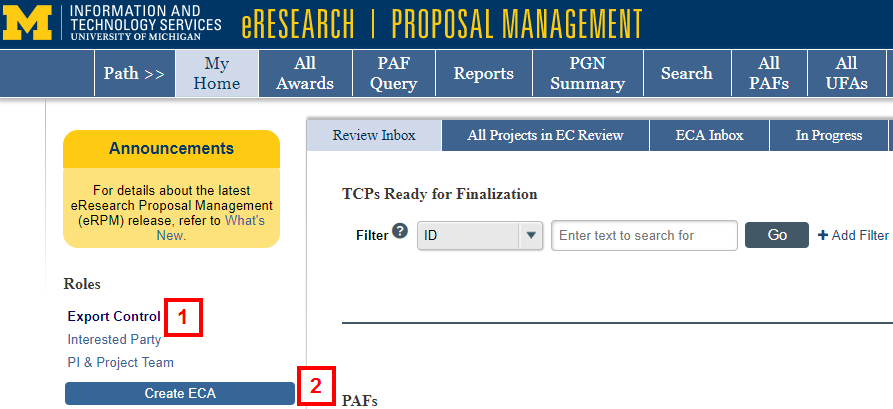
- Click the Create ECA button.
- Enter a Project Title.
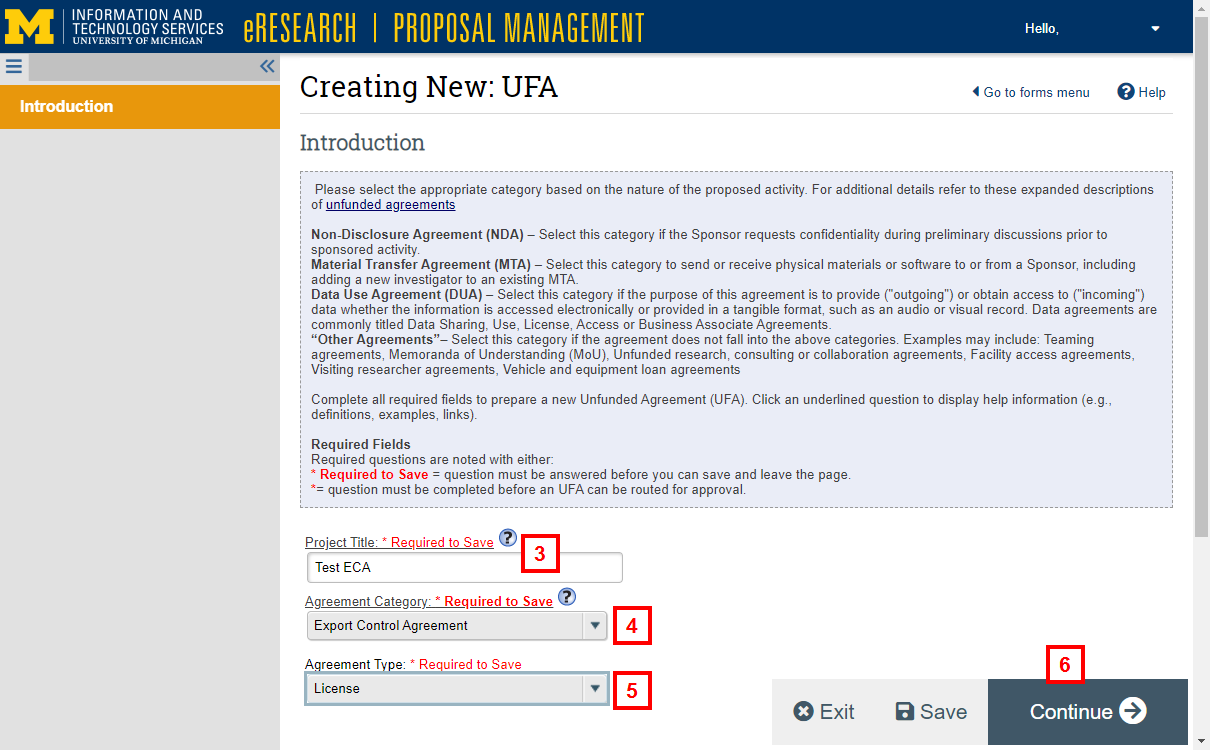
- Select Export Control Agreement from the Agreement Category drop-down list.
- Select the applicable Agreement Type from the drop-down list.
Note Depending on the Agreement Type selected, additional questions will display for completion. - Click Continue.
- Review the personnel listed and if needed:
- Click Add to enter additional personnel.
- Click Update to edit an individual’s contact information, role, and/or UFA edit rights.
- You must have at least one PI or Responsible Faculty Member and one Administrative Contact.
- The Primary Research Administrator is automatically granted edit rights on the UFA.
- In order to delete a Contact PI or a Primary Research Administrator, you must first add a new person with that role and click Save. Only then will a Delete delete button display, allowing you to remove the original person.
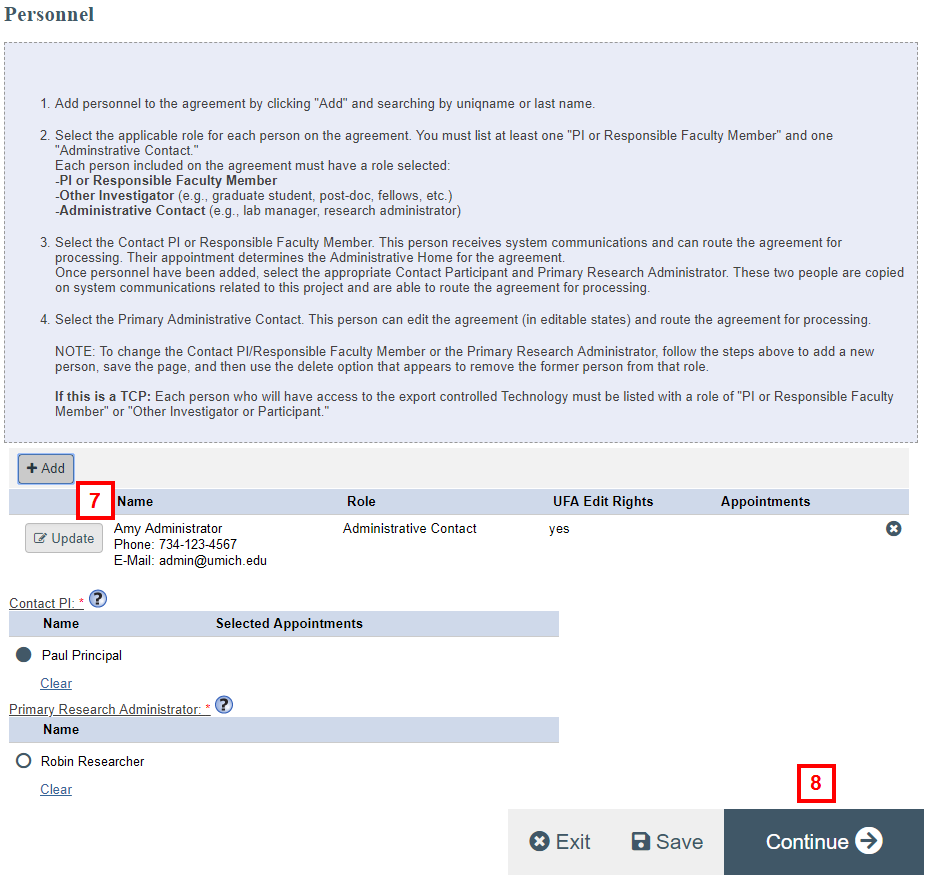
- Click Continue.
- Complete all required questions/fields (indicated by a red asterisk *) on the Export Control Agreement Details page. If applicable, complete optional fields.
Note Agreement Start and End Dates are not required and the Agreement Description field does not display for ECA-type Documentation.
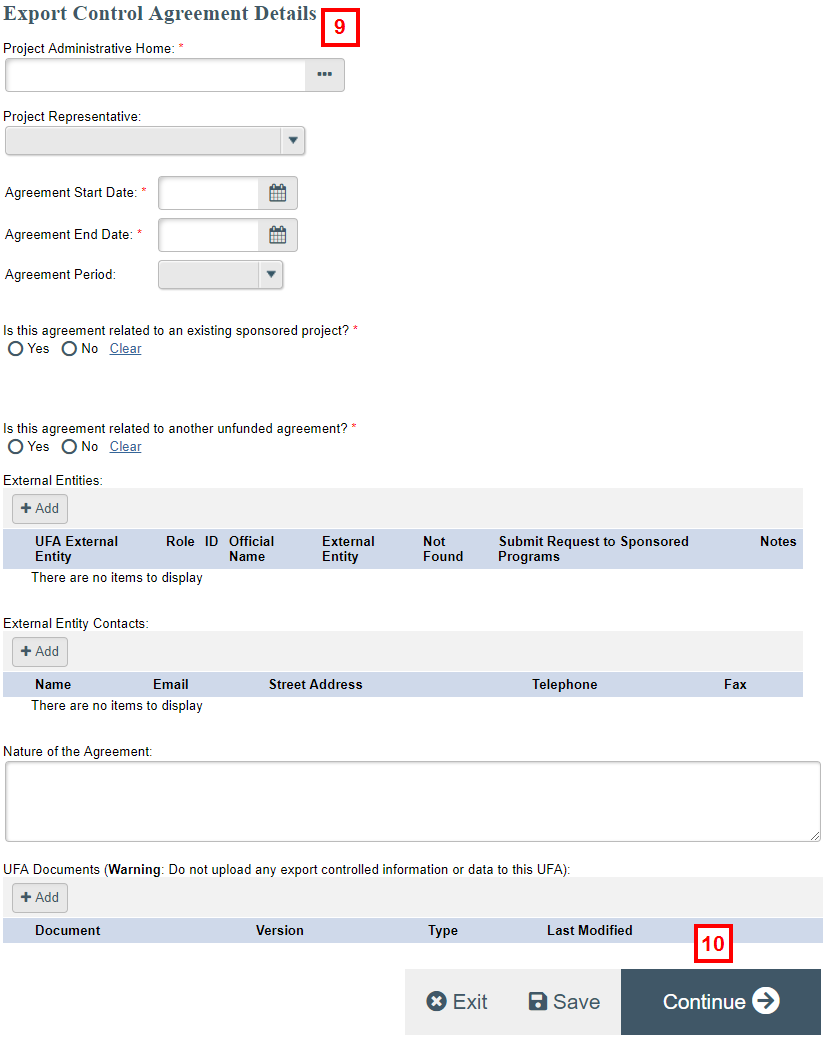
- Click Continue.
- Click Finish to return to the UFA workspace.

- Click Complete ECA Entry from the Activities menu.
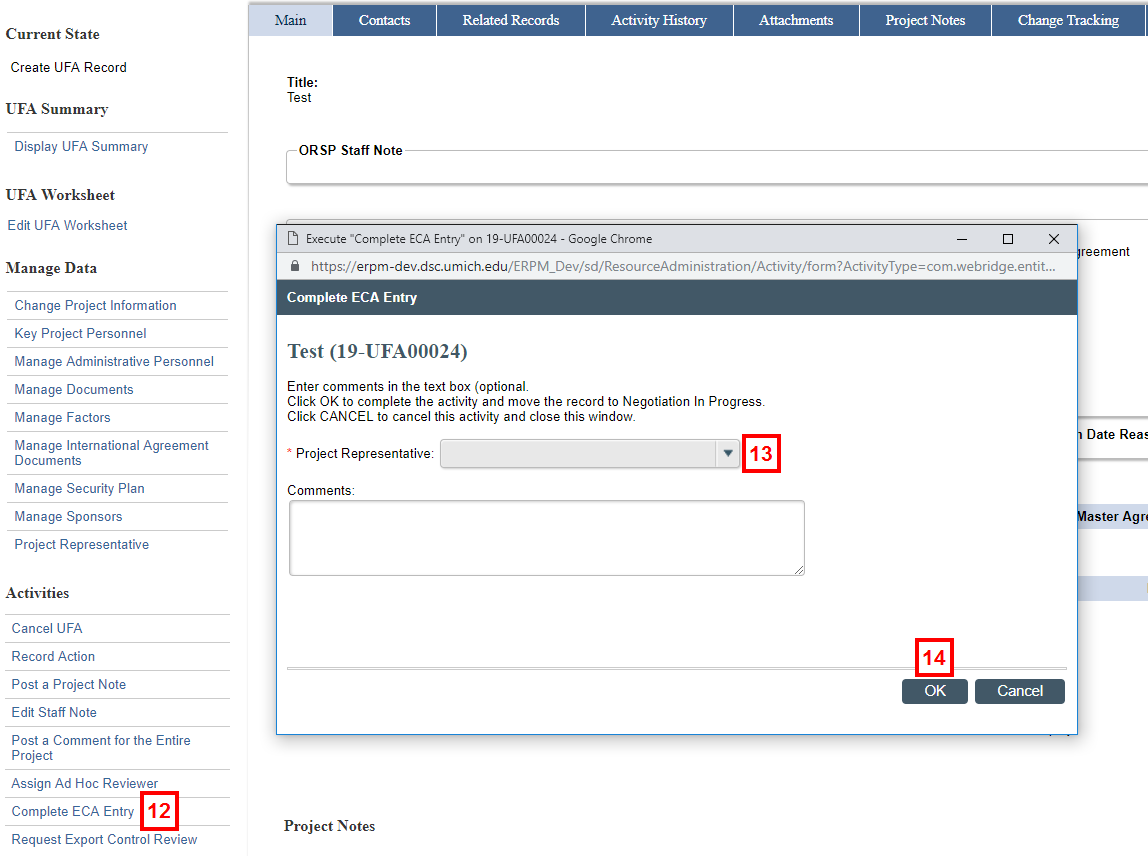
- Verify the correct Project Representative (PR) displays, or select the PR from the drop-down list.
- Click OK.
Note The state of the UFA changes to Negotiation In Progress. - Click Log Fully Executed ECA from the Activities menu.
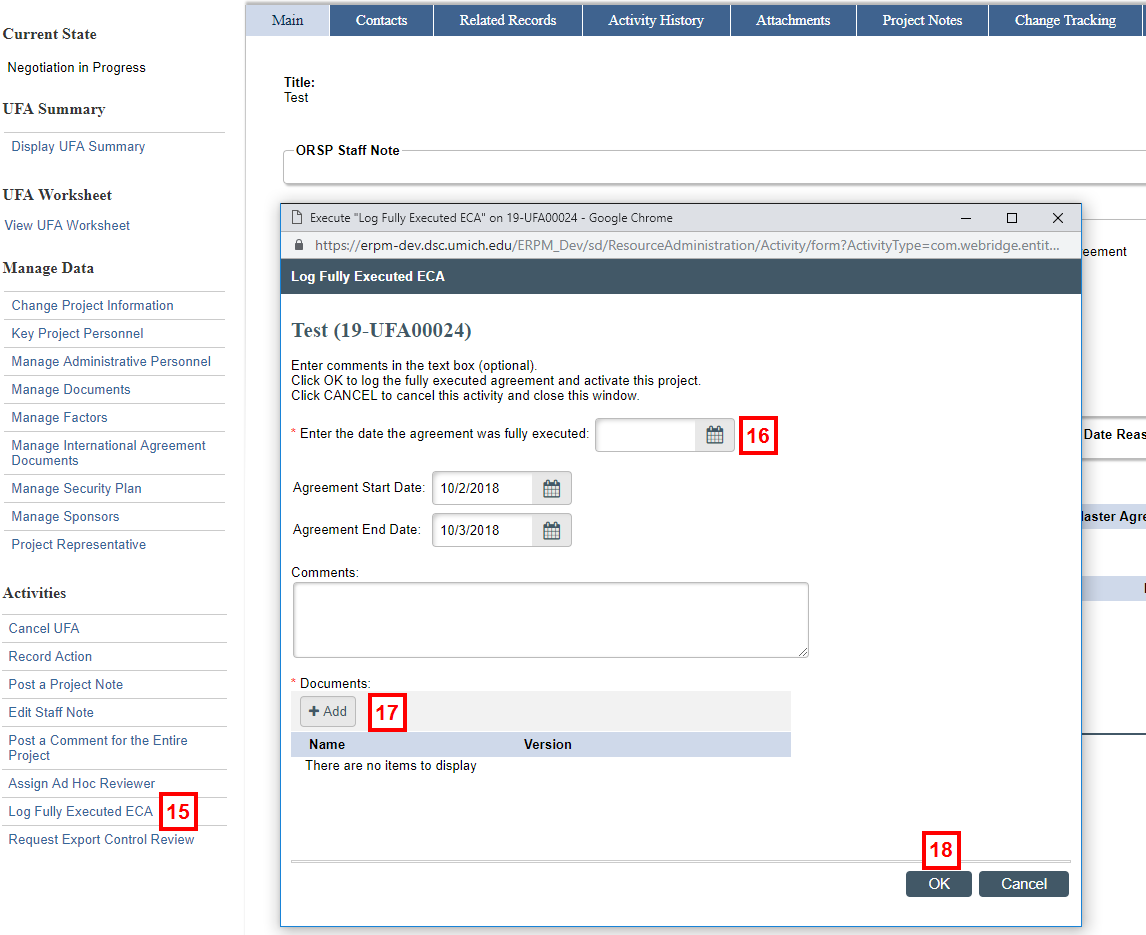
- Complete all required fields..
- Click Add (or Upload Revision, if applicable) to upload the Final Documentation.
- Click OK.
Note The state of the UFA changes to Active.
Changes to Active Export Control Agreements (Post-Active Changes)
Export Control Officers can make changes to the agreement after it has been activated. You must complete the following procedure if the changes involve altering the contract (e.g., agreement dates) in order to notify the project team.
- From the Active tab in the Home Workspace, click the name of the project you wish to make changes to.
- Click ECA Changes In Progress from the Activities menu.
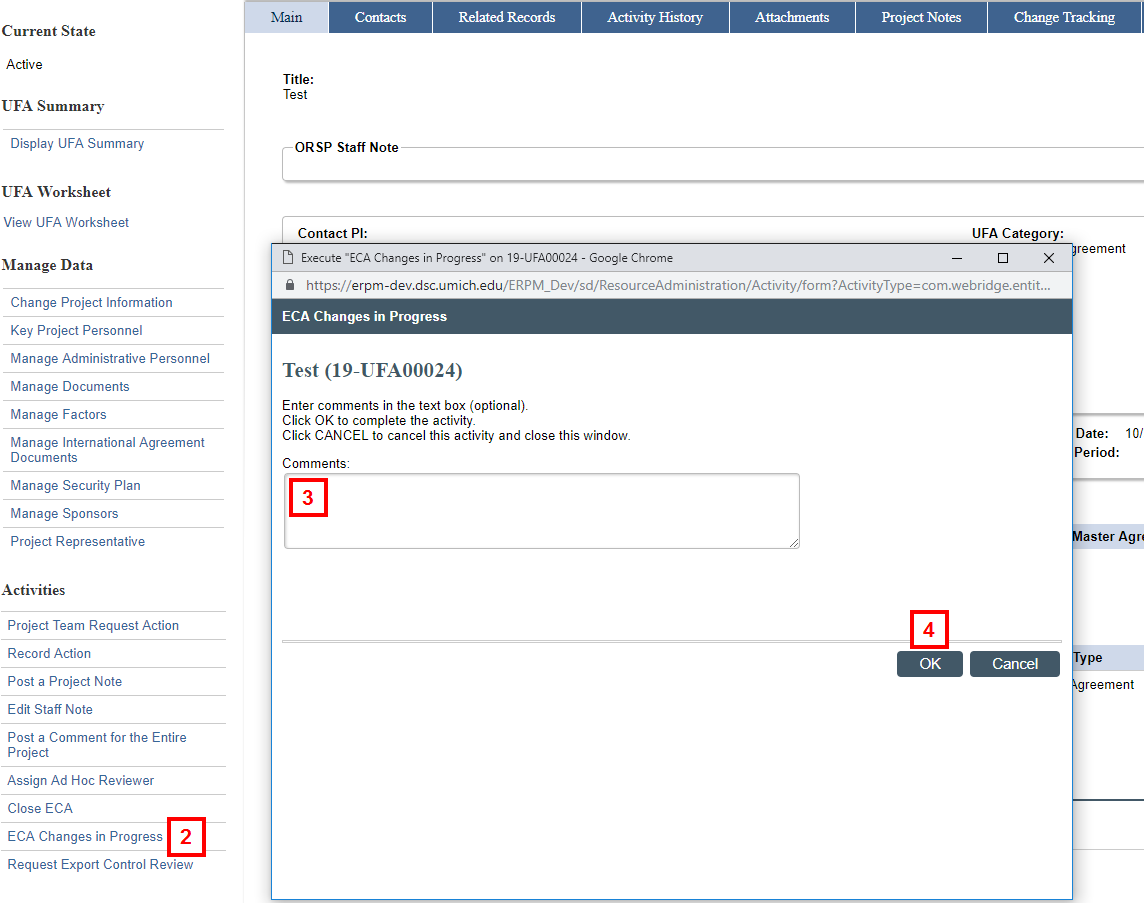
- If applicable, enter Comments.
- Click OK.
Note The state of the UFA changes to Post-Active Negotiation In Progress.Once all changes to the contract have been made, continue with the following steps.
If changes to the Agreement Start or End Dates are needed, they can also be changed in the following steps. - Click Log Fully Executed ECA from the Activities menu.
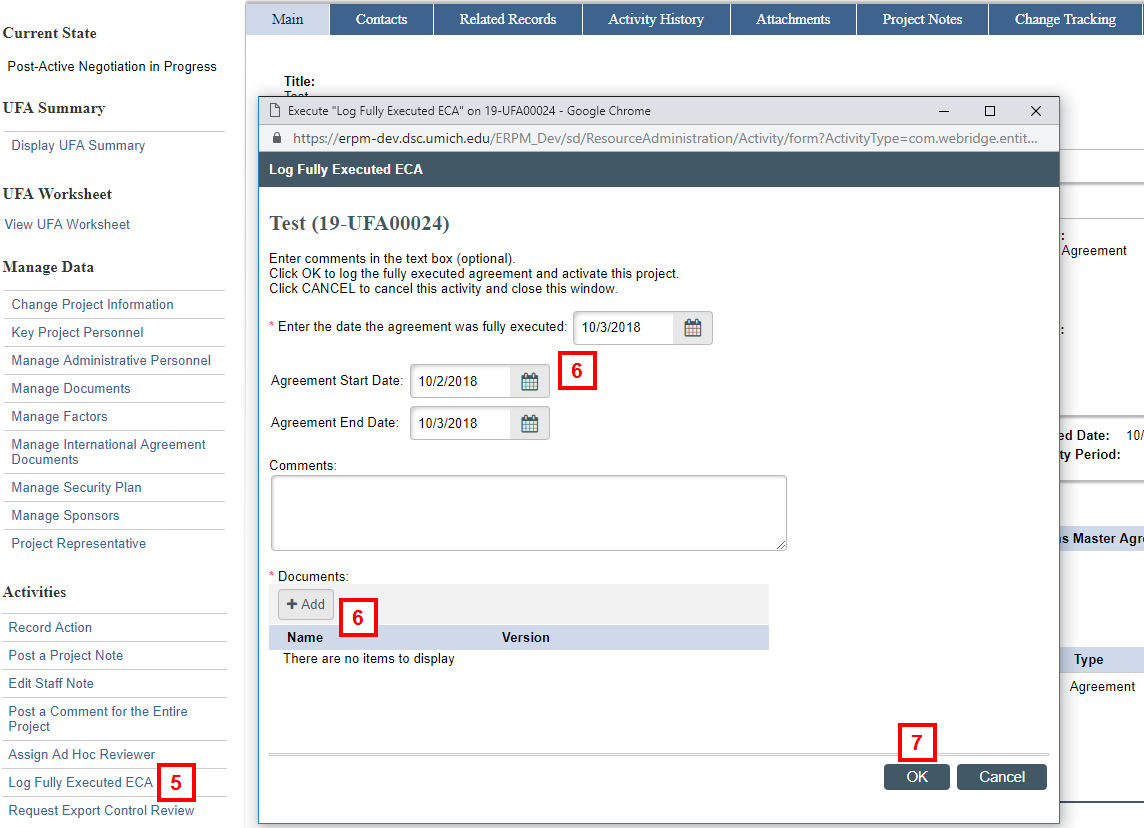
- If applicable, change any of the dates listed and ensure that the final (or most current) version of the agreement displays in the Documents section. If not, click Add or Upload Revision to upload it.
- Click OK.
Note The state of the UFA changes to Active.
