Overview
This procedure details how to:
- Create a PAF: the fields that must be completed in order to create a PAF.
- Validate: the function that allows you to view a list of fields that need to be completed before the PAF can be routed for approval.
- Route for Approval: U-M Principal Investigator or Primary Research Administrator can send PAF to units for review and approval.
Important Information
- Red asterisk (
*) indicates a question that must be answered in order to route for approval. - * Required to Save indicates a question must be completed before you can save and leave the page.
- This procedure focuses on the minimum information needed to create, but not to complete a PAF.
Navigation
Role: PI & Project Team > My Home
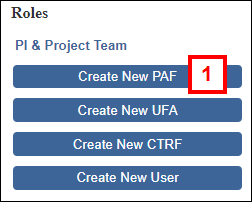
Create a PAF
- Click Create New PAF from your Home Workspace.
- Complete questions 1.1, 1.2, 1.3, and 1.4.
Note These questions must be answered to save the page and create the PAF as indicated.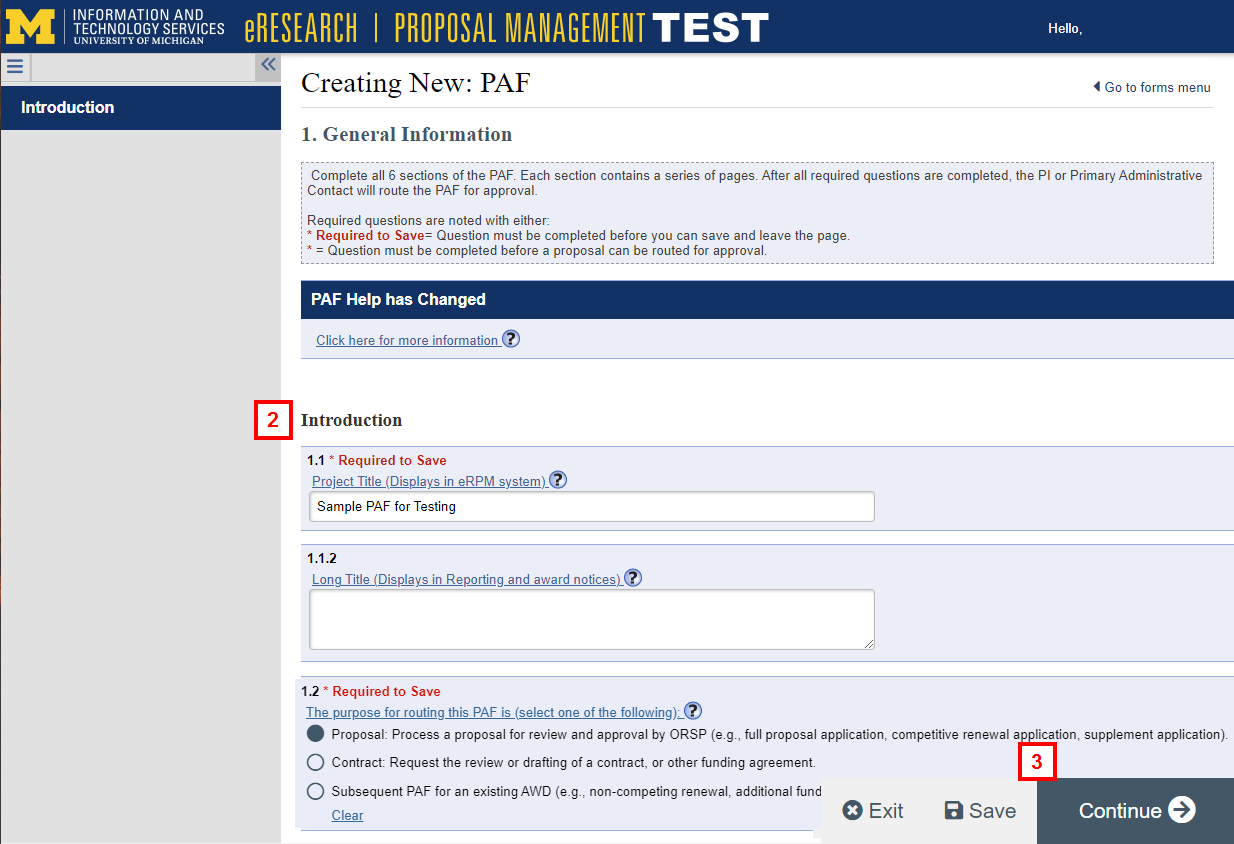
- Create the PAF by clicking Save
OR
click Continue to save and move to the next page of the PAF. The PAF is created, and your PAF menu options expand to include:
- Save: Save page
- Exit: Exit PAF Worksheet and return to your Home Workspace. Prompts you to save page.
- Print: Print page of PAF Worksheet.
- Validate: Validates that all fields required to route for approval are completed (error-checking).
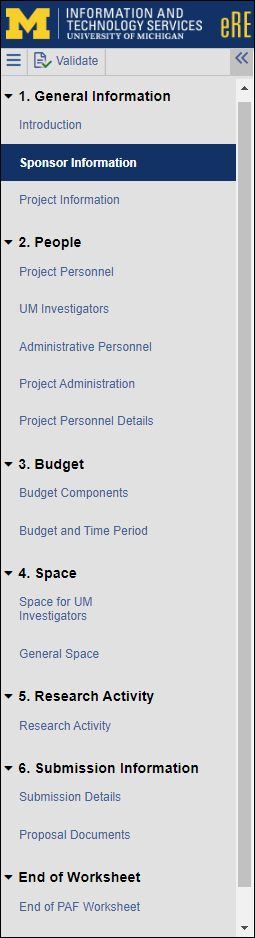
- bars Forms menu: Can click links to jump directly to pages of PAF Worksheet.
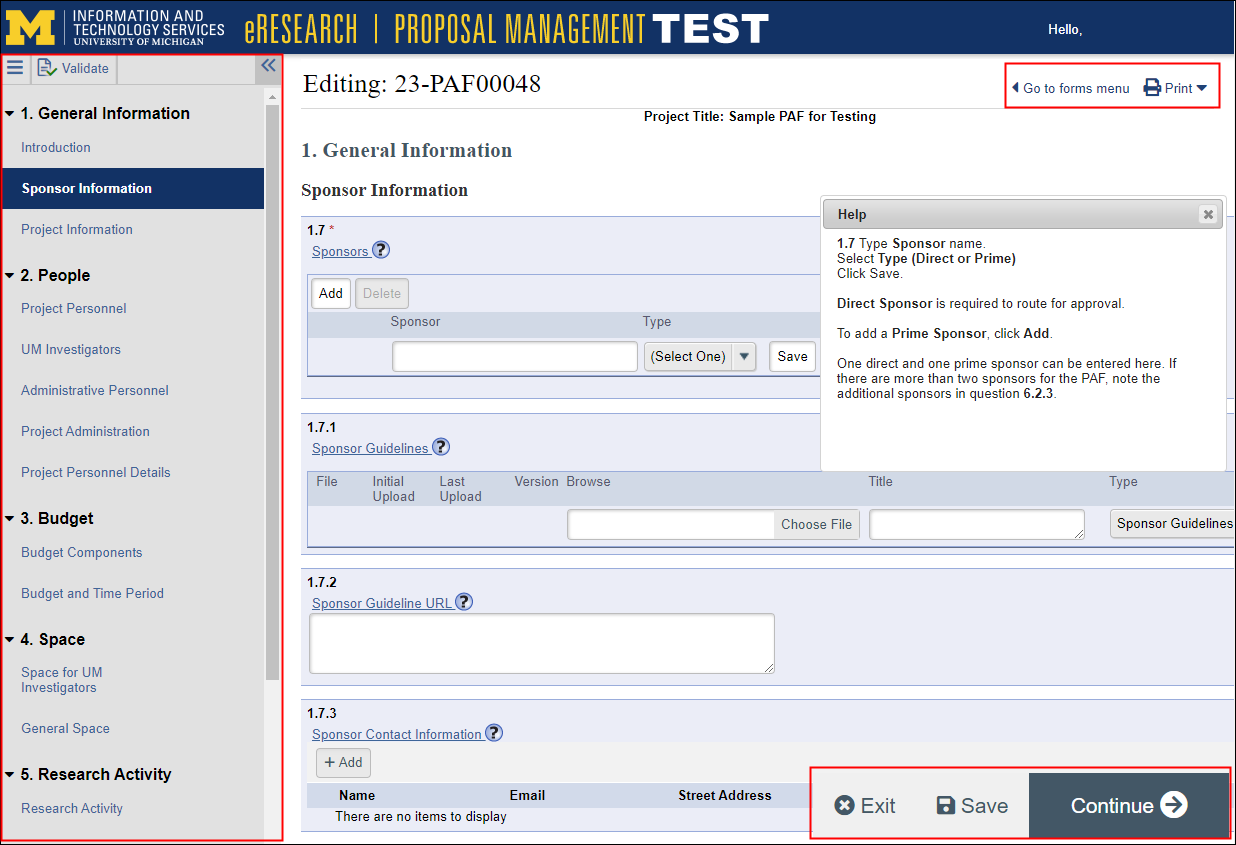
PAF Worksheet – Forms menu
bars Forms menu allows you to go directly to pages of the PAF Worksheet. It is recommended that you complete the PAF Worksheet in order through the Key Personnel section before starting to use the Forms menu to jump to specific pages.
Validate
Use Validate to create a list of fields that need to be completed before the PAF can be routed for approval (Error/Warning Messages). If these fields are not completed, you will not be able to route for approval.
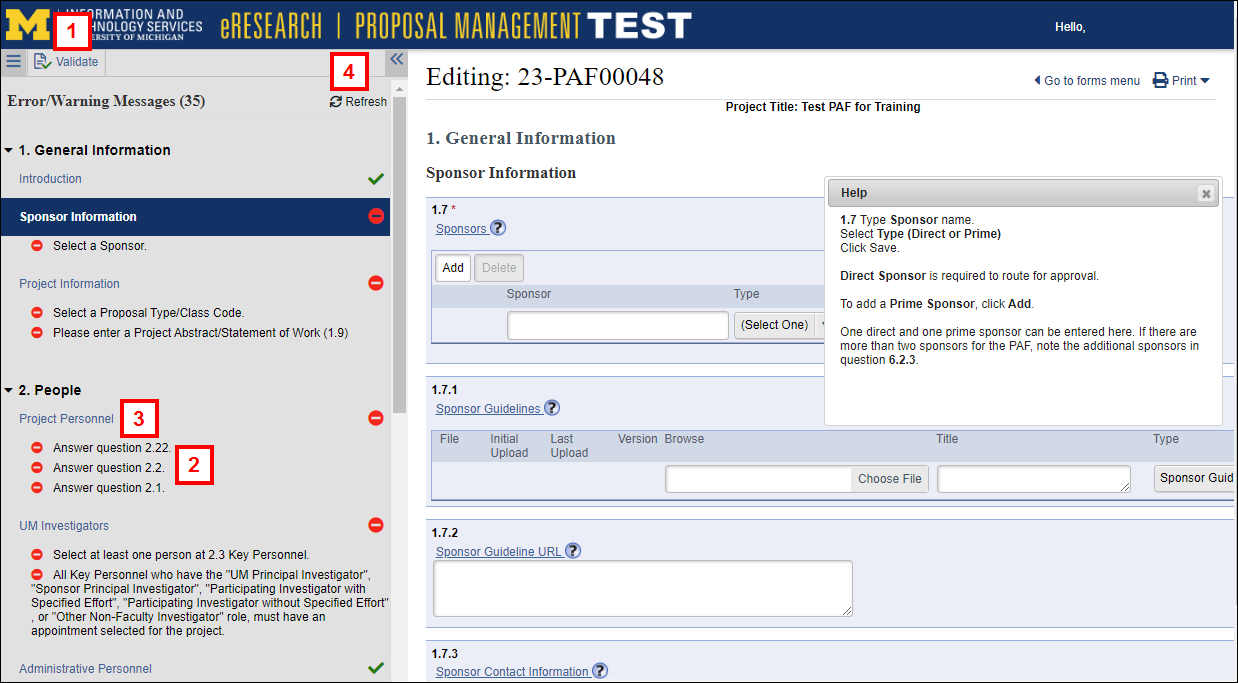
- Click Validate to view a list of fields that are required to route for approval that are not completed.
- Review the Error/Warning Messages that appear in red.
- Click on the link within to navigate to the page where the error is located.
Important Make sure to save changes made on each page. - Click Refresh to validate that you fixed errors.
Note Click the bars Forms menu icon to turn off the error display. - Click Exit to save your changes and return to the PAF Workspace.
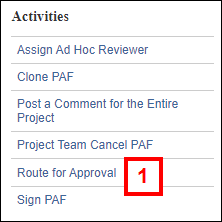
Route For Approval
Before you route for approval, you may want to request that the UM Principal Investigator sign the PAF/Conflict of Interest Statement because many departments will not approve unless the UM PI has signed the PAF/Conflict of Interest Statement.
Note Only the UM Principal Investigator or Primary Research Administrator can route for approval.
- Click the Route for Approval activity from the PAF Workspace.
- Review the displayed Departments. If you notice that a department is not listed that needs to review the PAF, click Cancel and Edit the PAF Worksheet.
Note The departments included are based on your PAF Worksheet entries regarding Personnel, Cost Sharing, Space, Other Commitments, Subproject/Grants, and Administrative Home.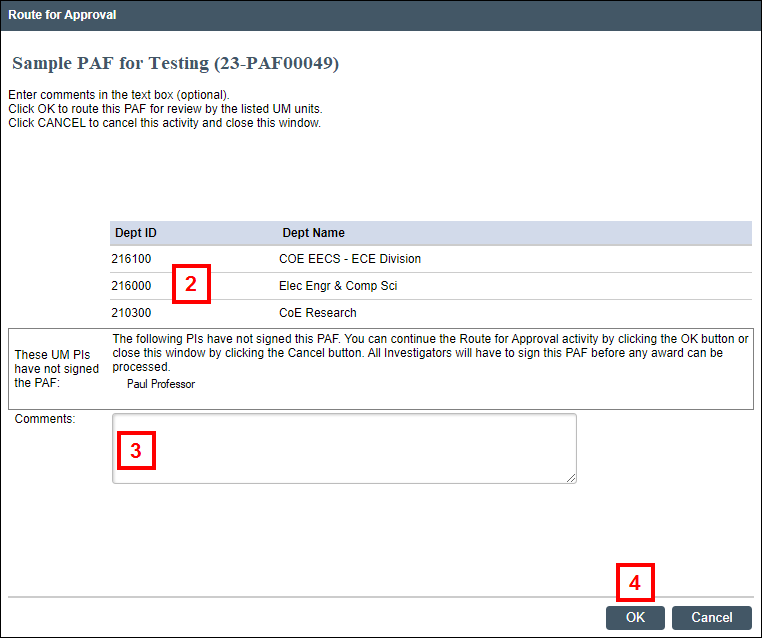
- Add Comments if desired or required.
Note If any of the U-M PIs have not yet signed the PAF, you are required to enter a comment. - Click OK.
Note The Current State of the PAF displays "Unit Review" after clicking OK. - The PAF Workspace now includes the Routing and Approval Status table.
Note The Primary Research Administrator & U-M Principal Investigator are sent an email to confirm that the PAF was routed for approval.
- Pending appears by the department(s) whose turn it is to review the PAF.
Notes- The PAF appears in the Inbox for Reviewers whose turn it is to review the PAF (Pending).
- An email is sent to the department email contacts when it is a department’s turn to review the PAF (Pending).
- Even if it is not a department’s turn to review a PAF (Pending), the reviewers from the department will be able to view the PAF in their Upcoming tab.
- Approved? will change from “no” to “yes” when a department approves and the Date Approved will display.
- If your PAF is stuck and you need to follow-up on its review status, click the name of the Department to view contacts for the department that you can call or email to find out more about the status of the department’s review.