Table of Contents
- Overview
- First Steps
- Export & Download Your Google Drive (My Drive) Files
- Export Your Google Data to a Personal Dropbox
- Export & Download Your Google Mail
- Export & Download Other Google Data
- Next Steps
Overview
Google Takeout is a tool developed by Google that lets you export and download copies of various types of data currently stored in your Google account, such as Drive or Mail. You can store the data locally on your computer or upload it to a third-party cloud storage service. This document provides instructions for getting started with Google Takeout and using it in common scenarios. (If you are looking to transfer all your email in Gmail and files you own in Drive to a personal (non-UM) Google account, refer to Getting Started With Google Takeout Transfer.)
Google provides this service "as is" and without administrative support. ITS has no ability to diagnose or assist with problems you might encounter.
First Steps
To begin, you should consider which types of data you want to export from your U-M Google account. For example, Google Takeout lets you pick which folders in Drive you’d like to export if you do not want to copy your entire Drive. In this case, you should organize the Drive files you’d like to export into folders you can select in the tool before starting the export process.
Tip: It is recommended to separate your exports into separate requests by service. For example, one request for Gmail data, one for Drive data, etc. If one of the services goes down or fails during export, Takeout will cancel the export, and you will need to restart the process.
After deciding which data types to export and organizing them accordingly, you can log in to the tool.
- Go to Google Takeout. (It is recommended to use a Google Chrome browser.)
- (If applicable) Enter your @umich.edu email address in the sign-in prompt and click Next. You will then be redirected to U-M Sign In, where you should log in with your uniqname and UMICH password and authenticate with multi-factor authentication if prompted.
Once you’re logged in, Google services that have your data are automatically selected on the Google Takeout page.
- If you would like to manually select the data to export, follow the instructions provided by Google.
- If you would like to follow steps for specific scenarios, refer to the sections in this documentation that follow and are applicable (including exporting/downloading Google Drive files, exporting Google data to Dropbox, exporting/downloading Google Mail, and exporting/downloading other Google data (Calendar, Contacts, and Photos)).
Important: Your data export file may not include certain data types and changes made to your data between when you request an export and when it is ready to download/view. Learn more about what data may not be included.
Export & Download Your Google Drive (My Drive) Files
If you would like to export and download only your Google Drive files to your personal computer or other non-UM storage services, follow the instructions below.
Note: Google Takeout only provides download access to Google Drive files that you have created in your My Drive. Files stored in Google shared drives or owned by others (and shared with you) are not included in your Takeout export request.
- Follow the instructions in the First Steps section.
- Click Deselect all in the upper-right corner of the Products section.
- Scroll down the page and find Drive. Check the box beside Drive.
- Click Advanced settings, and then check the boxes for both options under Additional Files. Click OK.
- Click All Drive data included. The tool will display all folders in your My Drive. You can keep the Include all files and folders in Drive box checked, or uncheck it and select the specific folders you’d prefer to export. Click OK.
- Scroll to the bottom of the page and click Next step.
- Leave the default Send download link via email option selected. (If you would like instructions for exporting to Dropbox, refer to the section below.)
- Leave Frequency set to Export once.
- You can adjust the file type and size of your export under File type & size. The defaults are .ZIP and 2GB.
- Click Create export.
A confirmation of your choices and the expected start date for your Google Takeout export will be displayed.
Refer to Next Steps for additional information on what happens next and how to proceed after submitting your Takeout data export request.
Export Your Google Data to a Personal Dropbox
If you would like to export your Google data to your personal (non-UM) Dropbox account, follow the instructions below. (If you only want to export your Drive files and Photos to U-M Dropbox, and you are eligible for U-M Dropbox, use the ITS Google Storage Transfer Tool.) You can also choose to download your Drive files to a personal computer.
Note: Google Takeout only provides download access to Google Drive files that you have created in your My Drive. Files stored in Google shared drives or owned by others (and shared with you) are not included in your Takeout export request.
- Follow the instructions in the First Steps section.
- Click Deselect all in the upper-right corner of the Products section.
- Scroll down the page and find Drive. Check the box beside Drive.
- Click Advanced settings, and then check the boxes for both options under Additional Files. Click OK.
- Click All Drive data included. The tool will display all folders in your My Drive. You can keep the Include all files and folders in Drive box checked, or uncheck it and select the specific folders you’d prefer to export. Click OK.
- Check the boxes next to each additional service you’d like to include in your data export, and customize as desired.
- Scroll to the bottom of the page and click Next step.
- Select Add to Dropbox from the Destination drop-down menu.
- Leave Frequency set to Export once.
- You can adjust the file type and size of your export under File type & size. The defaults are .ZIP and 2GB.
- Click Link accounts and create export.
You will be redirected to a Dropbox login page to give Google access to export your files to your non-UM Dropbox account. Enter your personal email address and password to log in to your non-UM Dropbox and click Sign in.
Note: If your personal Dropbox account is linked to your U-M Dropbox account, you may be asked to select which account to link (Personal or University of Michigan). Choose Personal.
- You will be redirected to a page to authenticate with your Dropbox account. This action gives Google permission to export data to that account. If you have previously authorized Google to access your Dropbox account, you may be taken to a page to review your current exports. You should notice your Drive export is either in progress or complete.
Refer to Next Steps for additional information on what happens next and how to proceed after submitting your Takeout data export request.
Export & Download Your Google Mail
If you would like to export and download only your Google Mail to your personal computer, follow the instructions below.
- Follow the instructions in the First Steps section.
- Click Deselect all in the upper-right corner of the Products section.
- Scroll down the page and find Mail. Check the box beside Mail.
- Click All Mail data included. The tool will display all mail labels in your Gmail. You can keep the Include all messages in Mail box checked, or uncheck it and select the specific labels you’d prefer to export. Click OK.
- Scroll to the bottom of the page and click Next step.
- Leave the default Send download link via email option selected.
- Leave Frequency set to Export once.
- You can adjust the file type and size of your export under File type & size. The defaults are .ZIP and 2GB.
- Click Create export.
A confirmation of your choices and the expected start date for your Google Takeout export will be displayed.
Refer to Next Steps for additional information on what happens next and how to proceed after submitting your Takeout data export request.
Export & Download Other Google Data
If you would like to export and download data other than Google Drive (such as Calendars, Contacts, and Photos) to your personal computer or other non-UM storage services (that aren’t listed as an export location), follow the instructions below.
Note: Google Takeout only provides download access to a) Google Calendars, for which you have the "Owner" or “Make changes and manage sharing” permission assigned to you (including those you’ve created), b) Google Photos that you have uploaded to your Photos library and any photos you’ve saved from a Partner Sharing connection (even if they are not owned by you or taking up space in U-M), and c) Google Contacts and contact photos you’ve added, as well as contacts saved from your interactions in Google products such as Gmail.
- Follow the instructions in the First Steps section. (If you have already done so, continue to step 2.)
- Click Deselect all in the upper-right corner of the Products section.
- Scroll through the page and check the boxes beside each service whose data you’d like to include.
- The most common services include Calendar, Contacts, and Photos:
- Check the box beside Calendar. Click All calendars included. The tool will display all calendars you created in Google Calendar. You can either keep them all selected or click Deselect all, then select the specific calendars you’d like to export. Click OK.
- Check the box beside Contacts. Click vCard format. The tool lets you choose the file format for exporting your contacts. If you intend to use the export with macOS or iOS devices, then keep the default vCard format setting. Otherwise, click the drop-down menu and select CSV for use with Microsoft Outlook or another personal Google account. Click OK.
Check the box beside Google Photos. Click All photo albums included. The tool displays all albums in your account. You can either keep them all selected or click Deselect all, then select the specific albums you’d prefer to export. Click OK.
Important: If you have Partner Sharing enabled, and the setting to save partner sharing photos to your account is set as “All photos” or “Photos of selected people,” Google will automatically include those albums in your export even if you do not own them, and they do not take up space in your U-M account. If you do not want to export them, please turn off Partner Sharing before starting the export. You can turn it back on after the export is complete.
- The most common services include Calendar, Contacts, and Photos:
- Scroll to the bottom of the page and click Next step.
- Leave the default Send download link via email option selected.
- Leave Frequency set to Export once.
- You can adjust the file type and size of your export under File type & size. The defaults are .ZIP and 2GB.
- Click Create export.
A confirmation of your choices and the expected start date for your Google Takeout export will be displayed.
Refer to Next Steps for additional information on what happens next and how to proceed after submitting your Takeout data export request.
Next Steps
Your export request may take a few minutes to several days to process, depending on the data types, the amount of data you’re exporting, and the number of individuals accessing the tool at the same time. ITS has no insight into this process and is unable to assist with Takeout. Please wait until you receive the email notification from [email protected] with a link to download or view your data in Dropbox.
You should always compare your Google Takeout data with the original data still in your U-M Google account to ensure everything has been exported properly. If Takeout fails or data is missing, either try the Takeout process again or manually download your files/folders from Drive to your desktop. (You can also manually export your Google Calendars and Contacts and export your Photos to a personal Google account.)
If you submitted a Takeout export request to…
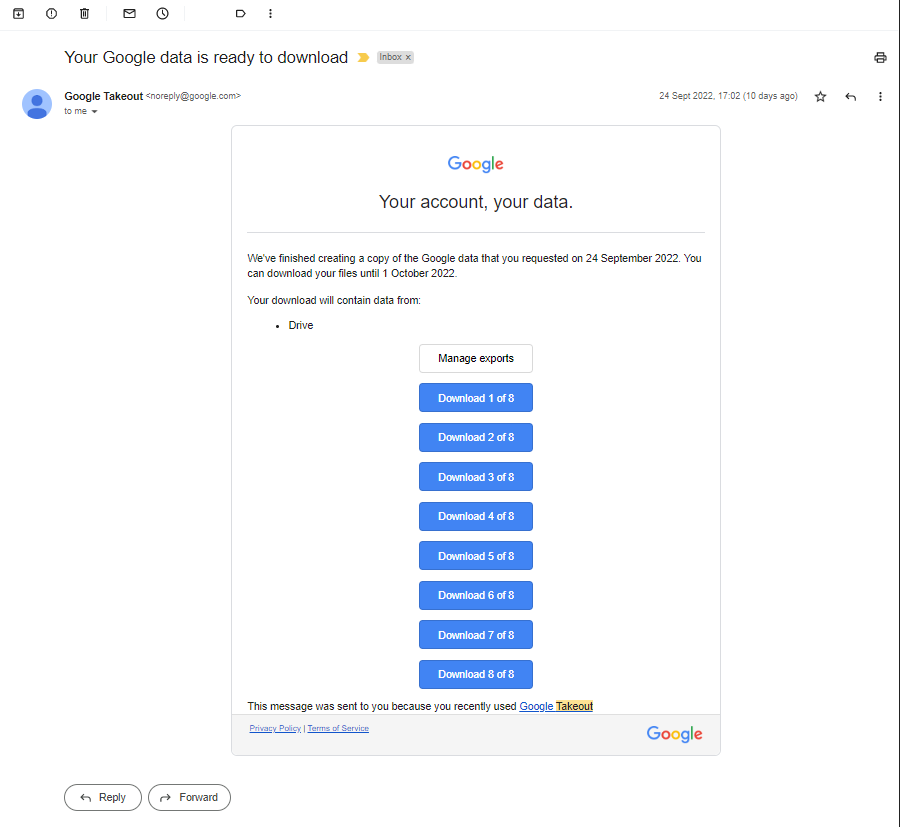
Download your Drive files
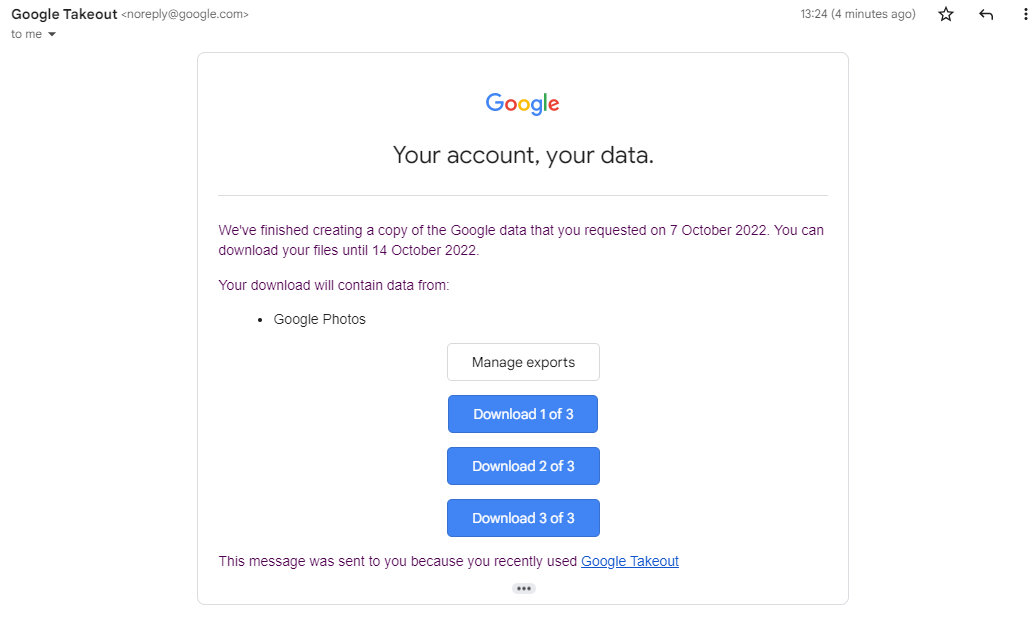
When you receive the email notification from Google, click each download link to save each .ZIP file. There may be several.
- Find the downloaded .ZIP files on your computer and extract each one (Windows / Mac).
- For every file, you will notice a .JSON file. The .JSON file contains metadata for each file, including the creation and modification dates and permission information. The file itself (not the .JSON file) does not contain the associated metadata, except for the creation date. (The .JSON format is a simple text format that can be read by any text editor or word processor (like Microsoft Word).)
- You can store your Google Takeout data locally on your computer or upload it to another cloud storage service, like a personal (non-UM) Google or Dropbox account or other non-UM cloud storage service.
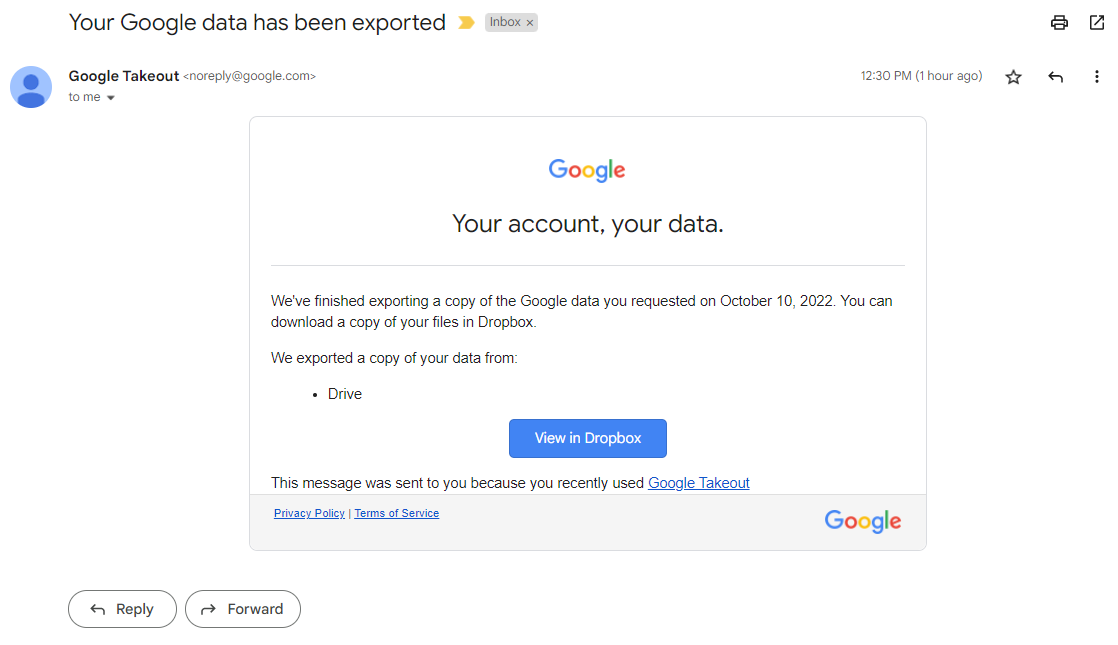
Export your Drive files to Dropbox
When you receive the email notification from Google, click View in Dropbox. You will be asked to log in to your personal Dropbox account. (If you are already logged in, you will be taken directly to your Dropbox account.)
- Your Takeout files should be stored in the following file path in Dropbox: All files > Apps > Google Download your Data
You can move the Takeout files from that folder to any other location in your account.
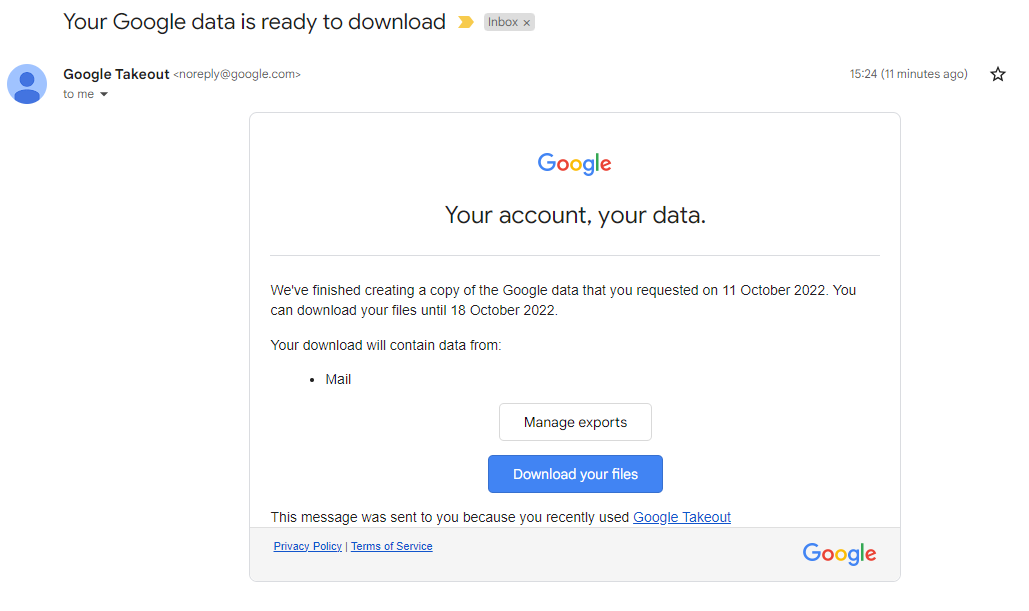
Download your Google Mail
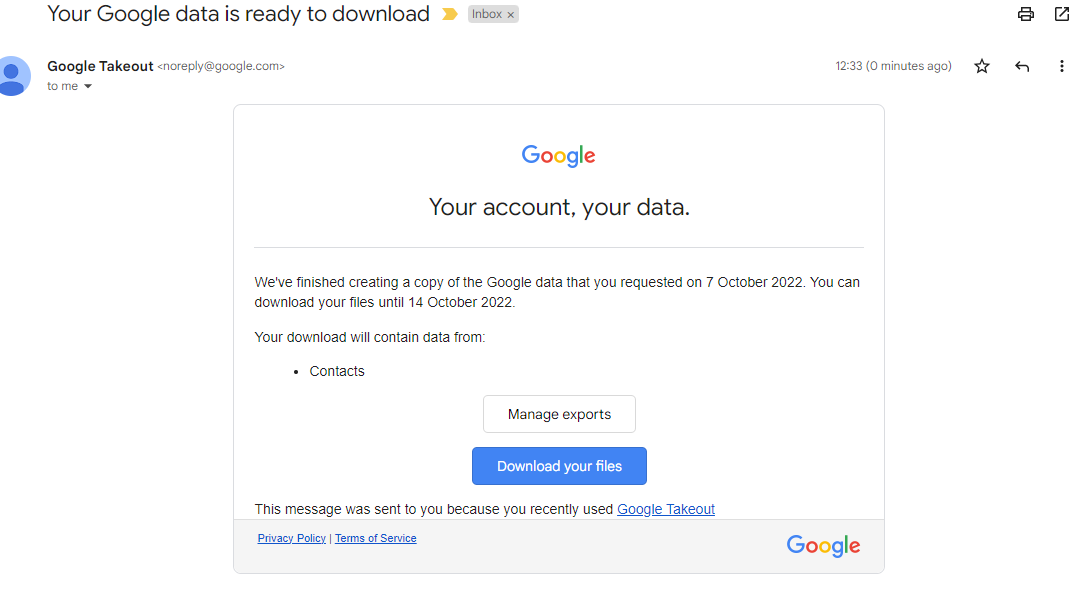
When you receive the email notification from Google, click Download your files.
- Find the downloaded .ZIP files on your computer and extract each one (Windows / Mac).
- Google Takeout provides email in the .MBOX format. The .MBOX format is a simple text format that can be read by any text editor or word processor (like Microsoft Word). This can be useful if you only need to keep your email for archival purposes. You can also import the .MBOX files can be imported into any third-party mail client that supports the format or special-purpose programs for transferring email between accounts.
Note: ITS does not assist with importing email to third-party mail clients or personal accounts. If you would like to do so, refer to the third-party vendor’s documentation.
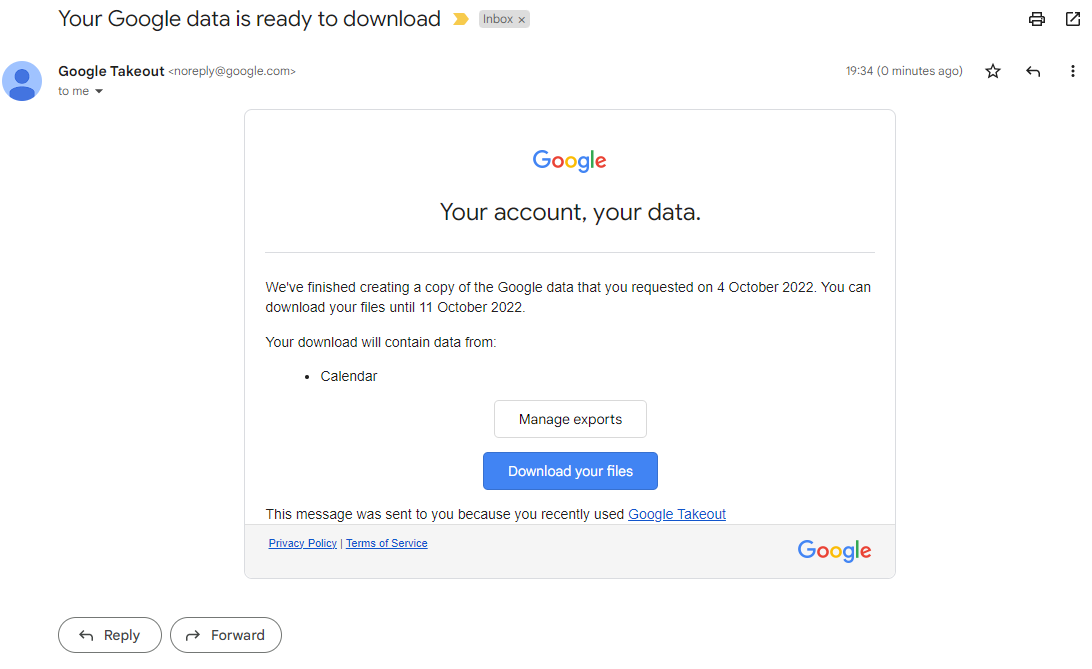
Download your Google Calendars
- Calendars usually download quickly because calendar files are generally small, but your experience may vary.
When you receive the email notification from Google, click Download your files.
- Find the downloaded .ZIP files on your computer and extract each one (Windows / Mac).
- Google Calendar files are in the .ICS format. You can import them into other personal (non-UM) Google accounts or any calendar program that supports this format.
Note: ITS will not assist with importing calendars to third-party clients or personal accounts. If you would like to do so, refer to the third-party vendor’s documentation.
Download your Google Photos
When you receive the email notification from Google, click each download link to save each .ZIP file. There may be several.
- Find the downloaded .ZIP files on your computer and extract each one (Windows / Mac).
- For every file, you will notice a .JSON file. The .JSON file is only useful if you have added any information like captions or descriptions to photos/videos in Google Photos. The information about where and when a photo was taken, and any camera settings, is stored in the photo/video file, not in a .JSON file. (The .JSON format is a simple text format that can be read by any text editor or word processor (like Microsoft Word).)
- You can store your Google Takeout data locally on your computer or upload it to another cloud storage service, like a personal (non-UM) Google or Dropbox account or other non-UM cloud storage service.
- If you would like to upload your exported photos/videos to a personal (non-UM) Google Photos account:
- Go to Google Photos and log in with your personal (non-UM) Google account.
- Click Import and select Computer.
- Find your extracted .ZIP Takeout folders and select all of the photos/videos you want to import.
- If you would like to upload your exported photos/videos to a personal (non-UM) Google Photos account:
Download your Google Contacts
- Contacts usually become available for download quickly due to the relatively small size of contact files, but your experience may vary.
When you receive the email notification from Google, click Download your files.
- Google Contact files will either be in the .VCF or .CSV file format, depending on which format you chose while going through the Takeout process.
- .VCF is best for macOS or iOS apps.
- .CSV is best for Microsoft Outlook or another personal Google account.
- Your download may include multiple folders, each representing a different source of contacts. Each folder will contain the images that are included with each contact (.JPG files) and a single .VCF or .CSV file containing the actual contacts.
- Although the download includes the contacts’ profile pictures, they are not linked to the corresponding contacts and may not appear when you import the .VCF/.CSV files, depending on the program you use.