Overview
With the Zoom for Google Workspace add-on, you can use Zoom to schedule easily, join, manage, and customize meetings from Google Mail and Google Calendar.
Important: Third-party add-ons may display advertisements, require additional terms of service agreements, have a separate privacy policy, or retain your information. For those reasons, most add-ons within the Google Workspace Marketplace are currently deactivated for the University of Michigan domain, with few exceptions.
Install the Zoom for Google Workspace Add-on
Important: If you currently use the Zoom Scheduler Google Chrome extension, we recommend that you uninstall the extension from your web browser and use the Zoom for Google Workspace add-on. The add-on provides the same user experience across all web browsers and the Google Calendar mobile application. For more information on how to uninstall a Chrome extension, visit Google’s Help Center.
To install the Zoom for Google Workspace add-on:
- Go to the "Zoom for Google Workspace" add-on in the Google Workspace Marketplace.
- Click Install.
- Zoom will ask for permission to access your U-M Google account. Click Continue and then Allow.
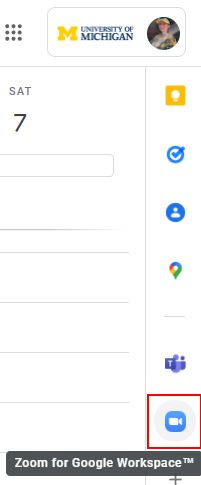
- Navigate to your Google Calendar and open the Zoom for Google Workspace add-on from the right-side panel after installation. You will receive a pop-up stating, “Zoom for Google Workspace was installed.” Click Got it to minimize.
- You will be asked to sign in to your U-M Zoom account once you have opened the add-on. Click Sign in. This will open a new window.
If you are currently logged into your U-M Zoom account:
Google Calendar will ask for permission to access your U-M Zoom account. Click Authorize.
If you are not currently logged into your U-M Zoom account:
- Click Sign in with SSO on the Zoom sign-in page.
- Enter
umichin the company domain field. - Click Continue.
You should now be able to use the add-on. You may notice the add-on has been added to your Google Calendar and Google Mail right-side panel.
Note: It may take a few minutes for the Zoom for Google Workspace icon to populate in the right sidebar of your Google Calendar.

Add a Zoom Meeting to a Google Calendar Event
To add a Zoom meeting to a Google Calendar event from your calendar:
- Go to Google Calendar and create an event.
- Enter the email addresses in the Add guests field under the Guests tab.
- Click Add video conferencing under the Event Details tab and select Zoom Meeting from the drop-down menu.
- Click Save.
- Click Send to send the invites.
Guests will receive an email with the event information and a link to the video meeting.
To add a Zoom meeting to a Google Calendar event from your email:
- Go to Google Mail and open an email you wish to create into an event.
- Click the Zoom for Google Workspace icon (
 ) from your right-side panel.
 - Enter your event details like Topic, When, and Duration using the side panel. You can also customize preferences for how your Zoom meeting is created.
- Click Schedule Meeting at the top of the side panel once you have finished.
Caution: This will invite all recipients from the email.
Guests will receive an email with the event information and a link to the video meeting.
Tip: If you are running into issues where Zoom states, "This meeting ID is not valid," refer to Zoom: "This meeting ID is not valid" Error / Cannot Join Meeting for troubleshooting steps.
Customize Meeting Preferences
If you want to update the meeting preferences when adding a Zoom meeting to a Google Calendar event, you can use the Zoom for Google Workspace add-on from the right-side panel.
- Go to Google Calendar and click the Zoom for Google Workspace icon (
 ) from your right-side panel
 - Click anywhere on your calendar to create an event. Event options should appear as a pop-up. The right-side panel will change to show the meeting preferences.
Tip: To find additional Google Calendar meeting options, click More options from the new event pop-up.
- Enter your event information in the corresponding fields and use the sidebar options to customize how your Zoom meeting is created.
- Click Add Meeting at the top of the side panel once you have customized your meeting preferences. It will populate in your event details.
- Click Save.
- Click Send to send the invites.
Guests will receive an email with the event information and a link to the video meeting.
