There are two ways to add documents to the Document Imaging System:
File Capture – Preferred method; use when your document is saved locally on your computer or a shared drive.
Hyland Virtual Printer – Use when your document isn’t saved on your computer, such as emails, web pages, or application screenshots that need to be captured.
For documents not saved locally, you can “Print to PDF” and save the document to a network or local drive, then upload it using File Capture. This method works for any document file type. Creating a dedicated folder for these documents on your computer is recommended, making it easier to locate and delete files that should not be retained.
File Capture (preferred method)
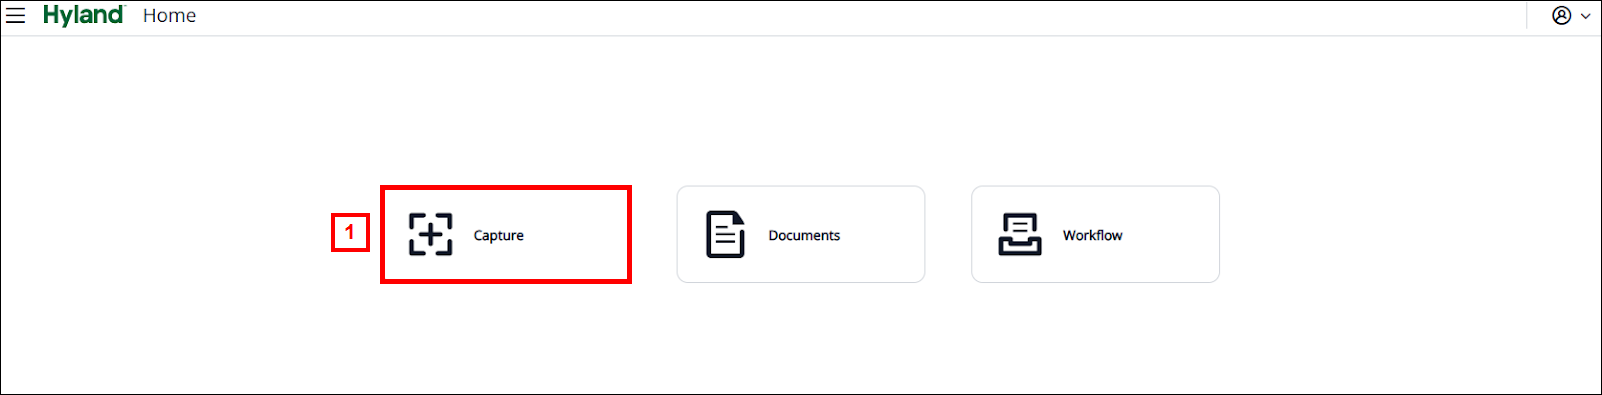
- From the home page, select Capture.
- On the top left, select the appropriate Capture profile from the drop-down.
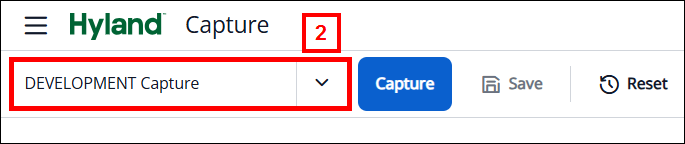
This screenshot shows that the 'DEVELOPMENT Capture' capture profile is selected, and the user will upload/capture documents into the DEVELOPMENT drawer. Select the appropriate capture profile for your specific needs.
Capture profiles are configured by the ITS BSA team to make it easy to upload documents within a specific drawer in the system. You have access to Capture Profiles based on your system access (i.e., the documents stored in a particular drawer in the system pertaining to a specific department or function).
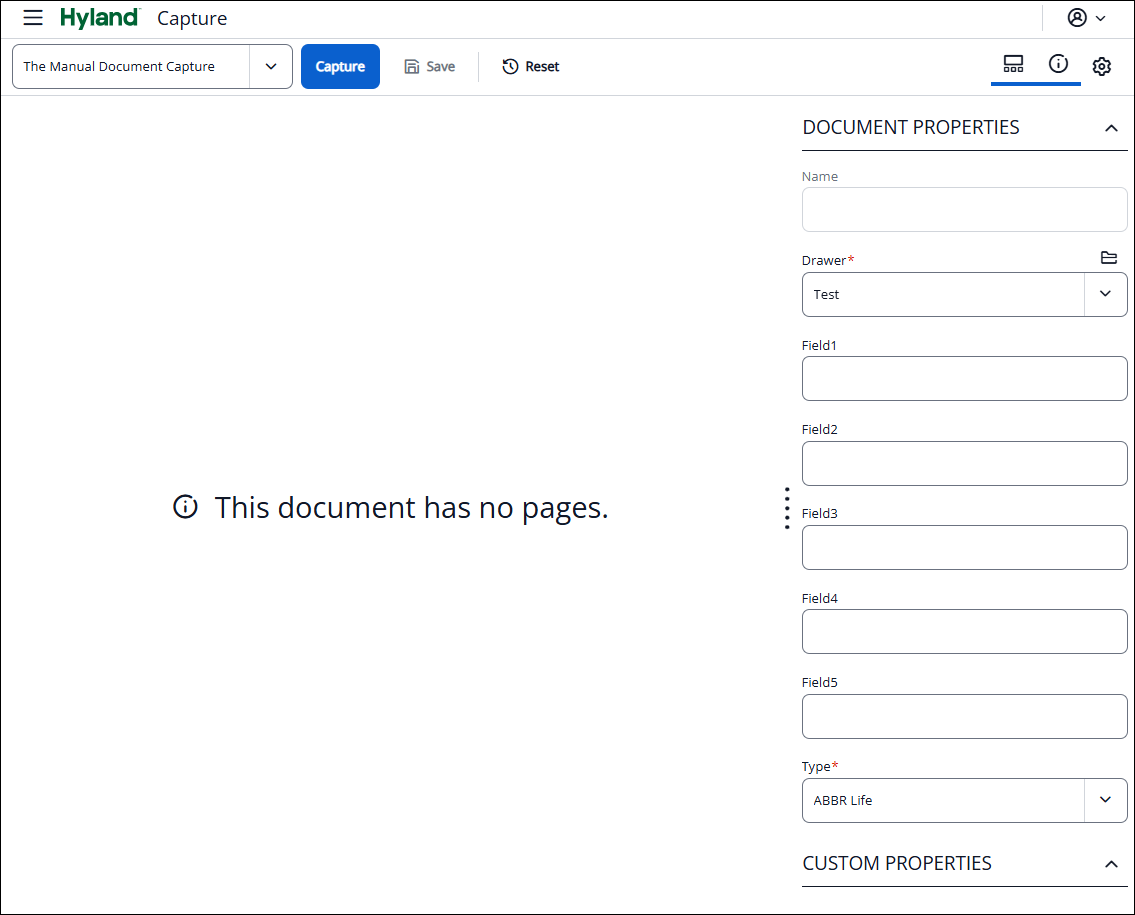
Notes:- Clicking on a Capture Profile updates the Document Properties on the right side of the screen to be specific to the profile you selected.
- The message “This document has no pages” displays before capturing and then again after saving the document, and can be ignored.
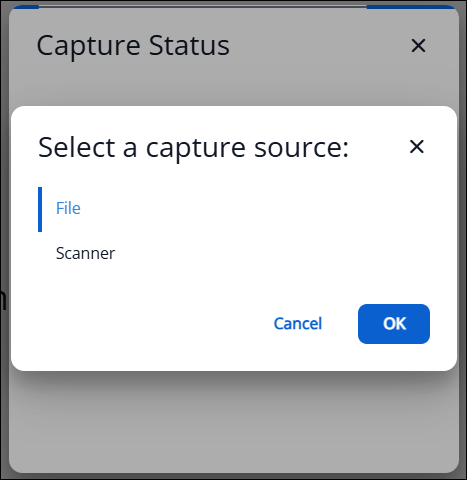
- Click the Capture button on the actions panel and the Source pop-up box appears.
- The capture source defaults to File, select OK.
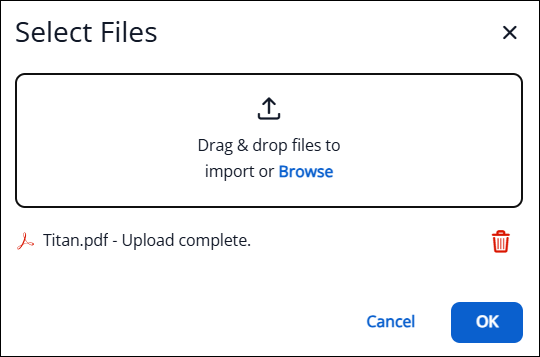
- The Select Files pop-up box appears. Click Browse to navigate to where your file is saved. Locate your file and click Open. Alternatively, you can drag/drop files into the box. Click OK once your file is selected.
- Your file will appear on the screen. Update the Document Properties on the right side of the screen with the appropriate values. If you wish to append the document you are uploading into an existing document, enter the same document properties as the existing document.
Note: The Document Properties that display will be different based on the Capture Profile that was selected.
- Click Save to finalize the document. A message appears letting you know the save was successful. Click the X to close the message.

- To view your recently captured document, there are two methods. You can determine which method works best for you.
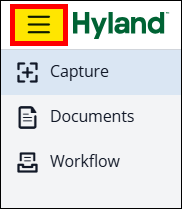
- Select the menu (three lines) at the upper left and select Documents. Select the Document View All Documents and the filter A User, 1 day
- Open two separate browser tabs of Titan, one for capturing the document and one for viewing the document.

- Select the menu (three lines) at the upper left and select Documents. Select the Document View All Documents and the filter A User, 1 day
Virtual Printer Capture
Note: The virtual printer does not currently support landscape printing at this time.
If your document needs to be printed in landscape mode and is a .pdf:
Select Auto as the option in the orientation section of the print panel. Once captured into Document Imaging, use the rotate buttons in the bottom left corner to change the orientation before saving the document.
Use the File Capture method mentioned above for any document type, but the document must be saved locally on your computer.
- Open the item that needs to be captured. Click Print and select Hyland Virtual Printer from the Destination drop-down box.
Note: If Hyland Virtual Printer is not listed as an option:- Windows computer users supported by MiWorkspace can install it from the software center.
- Windows computer users NOT supported by MiWorkspace should contact their local desktop support for assistance.
- The Hyland Virtual Printer is NOT available for Mac users.
- A new browser tab will begin loading the Document Imaging system and you will see a Capture Status box appear as the process is capturing the document.
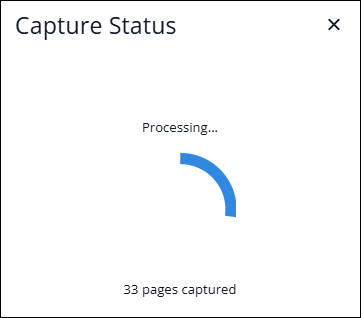
- Once it is finished capturing, your document will appear on the screen.
- In the upper left, select the appropriate Capture profile from the drop-down.
If you’ve previously captured a document, the last profile that you used will display.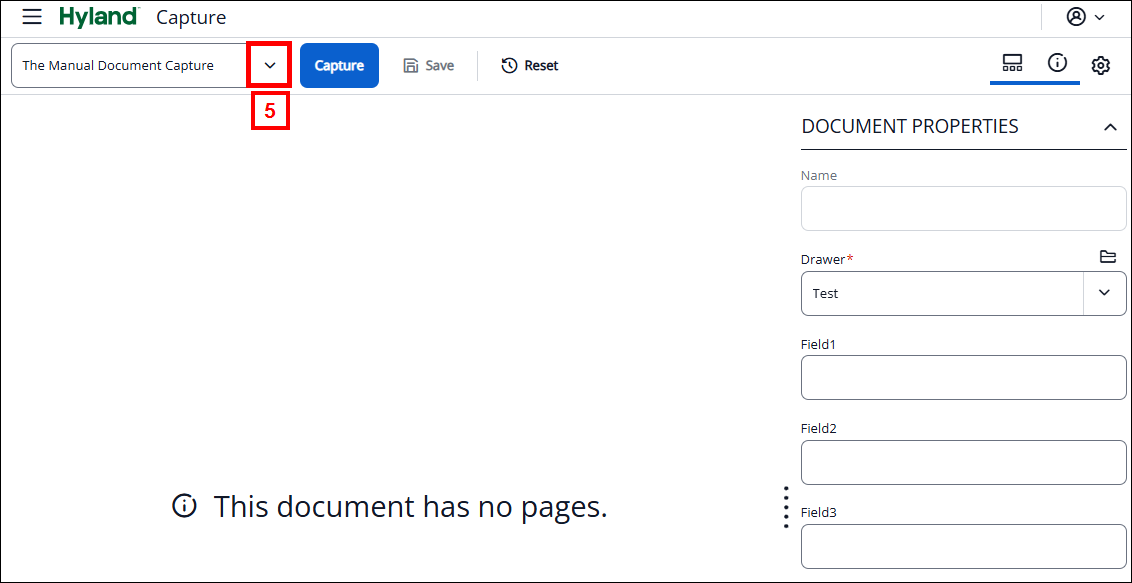
- Update the Document Properties on the right side of the screen with the appropriate values. If you wish to append the document you are uploading to an existing document, enter the same document properties as the existing document.
- Click Save to finalize the document. A message appears letting you know the save was successful. Click the X to close the message.
Recovering a Deleted Document
If you need to recover a document that you deleted from the document list , it can be found under the “My Recycled Documents” view at the bottom of the list of Document Views.
Caution: Deleted individual pages cannot be recovered, only full documents.
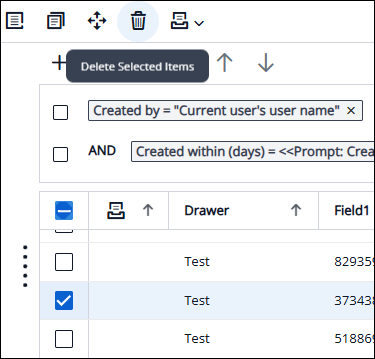
![]()