There are two ways to capture/upload documents into the Document Imaging System; a File Capture method which is used when the file is stored locally on your computer or shared drive. Or a Virtual Printer method which is used when the file is not saved to your computer or there is not yet a file for the item in which you need to capture (emails or attachments). This method allows you to print the file into the system without saving it first to your computer.
File Capture
- From the home page, select Capture.

- On the left, select the appropriate Capture profile from the drop down.
Capture profiles are configured by the ITS BSA team to make it easy to upload documents within a specific drawer in the system. You have access to Capture Profiles based on your system access (i.e., the documents stored in a particular drawer in the system pertaining to a specific department or function).
NOTE Clicking on a Capture Profile updates the Document Properties on the right side of the screen to be specific to the profile you selected.
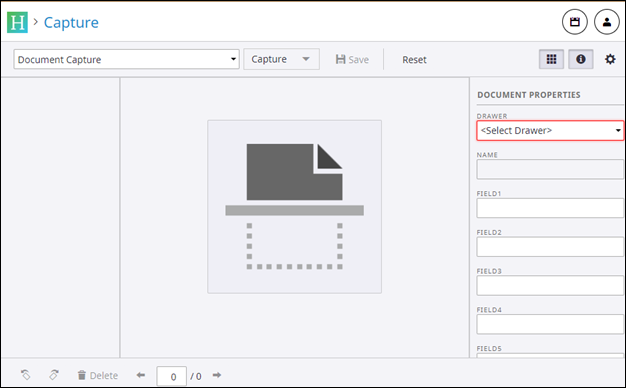
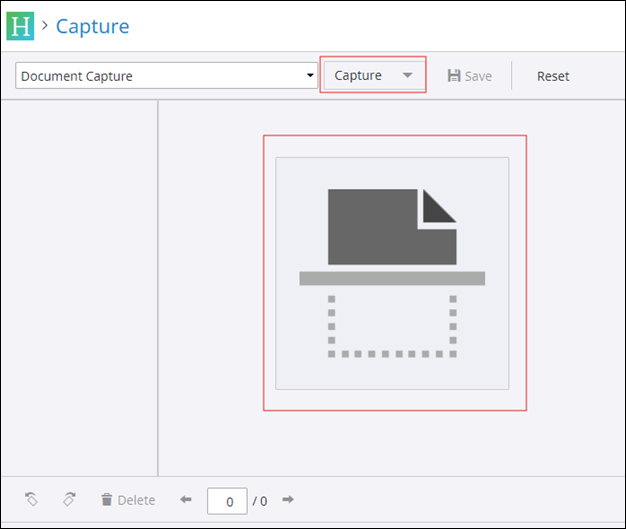
- Click the Capture button on the actions panel or click on the Document icon in the center of the screen.
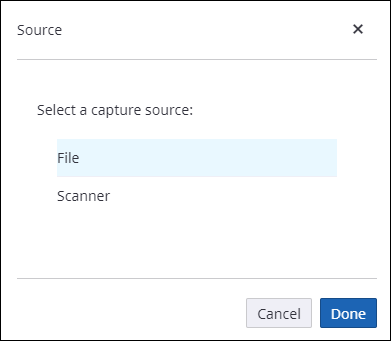
- The Source pop-up box appears. Select File and then select Done.
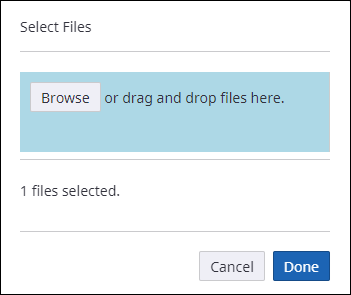
- The Select Files pop-up box appears. Click Browse to navigate where your file is saved. Locate your file and click Open. Alternatively, you can drag/drop files into the blue box. Click Done once your files are selected.
- Your file will appear on the screen. Update the Document Properties on the right side of the screen with the appropriate values. If you wish to append the document you are uploading into an existing document, enter the same document properties as the existing document.
NOTE The Document Properties that display will be different based on the Capture Profile that was selected.
- Click Save to finalize the document. A “Save was successful” message will appear and the page is ready to accept the next document.
- Return to the Documents area to view the document you just saved.
Virtual Printer Capture
Please note that the virtual printer does not currently support landscape printing at this time. If your document needs to be printed in landscape mode and is a .pdf, then select Auto as the option in the orientation section of the print panel. Once captured into Document Imaging, use the rotate buttons in the bottom left corner to change the orientation before saving the document. If your document is not a .pdf, first save it as a .pdf in order to have the ability to select Auto orientation when printing. Alternatively, if you do not wish to first save the document as a .pdf, then you can use the File Capture method mentioned above for any document type but the document must be saved locally on your computer.
- Open the item that needs to be captured. Click Print and select Hyland Virtual Printer from the Destination drop down box.
- For the sharpest image, select the dropdown of the Color print setting to match that of your original document (ie., if your original document is in color select color, if B&W select B&W ). Please note this setting is strictly to improve clarity, your document will capture into Imaging in B&W.
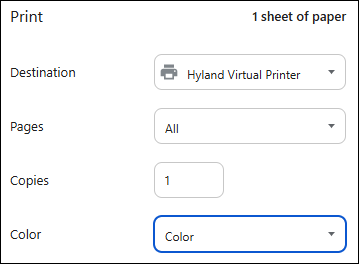
- For the sharpest image, select the dropdown of the Color print setting to match that of your original document (ie., if your original document is in color select color, if B&W select B&W ). Please note this setting is strictly to improve clarity, your document will capture into Imaging in B&W.
NOTES If Hyland Virtual Printer is not listed as an option:
- Windows computer users supported by MiWorkspace can install it from the software center.
- Windows computer users NOT supported by MiWorkspace should contact their local desktop support for assistance.
- The Hyland Virtual Printer is NOT available for Mac users.
- The Document Imaging system will open automatically and begin capturing the item you printed. You will see a Capture Status box appear as the process is capturing the item.
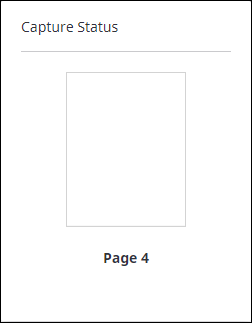
NOTE If you haven’t logged in yet or do not yet have an open Chrome window, you will need to first enter your login credentials on the screen that appears.
- Once it is finished capturing, your document will appear on the screen. If it is multiple pages, you will see them listed in the thumbnails area on the left side of the screen.
- In the upper left, select the appropriate Capture profile from the drop down. The last profile that you used is selected by default.
Capture profiles are configured by the ITS BSA team to make it easy to upload documents within a specific drawer in the system. You have access to Capture Profiles based on your system access (i.e., the documents stored in a particular drawer in the system pertaining to a specific department or function).
NOTE Clicking on a Capture Profile updates the Document Properties on the right side of the screen to be specific to the profile you selected.
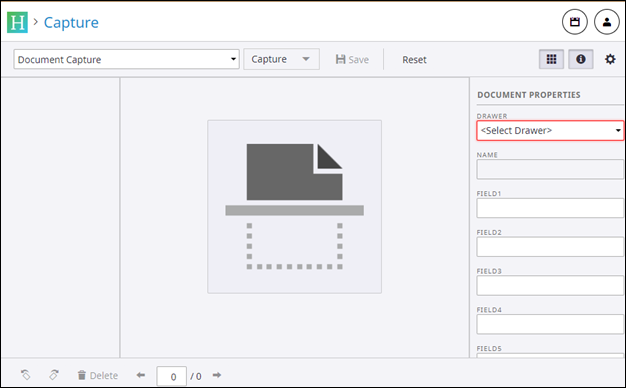
- Update the Document Properties on the right side of the screen with the appropriate values. If you wish to append the document you are uploading into an existing document, enter the same document properties as the existing document.
- Click Save to finalize the document. A “Save was successful” message will appear and the page is ready to accept the next document.
- Return to the Documents area to view the document you just saved.
