Table of Contents
- Overview
- Create a New Team
- View Team Members
- Add or Remove Team Members
- Manually Re-Sync Team Membership
- Delete a Team
Overview
Microsoft Teams allows you to create "teams" that incorporate workspace chat, videoconferencing, and file collaboration among a group of members. This document provides additional information and instructions on how to create and manage a team.
Create a New Team
To create a new team in Microsoft Teams, you must be the owner of an MCommunity group. Membership within new teams is based on your selected MCommunity group, and the team’s membership is synced with the membership (and subgroups) of the MCommunity group.
Once you have an MCommunity group of which you are an owner:
- Go to teammate.euc.it.umich.edu and log in with your uniqname and UMICH (Level-1) password. Complete Duo two-factor authentication if prompted.
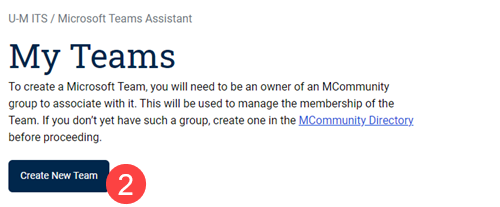
- Click Create New Team.
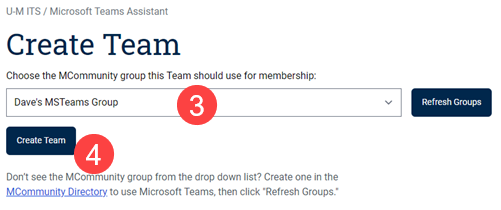
- Click the drop-down menu and select the MCommunity group you’d like to associate with the team. If you don’t see your desired MCommunity group, click Refresh Groups.
- Click Create Team.
Once a team is created, you can view the team members and add or remove U-M and external members.
View Team Members
- Open Microsoft Teams (via the web or desktop app).
- Click Teams in the navigation bar, and then select your team to open it.
- Click the three-dots icon and select Manage team from the drop-down menu.
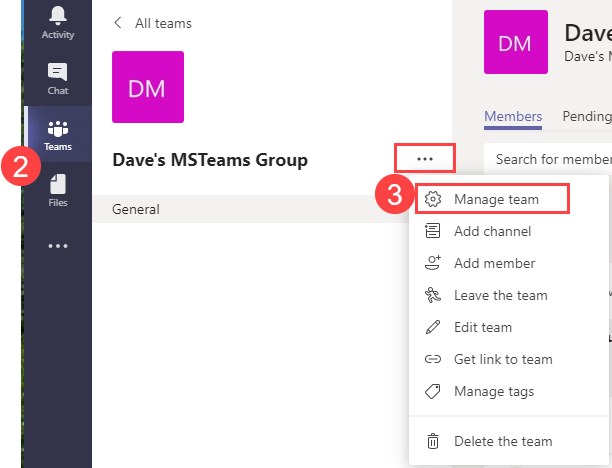
Owners and members will be listed on the page. If there are members of the associated MCommunity group missing from the team, manually re-sync the membership. Remember, external users (i.e., users with a non-UM email address) will not sync between Teams and MCommunity and will have to be added manually.
Add or Remove Team Members
Once a team is created, you can add or remove U-M and external members to the team.
For U-M members (i.e., users with an @umich.edu email address), their access to the team is controlled by the team's associated MCommunity group. You can add or remove members from the team by adding or removing them from the MCommunity group. (It can take up to 24 hours for Microsoft Teams to sync with MCommunity. If you do not wish to wait for the automatic sync, you can manually re-sync the team membership.)
For external (non-UM) members (i.e., users with a non-UM email address), their access to the team is controlled manually from within the Microsoft Teams web or desktop application. Microsoft Teams does not sync external members from MCommunity groups with the team. You (as the team owner) can add or remove external members to the team by adding or removing them from the team members in the application (not via MCommunity).
Manually Re-Sync Team Membership
It can take up to 24 hours for Microsoft Teams to sync with MCommunity. If you do not wish to wait for the automatic sync, you can manually re-sync the team membership.
- Go to teammate.euc.it.umich.edu and log in with your uniqname and UMICH (Level-1) password. Complete Duo two-factor authentication if prompted.
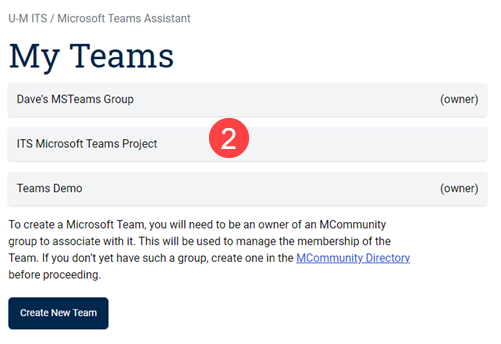
- Select your desired team from the list that displays.
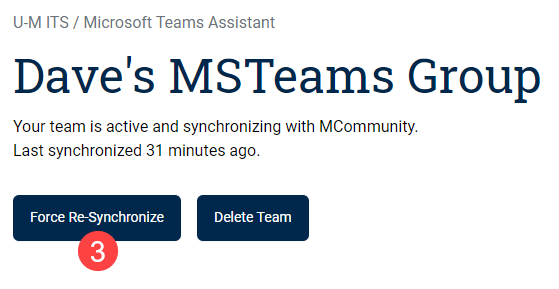
- Click Force Re-Synchronize and wait for the process to complete.
When you view your team membership again, the updated MCommunity membership should be visible in Teams.
Delete a Team
If a team is no longer needed, you can choose to delete it.
- Go to teammate.euc.it.umich.edu and log in with your uniqname and UMICH (Level-1) password. Complete Duo two-factor authentication if prompted.
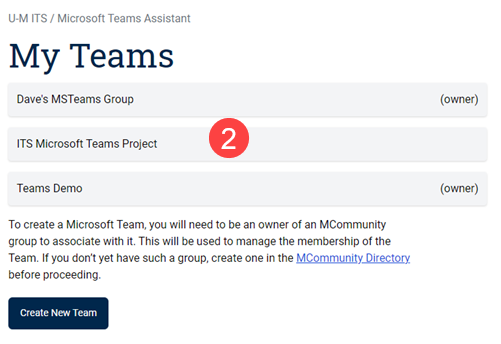
- Select your desired team from the list that displays.
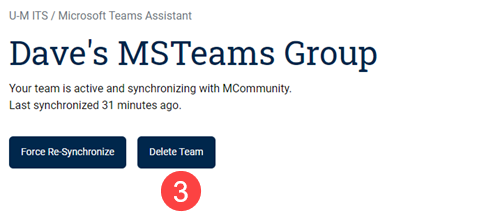
- Click Delete Team.
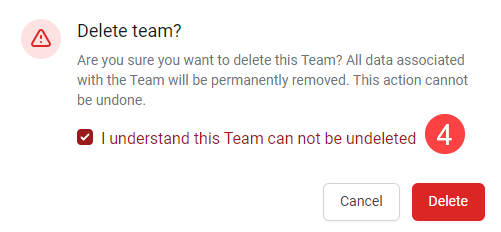
- Check the verification box stating that you understand, and then click Delete.
