
Overview
Setting up Adobe Bridge to add metadata to photos before uploading them to the Digital Asset Collaborative or DAC.
Note Photo Mechanic allows you to load controlled valued lists in various places. For Adobe Bridge, you will have to cut and paste location, rights and usage, and copyright values.
- Downloading the Metadata Template Files
- Importing Metadata Template Files into Adobe Bridge
- Adding Keywords
Downloading the Metadata Template Files
- Open Adobe Bridge.
- Visit the VP Comms website and click on the Download Metadata Template Files link.

- Click the Download all button.

Notes- You will be prompted to input an email address. It is fine to use your umich email address.
- Under "I am using this file for" select News / Public Relations / Non-profit.
- Click Save.
- Once the files are downloaded, unzip the PM_Export_Snap_PMX.zip folder.
Importing Metadata Template Files into Adobe Bridge
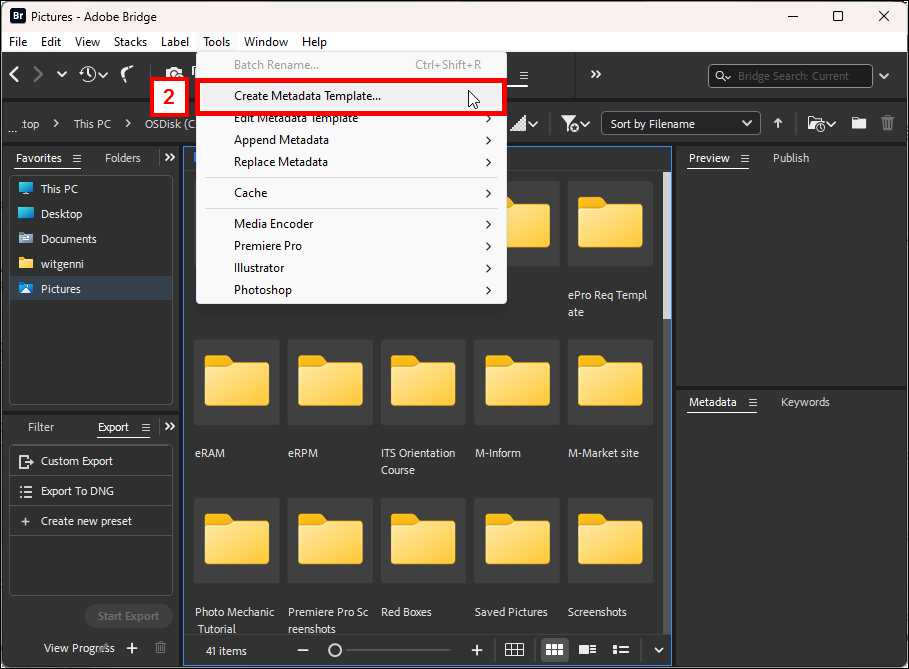
- Open Adobe Bridge.
- Click the Tools Tab and select Create Metadata Template.
- Click on the three lines button
 and select Load.
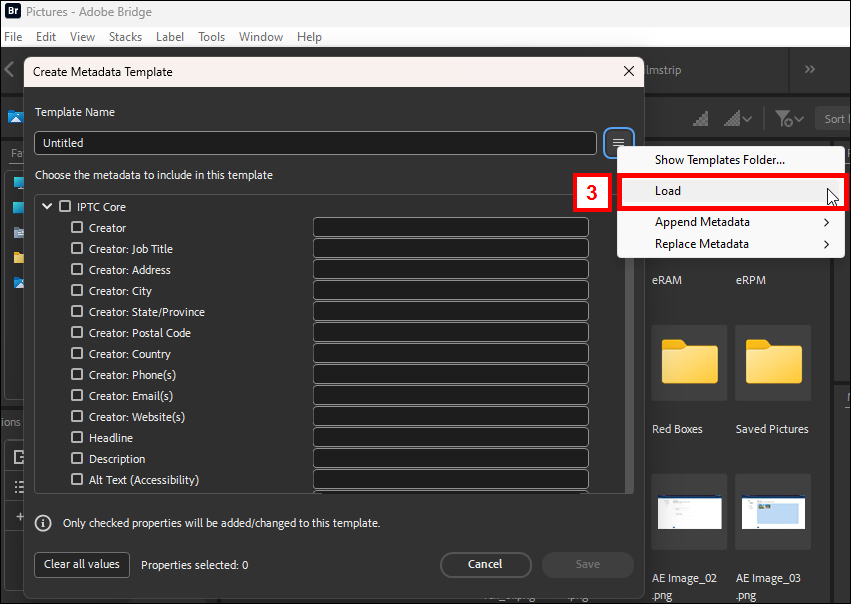
- Select the DAC_PM_Metadata.xmp file.
- Click Open.
Note Pre-populated text will appear in the template to assist you. If you don’t want to include some of the metadata fields, make sure to delete the pre-populated text before uploading to DAC.

- Click Save.
Adding Keywords
- In the bottom right corner, click on the Keywords tab.
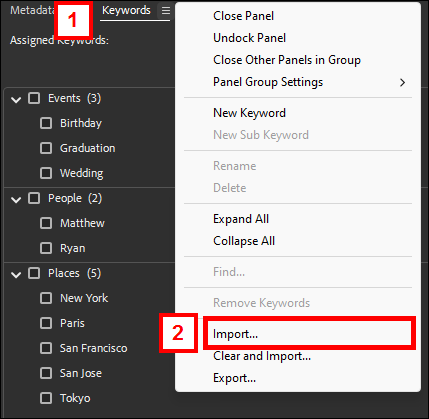
- Click the three lines button and select Import.
- Select U-M_Keywords_Taxonomy.txt file.
- Click Open.
Notes- If your unit needs to add more keywords, either notify via Google form or create a ticket.
- For unit specific keywords, put the unit name in front of the keywords.
- Keywords without the SCU in-front will be easier to find when performing a general system-wide search.
Last Updated:
Friday, September 22, 2023