
Overview
The Subscription Center allows Call Queue admins to schedule Zoom Phone Call Queue Historical reports to be emailed to them daily, weekly, or monthly.
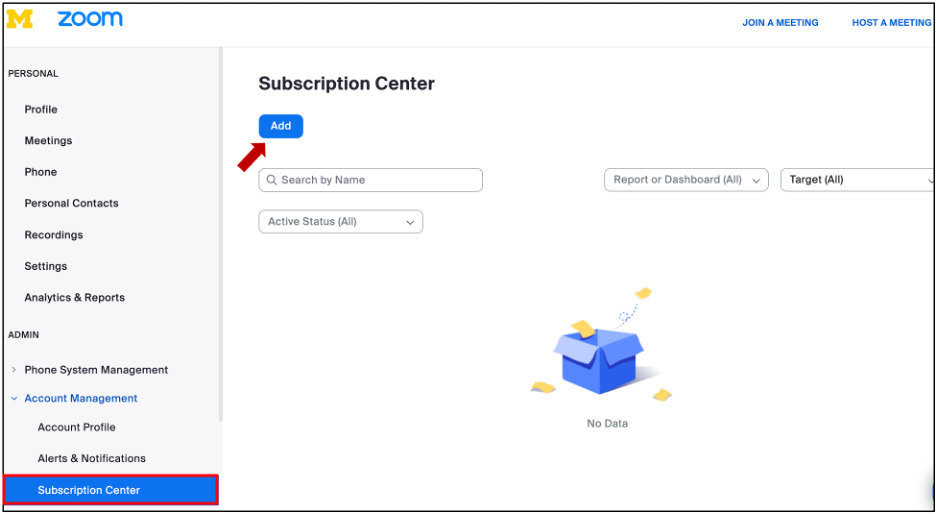
To Add a Subscription to Reports
- Log in to the U-M Zoom web portal with your U-M Credentials.
- In the left navigation menu, click Account Management, then Subscription Center.
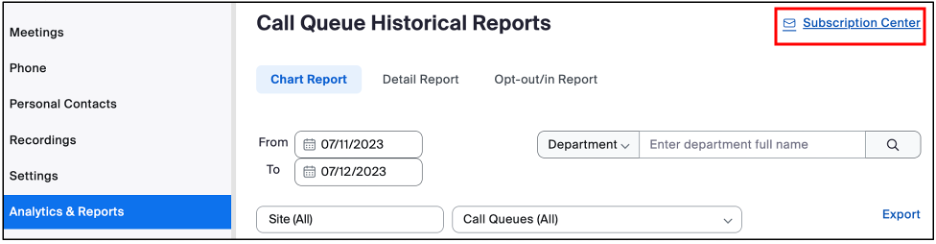
Important: You can also get into the Subscription Center by going to Analytics & Reports→ Call Queue Historical Reports → find Subscription Center at the top right corner.
- Click Add
- In the Subscription section:
- Enter a name of your subscription in the Subscription Name field. E.g (TA- Reports)
- Under Report or Dashboard, click the drop-down arrow
, then select Call Queue Historical Report.
- Under Target, click the drop-down arrow
to select one of the available queues to run reports for.
- In the Frequency Settings Section
- Under Frequency, click the drop-down arrow
, then select one of the three options available to receive reports: a. Monthly, b. Weekly or c. Daily.
- Under Time Frame, click the drop-down arrow
to select the time and time zone for the delivery.
- Under Email Recipients, add the email addresses of users within your account that will receive the reports.
- Under Frequency, click the drop-down arrow
Note: You can only add 10 email recipients.
- Select “You confirm that you are authorized to share the selected report(s) with the recipient(s) listed above”.
- Toggle on Active Status to enable the status of the subscription.
Note: Active Status will send a confirmation email to your recipients to let them know they’ve been added to the subscription list to receive reports. Make sure they confirm their emails to be able to receive those reports.
- Click Save
Last Updated:
Wednesday, July 12, 2023